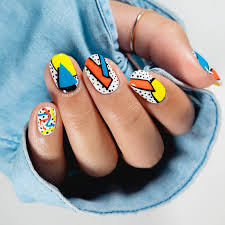
Nail Art Designs

Simple Nail Art Designs For Beginners And Nail Art Enthusiasts :-
Ladies, nails are an extension of what you wear, and cool nail art always
happens to garner a lot of attention and compliments. Besides, who doesn’t
love an added dose of glamor to their nails? If you’re bored of your classic,
monotone nail color and want to try out something fun and quirky, read on
and you may find the perfect nail art design for whatever mood you are in.
You can realistically accomplish these nail art designs right at home in just a
few steps. So, let’s begin!
White And Orange Flames Nail Art:-Everything about this nail art
design is so fresh and youthful. The color combination is great, and it can be
pulled off as the perfect summer nail look. You can also use a different set of
nail colors if you’re aiming for a different look.
What You Will Need
● A white nail polish
● Orange nail polish
● Yellow nail polish
● Black nail polish
● Nail art strips
Step By Step Tutorial

- Apply two coats of white nail polish for the base.
- Place the strips diagonally across each other and apply a coat of yellow nail polish.
- Place another strip vertically at the center and apply orange nail polish on one side.
- Place the strips as shown in the image and apply black at the base of your nail.
- Apply a coat of clear polish to complete the look.
Purple-Pink Floral Nail Art :-
Don’t these nails look pretty as hell? The pink and white combination is
delightful and is basically like you have spring on your fingernails. It’s a simple
yet classy design and can be recreated in just a few steps. You can wear it to
brighten up those dull days or even on a sunny summer day.
What You Will Need
● A white nail polish
● Pink nail polish
● Purple nail polish
● A thin nail art brush or a nail art pen
Step By Step Tutorial - Start by applying two coats of white nail polish for your base.
- Using a thin brush, create the flowers with a pink nail polish.
- Use the purple nail polish to add some oomph to the pink flowers.
- Finish with a top coat.
You can choose to recreate this look differently as well by creating flowers on the
whole nail instead of just one side. You can also use other bright colors over your
white base.
Color Splash Nail Art
This is by far my favorite nail art design. You are using your nails as a blank
canvas and splashing some colors around for that cool effect. Isn’t it just so artsy?
What You Will Need
● White nail polish
● An angled nail art brush
● Blue nail polish
● Purple nail polish
● Pink nail polish
Note: You can use any colors of your choice for this look. It will still look just as cool.
Step By Step Tutorial - Apply two coats of white nail polish for a good base.
- Once it dries, dip the brush in blue nail polish and using your thumb, splash the color over to your
nails. - Follow this process for each color until you achieve the
look that you want. - Apply a top coat to set.
Colorful Clouds Nail Art
There’s nothing to not love about this design. It’s colorful, it’s easy, it’s
bright, and it’s so damn adorable. We’re playing with just the ring
fingernail, and the others are left with a minimal aqua green-blue coat of
nail polish. This design is perfect for the spring and summer.
What You Will Need
● An aqua green-blue nail polish
● Pink nail polish
● Light blue nail polish
● A brush
Step By Step Tutorial - Paint all your nails with the green-blue nail polish except for your ring fingernail.
- Use pink nail polish for your ring fingernail.
- Use a brush to create the clouds. Start with light blue nail polish and make the vertical lines as
shown in the picture. - Once it dries, use the green-blue nail polish to create more clouds on top of the light blue surface.
- Apply a coat of clear polish on top.
Diagon-Alley Pink And Yellow Nail Art
This colorful nail art is a treat for the eyes. It’s trendy, vibrant, and young. You can pull it off casually and it will
brighten up your outfit and your day!
What You Will Need
● Purple-pink nail polish
● Yellow nail polish
● Peach nail polish
● Nail art strips
● Top coat
Step By Step Tutorial - Start by painting your nails yellow.
- Paint the lower half of the nail with a peach nail polish, going diagonally across the nail.
- Repeat the same with the purplish-pink nail polish, going diagonally across the other way.
- To finish, apply a top coat and you’re good to go!
Plastic Wrap Nail Art Design
This rare combination of light blue and gold is fabulous. You can wear this look either casually or for a fancy
event to go with your gold outfit, perhaps? We’re using plastic wrap to get that unique texture on the nail.
What You Will Need
● Light blue nail polish
● Gold nail polish
● Plastic wrap
● Clear polish
Step By Step Tutorial - Apply two coats of gold nail polish for your base.
- Once it dries, apply a coat of blue nail polish over the gold.
- While it is still wet, dab crumpled plastic wrap over your nail.
- You will see the gold nail polish seeping through the blue; finish with a top coat!
White Minimal Chevron Nail Art :-
This minimal design is uber classy and simple to recreate. It’s all white
and anything all white automatically takes exclusive to another level.
Don’t you agree?
What You Will Need
● White nail polish
● Thin nail strips
● Clear Polish
Step By Step Tutorial - Start by placing the nail strips over your nail creating three Vs.
- Apply white nail polish on the tip of your nail.
- Use a thin brush to fill in the white between the Vs.
- Gently peel off the stickers while the polish is still wet.
- Apply a coat of clear nail polish to finish.
Striped Aztec Nail Art
This may look complex but we’ve broken it down to just a few steps, and you can get this look right at home. It’s
THAT easy. Isn’t it the prettiest design ever? Also, we are totally loving the color combination that’s going on. It’s
so good!
What You Will Need
● White nail polish
● Black nail polish
● Pink nail polish
● Gold nail polish
● Thin brush
● Thin nail strips
Step By Step Tutorial

- Paint your nails white for the base.
- Once it dries, use the nail stripes to create the gold stripes
with gold nail polish. - Next, create the pink stripes.
- Use the same method and create the black stripe at the tip of your nail.
- Using a thin brush, create the aztec design as shown in the image.
- Finish by adding triangles in the middle.
- Apply a coat of clear polish to set.
Pink Ombre Nail Design
A pink gradient is created to achieve these pretty pink ombre nails. Don’t they look super cute? You can use the
same techniques with whatever colors you choose. This is a simple technique and can be done in just a few
steps.
What You Will Need
● A light-peach nail polish
● Pink nail polish
● Toothpicks
● Sponge
Step By Step Tutorial - Apply a coat of light-peach nail polish.
- Pour a little of both the nail polish colors on a clean surface or a plastic sheet.
- Using a toothpick, slightly blend the colors together.
- Dab the mixed colors using a sponge.
- Gently dab the sponge on the nail.
- Apply a coat of clear polish to finish the look.
Gold Glitter Nail Art
This design is fancy, and it can be worn on days you want to go a little extra! Isn’t it pretty? Also, super quick and
easy!
What You Will Need
● Gold nail polish
● Pink nail polish
● Black nail polish
● A thin brush
● Dotting tool
Step By Step Tutorial - Paint your nails with two coats of gold nail polish.
- Create pink dots on the corners with the dotting tool.
- Outline the pink with black nail polish intermittently as seen in
the image. - Apply a coat of clear nail polish.
Smokey Gray Nail Art
This design is so dark and beautiful. You need to try it!
What You Will Need
● A dark smokey gray nail polish
● Glitter
● Clear polish
● A brush
Step By Step Tutorial - Paint your nails using the dark gray nail polish.
- On a clean surface, mix your nail polish with some glitter (you can use craft glitter).
- Using a brush, apply this to the ends of your nails as seen in the image.
- To finish, top it up with a clear coat of nail polish!
Voila! Say hello to fabulous nails!
Chocolate Gold Nail Art
This is perhaps the chicest color on the list. This brown is beautiful, and the combo looks heavenly!
What You Will Need
● Chocolate brown nail polish
● Gold nail polish
● Tape
Step By Step Tutorial - Apply two coats of chocolate brown nail polish for your base.
- Place the tape diagonally across the nail, so as to form a
triangle (as seen in the image). - Apply gold nail polish in the triangular area.
- To finish, apply a coat of clear polish.
Four-Leaf Clover Nails
This four-leaf clover inspired nail art design is super simple to recreate. We
are loving the pale yellow and green combo. The significance of the four-leaf
clover is that it brings you good luck! That’s reason enough to try out this
design. Don’t you agree?
What You Will Need
● A pale yellow nail polish
● Green nail polish
● A thin brush
This four-leaf clover inspired nail art design is super simple to recreate. We are loving the pale yellow and green
combo. The significance of the four-leaf clover is that it brings you good luck! That’s reason enough to try out this
design. Don’t you agree?
What You Will Need
● A pale yellow nail polish
● Green nail polish
● Two-Toned Blue Nail Art
This nail art design is so simple to recreate, and it looks very fresh and
classy. You can use any two colors that you like to achieve this look and
glam up your nails in a flash!
What You Will Need
● A light blue nail polish
● Dark blue shimmer polish
● Nail strips
Step By Step Tutorial
Start by applying two coats of light blue nail polish.
Place a nail strip diagonally over your nail.
Apply a coat of the dark blue shimmer polish.
Top it up with clear polish to set!
Strawberry Fields Forever Nails
Do you love red but are bored of the classic red mani? Try something
different with this strawberry-inspired nail art design. It looks ultra-fresh
and can be worn as a fun summer look.
What You Will Need
● Red nail polish
● Dark green nail polish
● Light green nail polish
● A mellow-yellow shade or white nail polish
Step By Step Tutorial
- Apply two coats of red nail polish for your base.
- Using a thin brush, create dots over your nail with either a white nail polish or a dull yellow shade.
- At the base, create the head of the strawberry using a dark green nail polish with a thin brush.
- For a 3D effect, outline the dark green nail polish with a lighter
green. This will instantly make the colors pop. - Apply a coat of clear polish, and you’re done!
Deep Blue Nail Art
This is a fancy design suitable for occasions when you want to amp up your look.
It’s also got just the right amount of glitter. You can vary this design with different
colors if you wish.
What You Will Need
● Dark blue nail polish
● Blue Glitter polish
● Black nail polish
● Rhinestones (optional)Step By Step Tutorial - Start by using the blue glitter polish on the upper base of your nails as shown in the image. You
can emphasize on this area using other decorative material as well. - Using a thin brush, create a border with black nail polish.
- Use the dark blue nail polish to paint the rest of your nail.
- To finish, apply a good old coat of clear polish.
Valentines Nail Art Design- This V-day inspired nail art design is spot on – not too much and just about
right. If you’re in the mood for some pink hearts on your fingernails, then read on.
What You Will Need
● Pink nail polish (3 shades of pink, as seen in the image)
● Dotting tool
● ToothpickStep By Step Tutorial - Start by painting your nails in light pink for the base.
- Create hearts using a dotting tool.
- Use a toothpick to create the borders of the heart with a darker
pink nail polish. - Apply a coat of clear polish.
● Triple Cloud Nails
If you want to amp up your regular French manicure, then this design is for
you. It’s got a very minimal pale pink base and just a few pastel shades of nail polish to go with it.
What You Will Need
● Pale pink nail polish
● White nail polish
● Light blue nail polish
● Pastel orange nail polish
Step By Step Tutorial
Paint your nails using the pale pink nail polish. - To create the clouds, use a brush and start with the light blue
polish by making vertical arcs as seen in the picture. - Repeat the process with the white and the orange nail polish.
- Apply a coat of clear nail polish to set.
Scales Nail Art Design
This aqua-green nail art design is literally the easiest thing to do. It also looks great on short nails. It’s a forever
chirpy color that will make your nails stand out. The color is so bright, and you
get to play around with the dots on top using different shades of nail polish.
What You Will Need
● An aqua-green nail polish
● Beige nail polish
● White nail polish
● Purple nail polish
● Blue nail polish
● A thin brush
Note: For the scales, you may use other shades as well.
Step By Step Tutorial - Start by applying two coats of your aqua-green nail polish.
- Use a brush and start at the tip of your nail, creating dots as you go.
- Move up further until you’ve created dots till the base of your nail.
- Apply a coat of clear polish and leave to dry!
Lavender Circles Nail Art
This cute nail art design uses lavender and a grayish nude together, and it’s
the sweetest combo out there. You can instantly brighten up your hands
with this design. Flaunt it in the spring or summer or on a blue rainy day.
What You Will Need
● Lavender nail polish
● Nude-gray nail polish
● Rounded-hole nail art labels
Step By Step Tutorial - For your base, paint your nails with a lavender nail polish.
- Once it dries, place two round nail art labels on either side of the nail, leaving a gap at the center.
- Apply a coat of the nude nail polish to the middle of your nail and gently remove the sticker while
the polish is still wet. - Allow it to dry and apply a coat of clear polish to finish.
Leopard Print Nail Art Design
This chic nail art is easy to recreate with just a bit of will and patience. Aren’t the end results fabulous? The
younger crowd will love this animal pattern and it looks so bold and trendy.
What You Will Need
● A nude nail polish
● Light brown-beige nail polish
● Black nail polish
● Nail art brush
Step By Step Tutorial - For your base, apply two coats of the nude nail polish.
- Using a brush, create uneven spots with the brown-beige nail polish.
- Once it dries, use the black nail polish to outline the spots, leaving
gaps in the middle. - Top it up with a coat of clear nail polish.
There you go! You now have the chicest nails in town. I’m sure you will get a ton of compliments for this classic!
Musical Notes Nail Art
If you’re a hard-core music lover, then this is something for you. It’s a classic.
What You Will Need
● Nude nail polish
● Black nail polish
● A thin brush
● A dotting tool
Step By Step Tutorial - Paint your nails with the nude nail polish for your base.
- Create three thin horizontal lines on the lower part of your nail using a thin brush.
- Using your dotting tool, create a dot over the lines as seen in the image.
- Now, create the music note using the same brush.
- Top it with a coat of clear polish.
Red And White Polka Nail Art
These red and white polka dot nails look adorable! They’re so trendy and can be worn casually. You can also use
a different color combination if you want to try something different. Follow
these simple steps.
What You Will Need
● White nail polish
● Red nail polish
● Nail strips or tape
● Dotting tool or toothpicks
Step By Step Tutorial
- Paint your nails white for your base.
- Place a nail strip or tape diagonally across your nail and apply the red nail polish
- With some red polish on a clean surface, dip your dotting tool or toothpick in the polish and start
creating dots over the white area. - To complete the look, top it up with clear polish for that glossy salon-like effect!
Yellow Grapefruit Nail Art
Isn’t yellow such a happy color? Some of you girls may feel yellow nail polish is a
little too intense, but let’s reject that. This grapefruit inspired nail art design is so
summery and cute, you just have to try it!
What You Will Need
● A yellow nail polish
● Pastel pink nail polish
● White nail polish
● A thin brush
● Nail strips
Step By Step Tutorial - Paint your nails with the yellow nail polish for your base.
- Place a nail art strip on the upper-base area of your nail and paint it using the pink polish.
- Use white nail polish with a thin brush to create the lines over the pink area.
- Apply a coat of clear nail polish to complete the look.
- You can wear this design on your next beach vacation!
Halloween Skulls Nail Art :-This spooky yet cute nail art design is perfect for a Halloween party! What do
you think? Celebrate the fright night with this Halloween inspired mani.
Also, it’s super quick and easy to do.
What You Will Need
● Black nail polish
● White nail polish
● Thin brush
● Clear polish
Step By Step Tutorial - Paint your nails in black for the base.
- Use a brush to create the white spots on your nails with a
white nail lacquer. - Create smaller dots under the bigger ones to make the skulls.
- Use black nail polish for the eyes.
Tri Color Cliffs Nail Art
This nail art is super simple and is the perfect choice for someone who is just starting out. You don’t
need any extra tools apart from your nail polishes for this one. This
tutorial will be described using certain colors, but it’s entirely up to you!
Play around with your choice of colors!
What You Will Need
● Pastel blue nail polish
● White nail polish
● Pastel coral nail polish
How To Apply? - On clean nails, apply a base coat to protect your nails.
- Use the pastel blue color to create a vertical stripe on
one corner, while leaving some space empty near the
cuticle. - Now paint from the center, a little lower.
- Create the last stripe, again lower. You should have what
looks like 3 steps. - Repeat the steps but starting from below the blue.
- Do the same with the pastel coral.
- Seal this with a top coat and you are done!
Bow Nail Art Tutorial
Now that you’ve gotten the hang of doing nail art with just the nail polish, it’s time to start adding tools to the
pretty picture! This is also an incredibly simple nail art that you can easily do! It’s very casual so it can be worn at
all times.
What You Will Need
● Sky blue nail polish
● White nail polish
● Black nail polish
● Nail striper or a very fine paint brush
How To Apply? - Start by painting all of your nails with the sky blue shade as your base color.
- Paint over it with white in a heart shape as shown in the image.
- Using a nail striper or a paintbrush dipped in black nail polish, follow the shape where the white
and blue meet and create two loops at the center so that it looks like a bow. - Seal it with a top coat, and you are good to go!
Splatter Nail Art Tutorial
This one is for the artist in you. You can create a fun paint splatter pattern
using just a paintbrush!
What You Will Need
● White nail polish
● Light blue nail polish
● Purple nail polish
● Pink nail polish
● A stiff paint brush
How To Apply? - Paint all your nails with white as the base color.
- Now comes the fun part. Find a stiff brush like the one shown in the image. Dip it in the light blue
polish, and run your fingers through the brush and direct it at your nail so that the brush splatters
on your nails. - Repeat the same thing for the pink and the purple.
- You should have a nice splatter nail art.
- Use a cotton swab dipped in nail polish remover to clean up the sides around the nails.
- Seal it with a top coat.
Chevron Nail Art Tutorial :-
Okay, I know what you’re thinking. This may seem complicated, but the
best part is, it’s actually easy. For the tutorial, red, white and blue were
used but the choice of colors is all up to you!
What You Will Need
● Red nail polish
● White nail polish
● Blue nail polish
● Tape
How To Apply? - Use Red Nail polish as the base for the chevron nail art.
- Strategically place the tape so that it creates a chevron stencil.
- Paint over it with the blue polish.
- Wait for a minute or so to remove the tape.
- Now place the tape as shown near the cuticle and paint the area with
white. - Again, wait for a minute before pulling off the tape, and seal it all with a top coat.
Glitter V-Tip Nail Art Tutorial :-Is there a party around the corner? You probably had plans of going to the salon to
get your nails done, but something else popped up, and now, you’re short on time with your nails undone. This
nail art is perfect as they’re easy enough to do when you’re in a rush.
What You Will Need
● Black nail polish
● Silver glitter nail polish
● A ‘V’ shaped sticker or a piece of tape.
How To Apply?
Paint all your nails black as the background color.
Place the V sticker or the corner of a piece of tape near the tips as shown.
Paint the bottom half with the glitter polish.
Wait for a minute before you carefully pull away the tape or sticker.
Finish it off with a top coat.
Galaxy Nails :-
These nails are out of this world! I love anything to do with space. In fact, one of my favorite genres of
books and films is sci-fi so it’s no wonder that this nail art made it to this list.
What You Will Need
● Black nail polish
● Metallic green nail polish
● Pink nail polish
● Blue nail polish
● Makeup sponge
● Glitter top coat
How To Apply? - Start with a black base.
- Apply some metallic green on a makeup sponge and dab it
onto your nail. - Now apply the pink on a makeup sponge and dab onto the nail.
- Continue the same process with a blue shade.
- By this point, your nails will already start to resemble the galaxy.
- To amp up the game, add a glitter top coat, and you’re good to go!
Stripes and Lines Nail Art Tutorial
These fun geometric patterns add a little something to your nails and are super easy to do. You need a little
patience for this one, but the outcome is worth it!
What You Will Need
● Pastel blue nail polish
● Brown nail polish
● Tape
How To Apply? - Start with the pastel blue as your base.
- Once it is fully dry, you can begin the placement of your tape.
- On the pinky, place it diagonally.
- Cut up thin stripes for the ring finger.
- Create a ‘V’ shape from the tape for the middle finger.
- Create very sharp angled triangles with the tape and place them on the index finger as shown.
- Similarly, create a design for the thumb finger.
- Now, paint over the tape stencils you just created with brown nail polish.
- Wait for a minute or so for the nail polish to dry a little and then carefully remove the tape.
- Voila! You have yourself a fun manicure!
Stripes and Lines Nail Art Tutorial
:-Ready to step up your nail art game? This honestly looks so pretty, I’m tempted to try this one out on my nails!
I’m weak for anything pastel so this one is straight up my alley as far as nail arts are concerned.
What You Will Need
● Base Coat
● Pastel pink nail polish
● White nail polish
● Gold studs, bindis, or gold polish.
● Gold glitter nail polish
● Dotting tool or a bobby pin
How To Apply? - Apply a base coat.
- Apply the pastel pink polish to all your nails except the ring
finger. - Place a gold stud near the cuticle of the index and pinky
fingernails. Do this while your polish is still wet. This helps it to stick on. In case you do not have
any studs or bindis, you can use gold polish. - Now moving onto the middle and thumb. These two nails will be clad in daisies. Use a dotting tool
to create 5 dots in a circle so that it looks like a daisy. If you don’t have a dotting tool, you can use
the end of a dotting tool. - Place the gold stud or gold nail polish at the center of the daisies.
- Now all that’s left is the ring finger. Apply the gold nail polish as the base, and the glitter polish
over that. This gives it a more intense look. - Seal everything with a top coat, and there you go!
Nautical Nails:-A fan of sailing and the vast open waters? Then this nautical nail is probably perfect for you.
And if for some reason you don’t like the ocean, that’s okay because this still makes for a really cute nail design.
What You Will Need
● White nail polish
● Navy blue nail polish
● Red nail polish
● Nail striper or a fine paint brush.
● Toothpick
How To Apply? - Start with a white base.
- Use a nail striper dipped in navy blue nail polish to create stripes.
- Now, using the blunt side of a toothpick, create an anchor design. First, create a tiny circle.
- Then, create a line down from the circle.
- Draw two lines from the vertical line so it looks like an anchor.
- Finally, draw a horizontal line in the middle to complete it.
- Seal it with a top coat and you are ready to sail away!
Monochrome Polka Dots Nail Art Tutorial
Let’s finish off this list with an easy one, shall we? I love this one! Anything monochrome is my cup of tea. This
black and white polka dots nail art is another cute one which can be achieved with minimal effort.
What You Will Need
● Black nail polish
● White nail polish
● Dotting tool, bobby pin or pencil.
How To Apply? - Paint all of your nails black.
- Using a dotting tool, the back of a bobby pin or a pencil dipped into white nail polish, create dots.
- It’s as easy as that! Finish with a top coat.
Important Tips And Hacks To Do Nail Art At Home
● Most of the time, people have an issue with keeping their
hands steady. Make sure to work on a flat surface and sit down while doing
it. This will give you more control.
● Line the skin around your nails with petroleum jelly to ensure
a quick clean up.
● You can also apply a layer of glue around the nails so that it
can be peeled off after you finish your nail art.
● Use a paintbrush dipped in nail polish remover to clean the area around your nails.
● Make sure your nails are free from any oils or lotions before you
start with the nail art!
Tempted to try them out? Well, I definitely know I am. My nails have been bare
for a while, maybe it’s time to dive back into nail art again. Nail art can be quite
therapeutic. It gives you some time to be alone and gather your thoughts, and by
the end of it, you have beautiful nails! Who can say no to that?
Stepping out of the nail salon with a set of freshly painted nails can make you
feel like a new person. There’s nothing like a little pampering and a fresh mani to
make you feel like your best self. But it can get expensive fast, especially if you
opt for some nail art.
That’s why we rounded up 30 of our favorite simple and easy nail designs that
you can do at home (and probably with the nail colors you already own). We’re not nail artists by any means, but
luckily with these looks, that doesn’t matter. Whether you want to rock a set of stars along your cuticles, a tonal
gradient across all 10 fingers, simple glitter stripes, or a double French mani, you’re sure to find a look (or three
or four) that you love. See all of our favorite easy nail art ideas to DIY below.
Velvet Tips
Velvet nails took Instagram by storm for the holidays, but the festivities aren’t over yet. Tone down the
mesmerizing style (seriously, you have to see them in motion) by keeping the glitz to the tips.
Checkerboard Nails
Colorful checkerboard is having a moment in fashion—I can’t scroll through Instagram without seeing the
print—so it makes sense it’s now migrated to nails. Keeping it just on your tips ups the quirky factor even more.
French Manicure
Yes, the French mani is sticking around, and there are a ton of different ways
to wear it. Check out our guide to the best
French manicure ideas for even more inspo.
Mismatched Hands
For a unique nail idea, try different colored
nails on each hand. Make it even cooler with
very of-the-moment shades like lilac and moss
green. Try Essie Expressie in Get a Mauve On
and Precious Car-Go! for a similar vibe.
Pastel Swirls :- Just looking at this metallic, pastel, ombré situation makes
you feel calmer. The best part is they’re actually nail wraps, so it’s super easy to
get the same look at home.
Black and White Flowers:-
White and black nail designs are so graphic and cool,
especially when paired with something traditionally
feminine like flowers.
Party Dots:-You’ve probably seen polka-dot nails
before, but this one creates a new layer of fun. Pick a few
colors to create a bunch of tiny dots all around bare
nails—variation and overlap are all part of the fun here.
Colorful Lines:-The colored stripes make this
neutral mani fun and interesting, while remaining simple
enough for both execution purposes and more
conservative settings. Nail stripe stickers can
make achieving this look even easier.
Canary Yellow :-The contrast between the
yellow base and blue dots really makes this look
from Paintbox pop. These dots are 3D, but a
contrasting polish will also provide a bold impact if
you’re not looking to shop for extra baubles.
Matte manicure:-What about some matte nail
paint this season, or matte manicure? Matte nails have an exceptional quality to make
everyone fall for it in one look. This is a perfect alternative for glossy and flashy nails.
The sunset effect :-What about adding a little fire to your talons with a sunset
effect in fiery red, orange and yellow? If you are daring, you can definitely go for this bold nail art design and be
the center of attraction.
Tribal nail art :-Tribal manis will make you fall head over heels with their eye-catching, any-color-goes palette
and a mix of wild patterns. Some geometric inspiration and bright nail paints can help you get show stopping
tribal nails and a trendy look.
Bling Fingers :-Bejewel your nails for a minimum-effort, maximum-impact design. Grab some sparklers—like
these Swarovski Create Your Style Xirius Nail Combo Crystals and get to gluing.
Negative Space Stunners :-
If you want to rock a head-turning manicure but don’t have the patience to sit and paint all your nails, consider
this black and white half-and-half mani that confines the color to just two nails. Recreate the look using striping
tape to trace clean lines for your base color, then finish with dots of contrasting black or white polish.
Blue Gradient :-If you’re not one to get crafty with intricate nail art ideas but still
crave an eye-catching design, check out this gradient option. With a different blue
shade on each nail, it’s a dreamy contrast we can’t stop
staring at. If you’re not sure which shades of blue will pair
well together, take the guesswork out of the equation and
use Olive & June’s Blue Jeans Kit.
Smiley-Face Nails :- It seems the internet is
seeking out joy wherever possible, because smiley-face
nail design ideas are everywhere we look. They’ve been
spotted on everyone from Dua Lipa to Harry Styles—and
just about every nail blogger on Insta.
Half and Half :-Why paint each nail with one color
when you can make a major impact with two?
This nail art is super easy to recreate, too. Simply
use tape to create a sharp stencil to paint against and gently peel it off once
the polish dries. Cover your entire nail with a top coat and be on your merry
way.
:-These metallic gold and red striped nails have the wow factor of a
high-shine finish and negative space. Start at the tip of your nail when crafting
your stripes. You can recreate this look in the colors of your favorite
superhero for your next movie marathon or themed party.