Paint With Fruit and Vegetables
If your kids are tired of painting pictures with the same old boring brushes, shake things up with a look inside your produce drawer. Fruits and vegetables come in a variety of shapes that are perfect for applying paint to your canvas. Some are best used whole, but you can cut others into interesting shapes to customize your work of art. All you need is some produce, paint, and a piece of paper to unleash your creativity.
1
Choose fruit and vegetables with interesting shapes. You can use whatever fruit and vegetables that you’d like to paint with, but those with interesting shapes usually offer the most options. Visit your local grocery store or farmer’s market, and examine the produce to see which ones most appeal to you.[1]
Starfruit is an ideal option for painting because of its star shape.
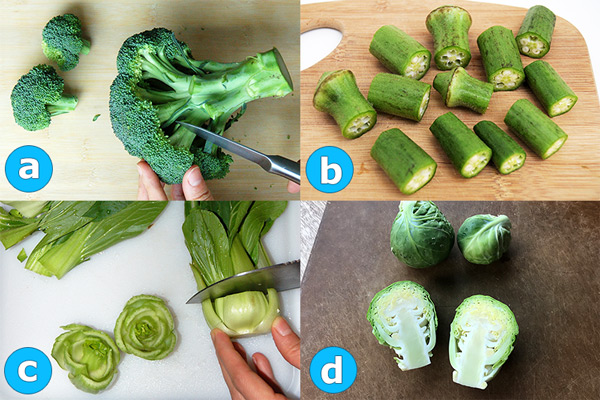
Chinese cabbage can create rose-like shapes when they’re cut.
Broccoli and cauliflower work well for painting because of their florets.
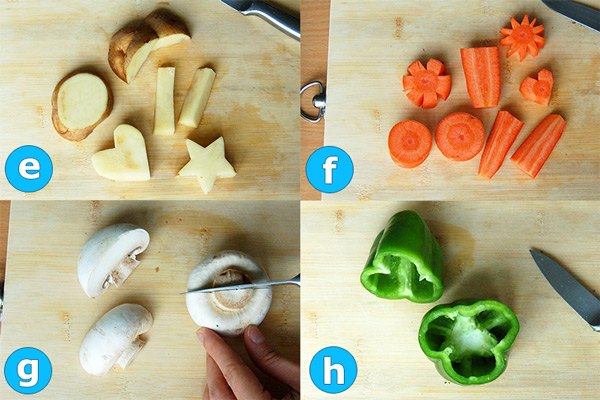
Mushrooms come in a variety of shapes that allow for creativity.
Apples, pears, bananas, strawberries, raspberries, potatoes, carrots, bell peppers, corn cobs, green beans, oranges, lemons, and limes are other good options.
Paint With Fruit and Vegetables Step 2
2
Wash and dry all of the produce. When you’ve chosen the fruit and vegetables that you plan to use, wash them with water to remove any dirt. Pat the produce dry with a clean towel.[2]
If any of the fruits and vegetables are particularly dirty, use a vegetable scrub brush to clean them more effectively.
3
Cut and trim the produce for more interesting shapes. Most of the fruit and vegetables should be cut for the most effective painting. Use a sharp knife to halve or cut them into your desired shapes.[3]
Slice a starfruit lengthwise to create star shapes. Chop off the base of a Chinese cabbage and use it for painting flowers.
Cut broccoli and cauliflower into individual florets.
Cut apples, pears, and strawberries in half lengthwise.
Cut oranges, lemons, limes, and bell peppers in half crosswise, and remove the seeds.
You can cut potatoes and carrots into wedges, quarters, or specific shapes, such as a star, heart, or flower. Bananas may be cut lengthwise or crosswise.
You can leave raspberries, blueberries, grapes, corn on the cob, and small mushrooms whole.
Part – 2
Paint With Fruit and Vegetables Step 4
1
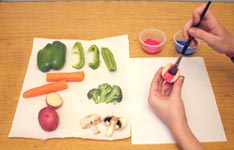
Pour the paint into shallow containers. To make it easier to dip the produce into the paint, transfer it into disposable shallow containers, such as a plate or dish. Fill a plate with each shade of paint that you plan to use.[4]
Tempera paint works best for vegetable and fruit painting.
Paint With Fruit and Vegetables Step 5
2
Tape the paper to the work surface. When you’re pressing the fruit and vegetable pieces to the paper that you’re working on, it has a tendency to shift around. Keep it steady by securing it to your table, counter, or other work surface with double-sided tape.[5]
You can use any type of paper that you like for your canvas, such as sketch paper, poster board, or cardstock.
Image titled Paint With Fruit and Vegetables Step 6
3
Blot the cut produce and set them out on a plate. When you’re ready to start painting, gather all of the fruit and vegetables that you’ve cut on a plate. Use a piece of paper towel to gently blot the cut sides to remove any moisture that might dilute the paint.[6]
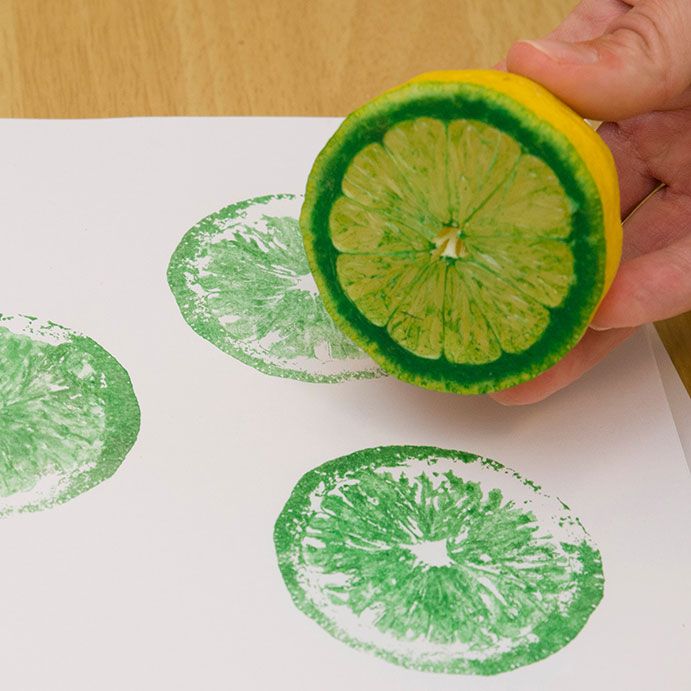
Dip the produce into the paint. When you’re ready to start painting, place the cut side of the fruit or vegetable into the paint. Make sure that the piece is covered evenly with a thin coat of paint.
You can use a paint brush or sponge to apply the paint to the produce instead of dipping it to ensure that it’s evenly distributed.
If you apply too much paint to the fruit and vegetable pieces, it can seep up around the produce and create a messy, indistinct shape when you press it onto the paper. Aim for a light layer of paint.
2
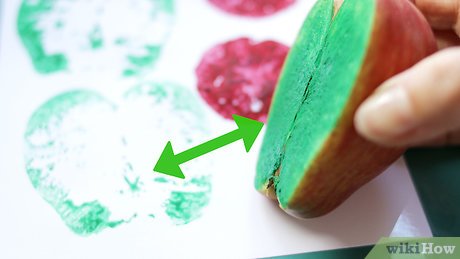
Stamp the produce to the paper. Once the fruit or vegetable piece is covered with paint, press it firmly down on your piece of paper. Lift the produce away to ensure that it’s left a clear imprint on the page
Lift the fruit or vegetable up smoothly to ensure that you make a clean image.
If you aren’t happy with the image that you’ve made, you may want to repress the product over the same spot to add more paint.
Image titled Paint With Fruit and Vegetables
3
Continue painting to finish your picture. After you’ve stamped the first fruit or vegetable on the paper, stamp other produce over the canvas to create a scene or design that you like. You may want to have a piece of scrap paper on hand so you can test out the fruit and vegetables to see what shapes they make before pressing them on the paper.[9]
When you’re finished painting, you can use crayons, markers, and/or colored pencils to add fine details to the picture.
Paint With Fruit and Vegetables Step 10
4
Allow the painting to dry. When you’ve finished with your painting, set it aside to let it dry completely before displaying it. It should take 1 to 2 hours, but placing it in a sunny area can often help it dry more quickly.