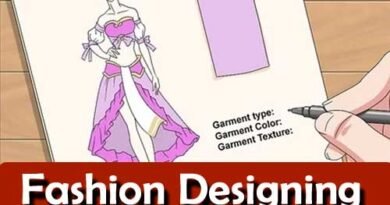
What is Seams & Definition of Seams
Seam – What is it? and How to sew them for your garment
A seam is a term that refers to the stitching line where two fabrics are stitched (pieced, if you want the technical term) together. It is the basic building block of a garment. The stitching line along the seam is called the seam line.
Seams form the structure of the garment and help to create the garment. They are also used as a decorative feature.
The seam allowance (SA) is the space between the fabric edge and the seam line. You can checkout the post on seam allowances for some details on how to sew a straight line and the common seam allowances used.
- How to decide which seam is suitable for your sewing.
- 1.Plain seam
- 2. Plain seam with a single stitch
- 3. Plain seam with double top stitch
- 4.Reinforced seams
- 5. Hairline seam
- 6. Lapped seam
- (also called Tucked seam)
- 7.French seam
- 8.Flat felled seam or Run and fell seam
- 9. Mock flat fell seam ( also Welt seam )
- 10.Corded or Piped seam
- 11.Faced seam
- 12.Hemmed fell seam
- 13.Mock French seam (1)
- 14.Mock French seam (3)
- 15.Serged seam
- 16.Slot Seam
- 17. Counter seam
- 18. Butt seams
- 19. Sheet seam/linen seam
- 20. Hand stitched seam – with ladder stitch
- 21. Strap seam
- 22. Taped seam
How to decide which seam is suitable for your sewing.
Seams should be carefully done for a beautifully finished garment. Not only that, it should also suit the type of garment you have, the fabric it is made of etc. For eg: a flat felled seam is used to sew jeans side seams.
There are some things to take into consideration when deciding what seams to use.
Type of fabric – “What kind of fabric is it ?” is a top consideration. If it is a sheer fabric the seam finish you select will be very different from what it will, if the fabric is a heavy weight Brocade cloth. A loosely woven cotton seam will be finished differently from a rayon blend fabric seam. A lace cloth will have a different seam than a denim cloth. Here is a post detailing all the types of fabric there are.
Seam placement – A curved seam will be differently treated from a straight seam. If it is an exposed seam as in pants, it will be different from an enclosed seam as in a yoke or a collar.
Sewing machine – What is your sewing machine capable of? What attachments do you have?, are also important – if you have a serger or at least a zig zag machine you have more possibilities than a simple straight stitch machine.
Garment’s purpose and use – A child’s dress will need a more sturdy seam than a camisole top. A wedding gown will not have the same seam finish as a biker’s gear.
Related post : How to sew straight seams with simple tools.
Types of Seams
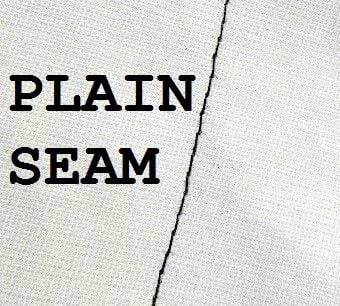
1.Plain seam
In a Plain seam, two fabrics are joined together along the seam line by a line of stitching. It is also called a single needle Butterfly stitch as once the seam is made the seam allowances are pressed open to either side of the seam line to look like a butterfly.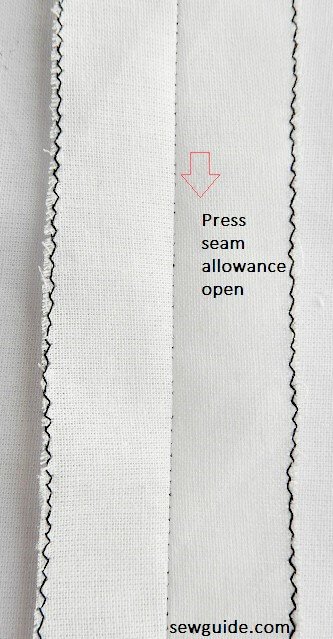
This is the simplest and easiest seam to make. It can be made by hand or machine. Straight stitches are used to make this seam though sometimes a tight zigzag stitch can also be used to make this seam especially for knit or stretch fabrics. More on straight stitch and zig zag stitch.
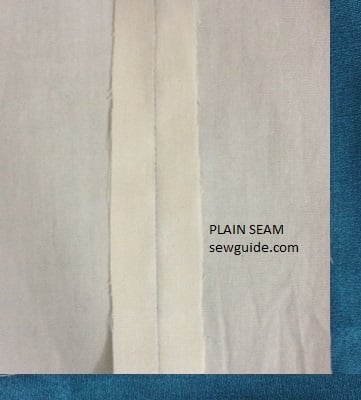
This seam requires a seam finish for its exposed edges.
The advantage of a plain seam is that this seam does not add bulk to the seam lines. But as it has only a single line of stitch the strength of the seam is not that great.
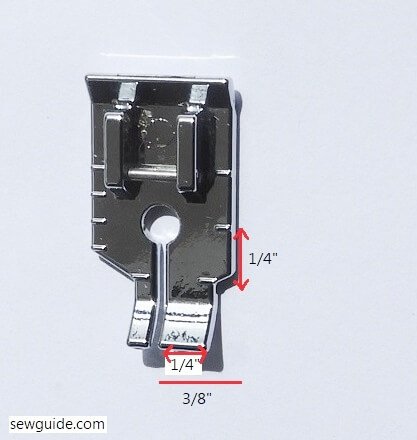
Other than the ordinary foot you use to sew, you can use a 1/4 inch seam foot for accuracy in sewing a seam with a 1/4 inch or 3/8 inch seam allowance. It can help you get a continuous seam line that has the same seam allowance. Checkout this post on using the 1/4 inch seam foot for more details.
How to sew a Plain seam
Keep the two fabrics together with right sides together. Make sure that stitching lines are aligned. Pin in place Stitch along the line you have made marking the seam line.
Start stitching and then do a back stitch for strength. At the end also do a back stitch and then a forward stitch.
Do not forget to press the seam open (do not iron; just press with a hot iron)
More on the plain seam here with Tips to sew it strong and straight, without bulk {& Stitch curves nicely} The best way to hand sew a plain seam is to use a back stitch or saddle stitch. A saddle stitch can look exactly like a sewing machine lock stitch. You can check out these posts Saddle Stitch and Back stitch for detailed steps to make them.
2. Plain seam with a single stitch
A single topstitching seam, this seam is a strong seam as well as a decorative one.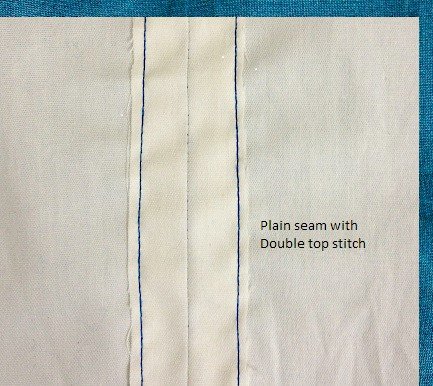
How to sew a Plain seam with a single overcast stitch
To get this effect, after plain seam is done, press both the seam allowances to one side and give top stitching on that side.
3. Plain seam with double top stitch
Double top stitching seam; This is a decorative seam which also provides great strength to the seam line.
How to sew a Plain seam with double top stitch
To get this seam, after making the plain seam, seam allowances are pressed open on both the sides and top stitched on both sides of the seam at equal distances.
4.Reinforced seamsThere are many instances where you want the seam to be super strong – and there are many ways to get this rip-proof seam. Checkout this post on sewing a super strong seam here.
5. Hairline seam
This is a type of enclosed seam which is mostly used for collars and other enclosed areas. The seam allowances are not visible from the outside as it gets enclosed.
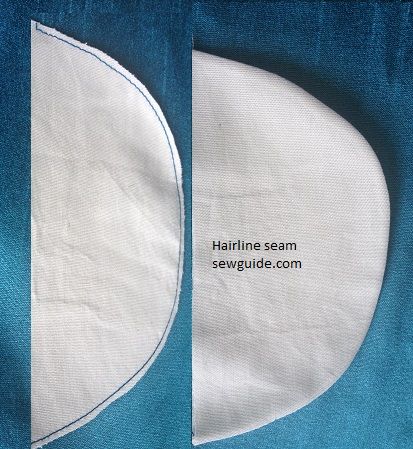
How to sew a Hairline seam
Make a plain seam using a very tight straight stitch, with the fabrics right side together. Trim away very close to the stitching line. You can also clip the extra seam allowance till the stitching line and then Press the seam. Ensure that the stitching line is not cut as you clip.
Turn right side out.
You can make a top stitch to secure the seam
6. Lapped seam
(also called Tucked seam)
This is a very useful seam when sewing with heavy fabrics like suede, artificial leather, felt.

How to sew a Lapped seam
Decide on which fabric piece will be on top with the lapped application. Turn under the seam allowance of that piece along the seam line and press in place.
Keep the folded fabric on top of the other fabric along the seam line. The seam lines should align. Pin together to keep it in place. Edge stitch close to the folded edge
Press.
When sewing with heavy fabrics, as the edges of these fabrics do not fray, you can create this seam by trimming the whole seam allowance of the top piece. Now the bulk is eliminated as there is no fabric to turn under.
7.French seam
This is the best seam for sheer fabrics. As this seam encloses the raw edges in a fold, the raw edges are not seen from outside without adding much bulk. This seam is usually done on straight edges but if you clip nicely it can also be done on curved edges.
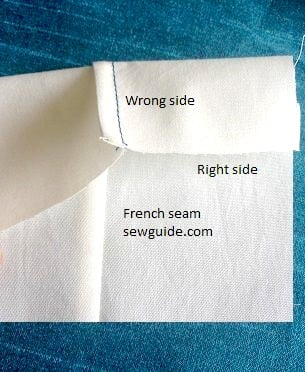
How to sew French seams 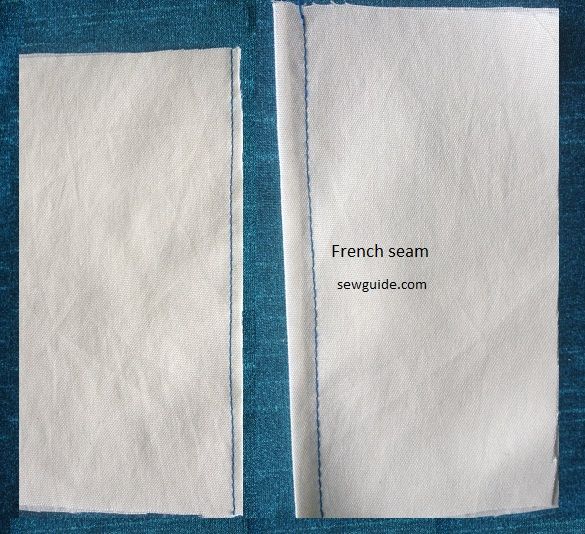
For this seam unlike other seams, you have to start with the wrong sides of the fabric together matching the stitching lines (instead of right sides together) to make a plain seam.
First on right side of the fabric, mark the stitching line with 1/2″ seam allowance. Then on the wrong side, Mark a line half way through the original seam allowance i.e for a 1/2 inch seam allowance mark a stitching line at 1/4″
Stitch the plain seam through this 1/4″ line. (picture 1 of the above diagram)
Trim the seam allowance a little bit.
Now fold the fabric over at the seam RIGHT SIDES TOGETHER, covering the raw edges. Press.
Stitch on the original seam line. (at the 1/2″ mark) right sides of the fabric together (picture 2 of the above diagram)
Press flat and then to one side.
Now the raw edges are nicely enclosed in the back.
A more detailed explanation on making a french seam and use it in dressmaking can be found here in the post – French seam.
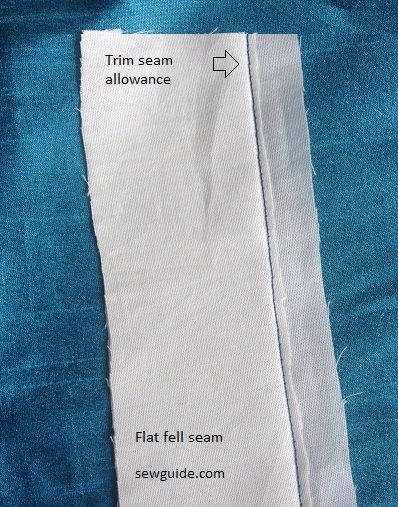
8.Flat felled seam or Run and fell seam
Mostly used in sports wear, men’s shirts, jeans kids clothes, pyjamas etc. It provides adequate strength to the seam line. This seam can be stitched inside as well as outside the garment.
How to sew a Flat felled seam ?
Make a plain seam.
Press both the seam allowance to one side. One seam allowance is trimmed to 1/8 inch.
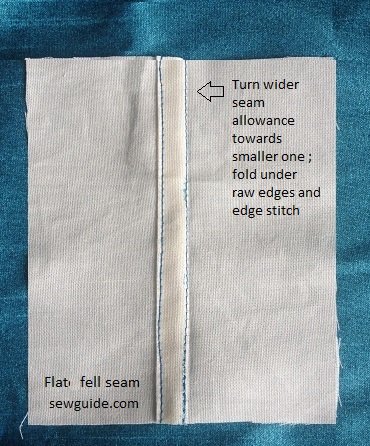
Turn the larger seam allowance up and over the smaller one, all the way nearly to the seam line stitched earlier. Use an iron to press this .
Now fold the whole seam over on itself to the other side so that the raw edge is now hidden and press again.
Edge stitch over the fold. Make sure that an even distance is maintained from the original seam line.
Learn more about a flat fell seam here.
9. Mock flat fell seam ( also Welt seam )
This is a seam which looks a lot like Flat fell seam but is easier to make.
Unlike the flat fell seam here the raw edge is not turned under. So this seam will have exposed raw edges of the seams on the wrong side. Hence it is better to be used with fabrics which do not fray or where the seam will not be seen. This is a great seam for a bulky fabric like felt or synthetic leather.
How to sew a mock flat fell seam.
Stitch a plain seam as usual with right sides together.
Decide on the side you will be sewing the seam allowance to.Trim the seam allowance of that side to half of what it is. Press the seam allowance to that side. (now the wider seam allowance will be over the smaller one)
Now turn to the rightside of the fabric. Edgestitch close to the seam line.
Then turn to the other side and stitch along the raw edge. Now there will be two rows of stitching parallel to the seam line.
10.Corded or Piped seam
In this seam, a fabric-covered cording is inserted between the seam line. It is a decorative seam and is mostly used in collars, cuffs, pockets and home decorating fabrics.
How to sew a Corded or piped seam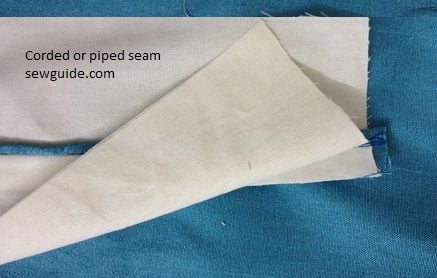
For this seam bias strip covered cords are used. You can either buy a precovered cording or buy cording and cover it yourself.It is sewn with a zipper foot attachment. The cord is kept snugly inside the bias strip and then using the zipper foot the bias strip is sewn close sandwiching the cord inside. The stitching line should be made as close to the cord as possible without the needle touching the cord.
Checkout the tutorial to make bias tape and how to bind fabric edges with the bias tape