Flower Embroidery using 3 Different Stiches
Flower embroidery is a delightful craft that allows artists to create intricate and colorful floral designs using various stitching techniques. In this class, we will explore three fundamental stitches commonly used in flower embroidery: the satin stitch, the lazy daisy stitch (also known as the detached chain stitch), and the French knot. These stitches are versatile and form the basis for creating realistic and stylized flowers in embroidery.
1. Satin Stitch
Overview: The satin stitch is a smooth and glossy embroidery stitch used to fill in shapes and create solid areas of color. It is characterized by its smooth and shiny appearance, making it ideal for petals and broad leaf shapes in floral designs.
Technique:
- Starting Point: Bring the needle up through the fabric at the edge of the shape to be filled.
- Stitching: Insert the needle back down very close to where it came up, ensuring the stitches are parallel and close together.
- Coverage: Continue stitching in parallel rows, adjusting the angle of the needle to follow the shape of the petal or leaf.
- Finishing: End the stitch neatly at the edge of the shape or blend into another stitch for shading effects.
Application in Flower Embroidery:
- Petals: Use satin stitch to fill in large or small petal shapes, creating a smooth and uniform surface.
- Leaves: Satin stitch can be used for the broad leaves of flowers, allowing for natural shading and color variation.
2. Lazy Daisy Stitch (Detached Chain Stitch)
Overview: The lazy daisy stitch, also known as the detached chain stitch, is a simple and charming stitch used to create individual flower petals or small leaf shapes. It is characterized by its looped appearance, resembling a tiny daisy petal.

Technique:
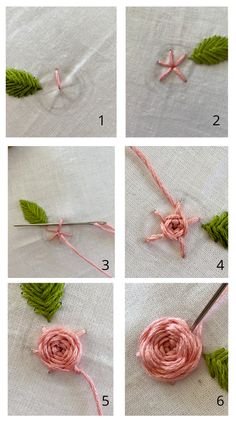
- Starting Point: Bring the needle up through the fabric at the starting point of the petal.
- Forming the Loop: Insert the needle back down through the fabric very close to the starting point, but do not pull the thread all the way through. Leave a loop of thread on the surface.
- Anchoring: Bring the needle up again at the tip of the loop to anchor it, forming a petal shape.
- Finishing: Secure the loop with a small stitch to complete the petal.
Application in Flower Embroidery:
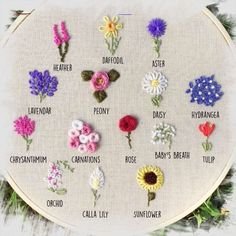
- Flower Petals: Use lazy daisy stitches to create individual petals for flowers like daisies, roses, or daffodils.
- Leaves: Form small leaf shapes by arranging several lazy daisy stitches in a cluster, varying the length for natural variation.
3. French Knot
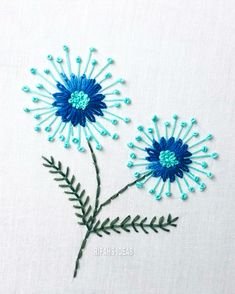
Overview: The French knot is a versatile and textured stitch used to create small, raised dots or clusters in embroidery. It adds dimension and detail to flower centers, buds, or even the fine stamens of a flower.
Technique:
- Starting Point: Bring the needle up through the fabric at the desired location for the knot.
- Wrapping the Thread: Hold the working thread taut and wrap it 2-3 times around the needle.
- Forming the Knot: Insert the needle back down through the fabric very close to the starting point, while holding the wraps in place with your thumb.
- Securing: Gently pull the needle through to the back of the fabric, adjusting the tension to control the size of the knot.
Application in Flower Embroidery:
- Flower Centers: Use French knots to create textured centers for flowers like roses, sunflowers, or daisies.
- Buds: Create small clusters of French knots to depict flower buds or clusters of stamens.
Conclusion
Mastering these three fundamental stitches—satin stitch, lazy daisy stitch, and French knot—will provide you with a solid foundation for creating beautiful flower embroidery designs. Experiment with different thread colors, textures, and arrangements to achieve realistic or stylized floral effects. Remember, practice and patience are key to developing proficiency in embroidery. Enjoy the creative journey as you bring vibrant and lifelike flowers to life on fabric!