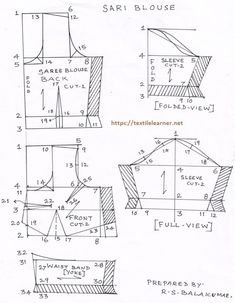
Cutting Clothes and Stiching
Cutting and stitching are integral parts of the garment making process, where precision and skill are essential to transform fabric into wearable clothing. This class note covers the fundamental techniques, tools, and considerations for cutting and stitching clothes effectively.
Cutting Clothes
Tools and Equipment
- Cutting Surface:
- Use a large, flat surface like a cutting table or mat to ensure fabric lays flat and measurements are accurate.
- Ensure the surface is clean and free of debris to prevent snagging or damaging the fabric.
- Measuring Tools:
- Measuring Tape: Essential for taking body measurements and measuring fabric lengths.
- Rulers: Straight rulers and curved rulers (like French curves) for measuring and marking curves.
- Pattern weights: Used to secure pattern pieces or fabric to prevent shifting during cutting.
- Cutting Tools:
- Fabric Scissors: Sharp, dedicated scissors for cutting fabric. Avoid using them for other materials to maintain sharpness.
- Rotary Cutter and Mat: Useful for cutting straight lines quickly and accurately, especially for quilting or multiple layers of fabric.
- Pinking Shears: Optional, but used to finish fabric edges to prevent fraying.
- Fabric Marking Tools: Fabric chalk, disappearing ink pens, or tailor’s chalk to mark cutting lines and pattern markings.
Techniques
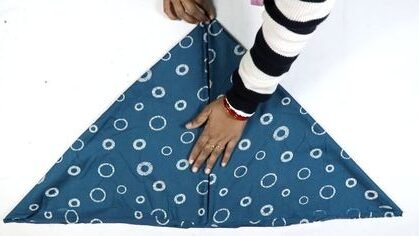
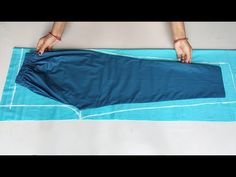
- Preparing Fabric:
- Washing and Ironing: Wash and press fabric before cutting to pre-shrink and remove wrinkles.
- Laying Out Patterns: Arrange pattern pieces on fabric according to grainlines, pattern instructions, and fabric nap (if applicable).
- Pin or Weight: Secure pattern pieces to fabric using pins or pattern weights to prevent shifting during cutting.
- Cutting Techniques:
- Using Scissors: Hold fabric taut with one hand while cutting smoothly with the other hand. Follow cutting lines precisely to ensure accuracy.
- Using Rotary Cutter: Place ruler along cutting line, press firmly, and roll rotary cutter against the ruler’s edge for straight cuts.
- Notching and Marking: Make small notches or mark darts, pleats, and other pattern details with fabric chalk or marking tools as you cut.
- Handling Different Fabrics:
- Knits: Use ballpoint scissors or rotary cutter to prevent snagging.
- Silk and Delicates: Cut with sharp scissors and handle gently to avoid fraying or stretching.
- Denim and Heavy Fabrics: Use sharp, strong scissors or rotary cutter with a sharp blade for clean cuts.
- Pattern Matching:
- Align pattern pieces to ensure continuity of design across seams, especially with prints or stripes.
Stitching
Sewing Machine Basics
- Machine Setup:
- Thread: Use appropriate thread weight and color matching the fabric.
- Needles: Choose needle size based on fabric type (e.g., universal, ballpoint, denim needles).
- Tension and Stitch Length: Adjust according to fabric thickness and stitch type.
- Basic Stitches:
- Straight Stitch: Used for seams and topstitching.
- Zigzag Stitch: For finishing raw edges, sewing stretch fabrics, or decorative purposes.
- Overlock Stitch: Use on a serger or overlock machine to finish edges and seam allowances.
Hand Sewing Techniques
- Tools:
- Needles: Use different needle sizes and types for various fabrics and stitching tasks.
- Thimble: Protect fingers when pushing needles through thick or tough fabrics.
- Basic Stitches:
- Running Stitch: Basic stitch for joining fabric pieces together.
- Backstitch: Strong stitch for seams or securing hems.
- Basting Stitch: Temporary stitch for fitting or holding fabric layers together.
Techniques
- Seam Allowances:
- Standard: Typically ⅜” (1 cm) for most garments, but can vary depending on pattern instructions.
- Finish Edges: Use zigzag stitch, overlock stitch, or serger to prevent fraying on raw edges.
- Sewing Seams:
- Pin or Baste: Align fabric edges, pin or baste to hold in place before sewing.
- Stitching: Sew along seam line, backstitching at the beginning and end to secure stitches.
- Pressing:
- Before: Press seams open or to one side as per pattern instructions to set stitches.
- After: Press garment pieces and seams flat to create crisp edges and professional finish.
- Hemming:
- Mark and Measure: Mark hemline evenly around garment.
- Finish: Fold hem twice for a clean edge, press, and sew with appropriate stitch (e.g., straight stitch, blind hem stitch).
Advanced Techniques
- Darts and Pleats:
- Marking: Transfer dart or pleat markings accurately from pattern to fabric.
- Sewing: Fold fabric as indicated by markings, stitch along fold line, and press.
- Inserting Zippers and Fastenings:
- Mark and Pin: Mark zipper placement, pin or baste zipper in place before stitching.
- Sewing: Use zipper foot for precise stitching along zipper tape.
- Finishing Touches:
- Topstitching: Stitch along edges or seams for reinforcement or decorative purposes.
- Adding Trims and Embellishments: Attach lace, ribbons, or other embellishments as desired.
Conclusion
Mastering cutting and stitching techniques is essential for creating well-fitted, professionally finished garments. Whether using hand sewing methods or sewing machines, understanding fabric handling, pattern layout, and stitching techniques ensures successful garment construction. By practicing these skills with attention to detail and using appropriate tools, students can develop proficiency and confidence in their ability to create clothing and other textile projects. Continuous practice and exploration of new techniques will further enhance their skills and creativity in the field of garment making.
