Computer Notes 31
Using a printer is a straightforward process, but it can vary slightly depending on the type of printer (inkjet, laser, etc.) and whether it’s connected via USB or Wi-Fi. Here’s a quick guide to help you get started:

1. Set Up the Printer
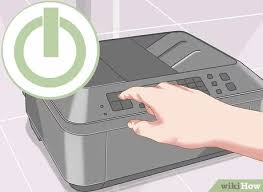
- Unbox and Connect: Remove the printer from its packaging. Connect it to a power source and turn it on.
- Install Cartridges: Open the printer and install the ink or toner cartridges as per the manufacturer’s instructions.
- Load Paper: Place the appropriate size and type of paper into the input tray.
2. Connect to Your Device

- USB Connection: Plug the USB cable from the printer into your computer. Most systems will automatically recognize the printer.
- Wireless Connection: For Wi-Fi printers, use the printer’s control panel to access network settings. Connect it to your Wi-Fi network, usually by entering the network password.
3. Install Drivers
If your computer doesn’t recognize the printer automatically, download and install the necessary drivers from the manufacturer’s website. This step is essential for proper functionality.

4. Print a Document
- Open the Document: On your computer, open the document or image you want to print.
- Select Print: Go to the “File” menu and choose “Print” (or use the shortcut Ctrl+P).
- Choose the Printer: Select your printer from the list. Adjust settings like the number of copies, color options, and paper size as needed.
- Click Print: Once everything is set, click the “Print” button.
5. Check Printer Status

If the printer doesn’t start, check for any error messages or alerts. Ensure there’s enough paper and ink/toner, and that there are no paper jams.

Conclusion
By following these steps, you can easily use your printer to produce high-quality documents and images. Regular maintenance, like replacing cartridges and keeping the printer clean, will ensure optimal performance.
4o mini

