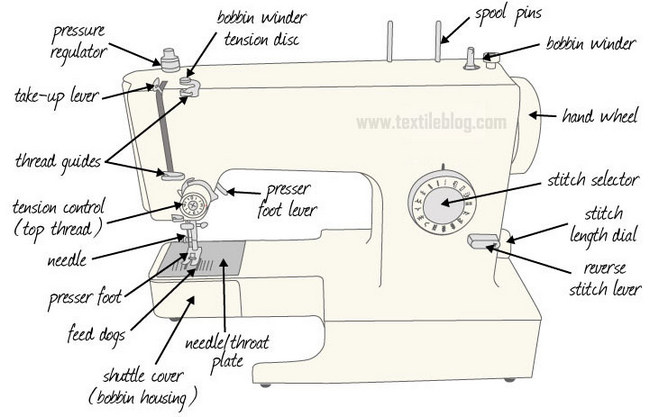
Common Sewing Machine Problems and their Solutions
Common Sewing Machine Problems and their Solutions
Different Hand Sewing Methods
Every tailor should know a few of the basic hand stitching methods. The popularly used hand stitching methods
are listed below.
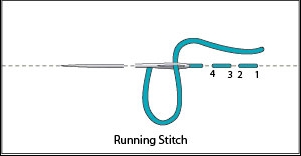
Running Stitch: Push point of needle in and out of fabric until you have several stitches on the needle Hold fabric taut with left hand, pull the needle through. It’s the basic stitch in hand-sewing and embroidery, on which all other forms of sewing are based
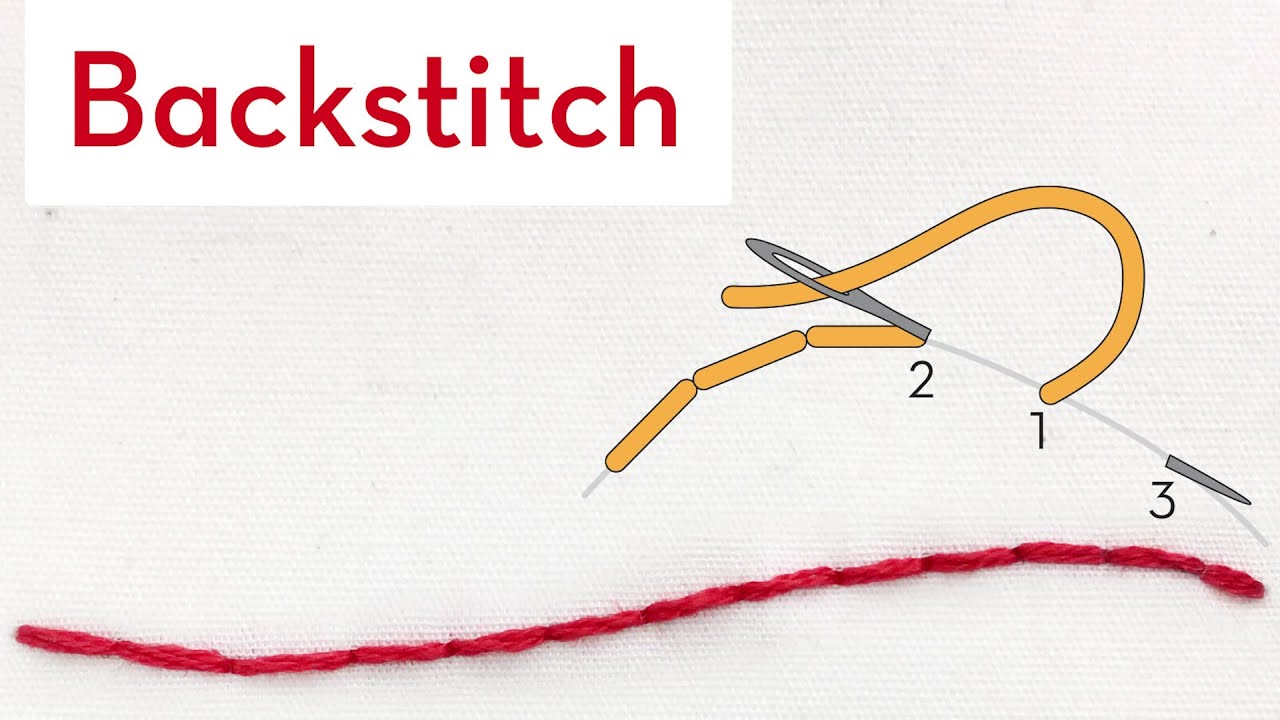
Back Stitch: It is used in strengthening a seam made by hand
Make a running stitch
Take a back stitch to the beginning of the first stitch, overlapping each running stitch

Basting: This stitch holds the fabric temporarily in place, until permanently stitched. It is a longer version of a running stitch.
Outline Stitch: It is the slated version of the back stitch. Start with a straight stitch in the fabric, and pull the thread through until you are left with a small loop. This stitch is used to mark outlines in an embroidery pattern.
Blanket Stitch: Put your needle in 1/4 inch from the edge of the fabric, put the thread under the point of the needle and pull through. It is used for edging material of table-covers, mantel valances, blankets etc.

Catch Stitch: It is one of the hemming stitches. The catch stitch is an ideal stitch for when you need to hem knit garments. Working from left to right, Take a stitch in the hem, then a tiny stitch to the right just beyond edge of hem with the point of needle to the left. This makes diagonal lined that cross each other.
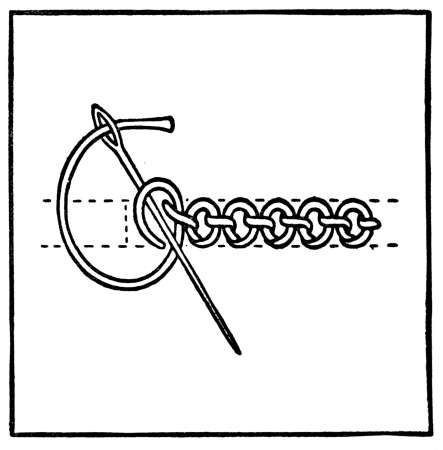
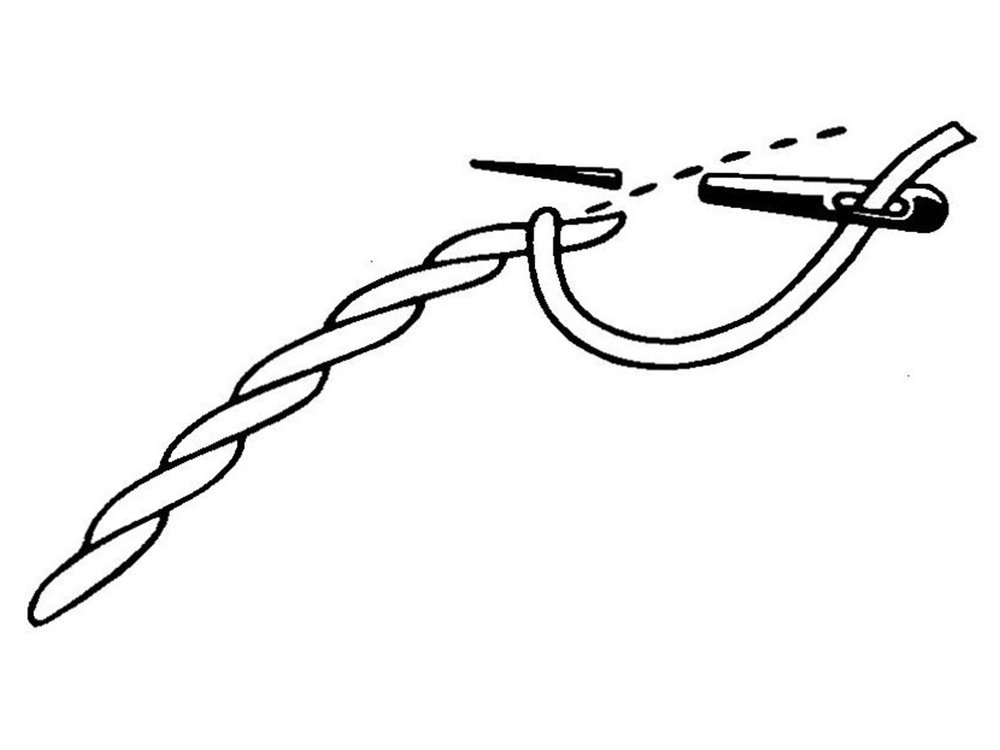
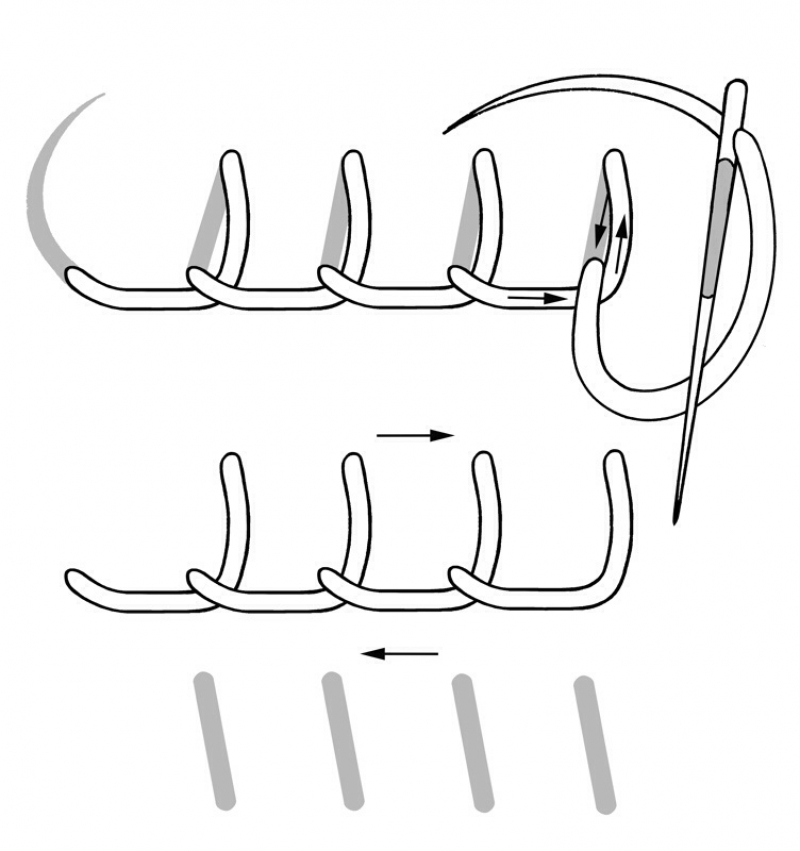
Chain Stitch: Chain stitch is a series of looped stitches forming a chainlike pattern. It is adapted to all different techniques, even lace making. Insert the needle in and out of the fabric (as in the running stitch). Bring the thread under the tip of the needle while still in the fabric, then pull the needle through.
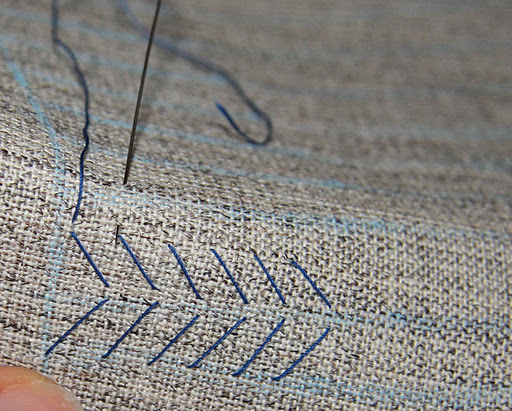
Padding stitch: Put at an angle this stitch resembles a temporary stitch. The first line is taken at a certain angle and in the next line the angle is in the opposite direction Used to set layers of cloth. It is used mainly in coats
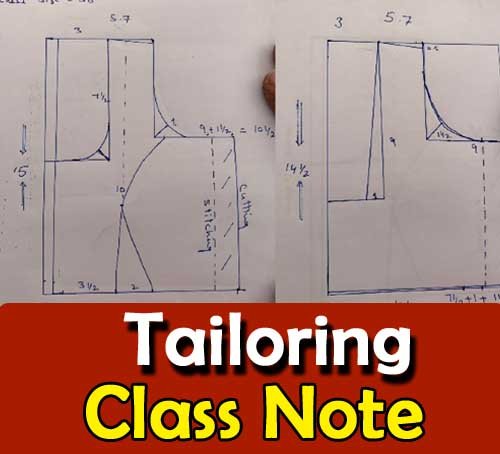
Sequence of Sewing (A Basic Apron with Pocket)
Materials, Tools and Equipment Required:
1 yard of fabric
Piece of coordinating fabric for the pocket
7/8″ ribbon
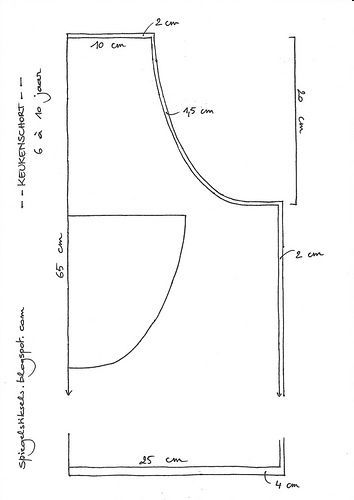
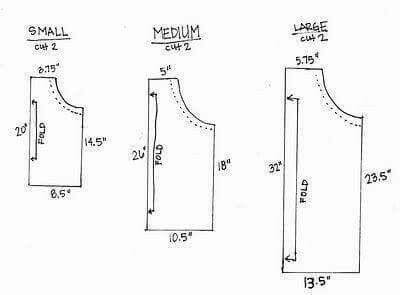
Apron Pattern
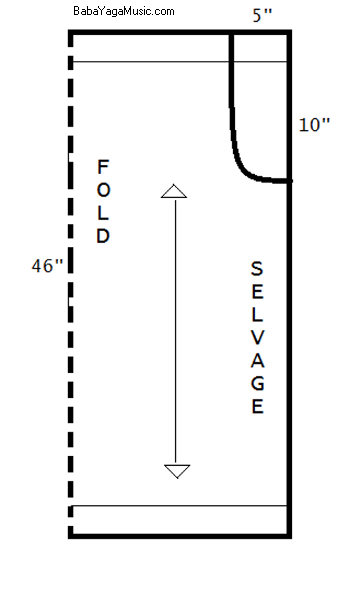
STEP 1: Place the apron pattern on the folded fabric and cut out.
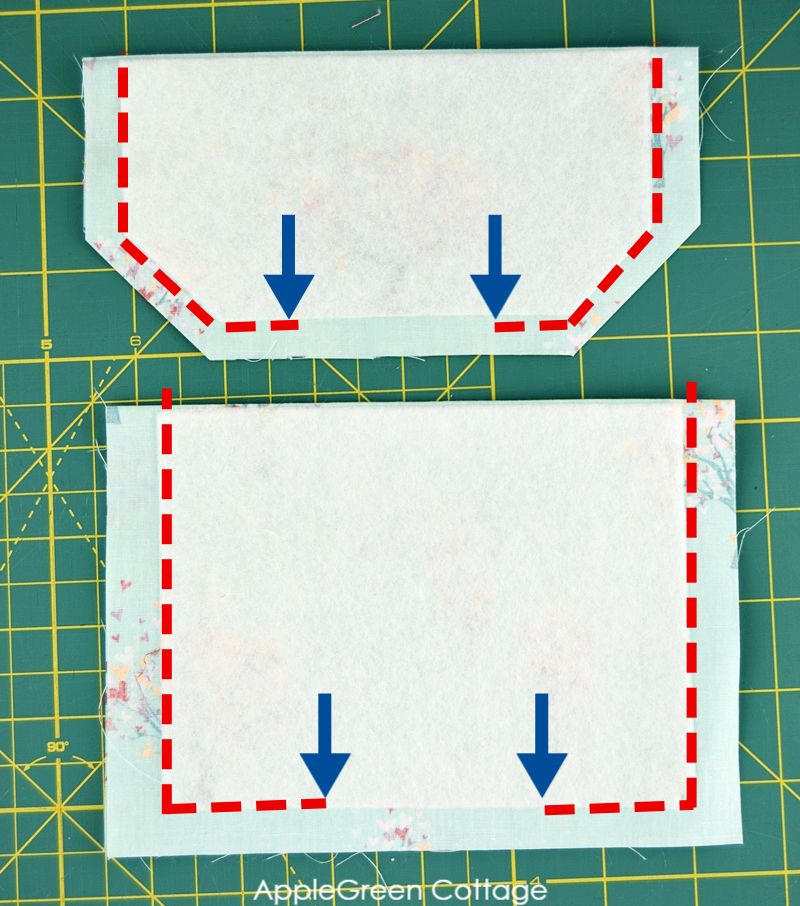
STEP 2: Fold the rectangle of coordinating
fabric in half with right sides together Stitch around three sides of the pocket using a 1/2″ seam allowance, leaving a 3″ opening at the bottom Clip the corners
STEP 3: Turn the pocket right side out and push out the corners of the pocket with an item like a chopstick.(Don’t use something too sharp or you will poke a hole through the fabric.) Press the pocket flat, folding in the raw edges of the opening. Topstitch along the fold, which will be the top of your pocket.
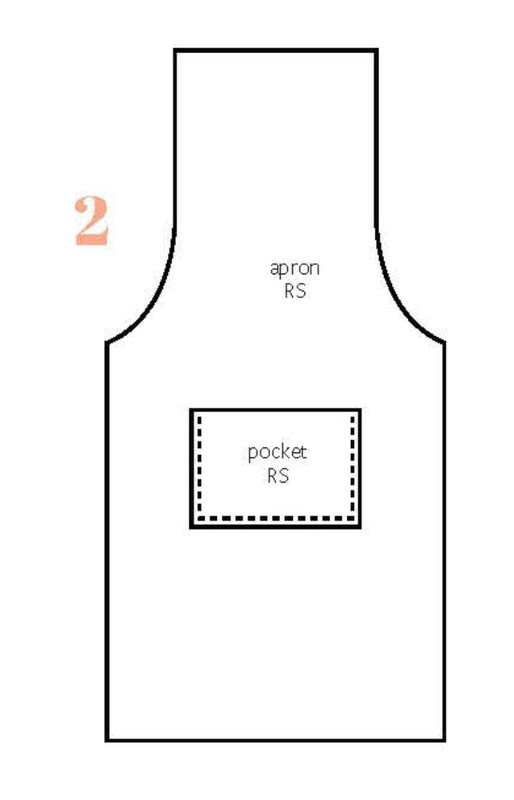
STEP 4: Place the pocket on the centre of the apron approximately 12″ from the top Stitch the sides and bottom of the pocket to the apron. (Placement of the pocket may vary)
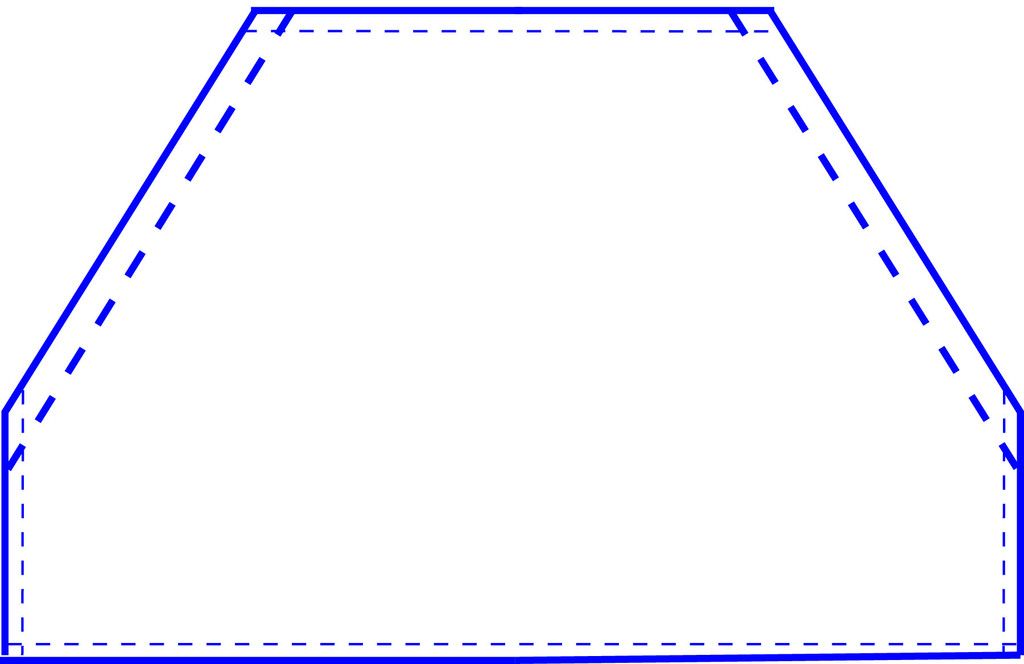
STEP 5: Using a double fold hem (folding tabn in 1/2 pressing, then folding 1/2″ again and pressing for a 1″ hem), pin and stitch the sides and bottom of the apron

STEP 6: Using a double fold hem (folding fabric in 5/16″ pressing, then folding 5/16″ again and pressing for a 5/8″ hem), pin and stitch the curved side of the apron
STEP 7: Fold down 1/4 along top and press Fold 1 again and press Stitch facing down.
STEP 8: Using a double fold hem (folding fabric in 5/16″, pressing, then folding 5/16″ again and pressing for a 5/8″ hem), pin and stitch the curved side of the apron.
STEP 9: Fold down 1/4″ along top and press. Fold 1″ again and press. Stitch facing down.
Industry Visit
The purpose of visiting a tailor shop/boutique is to get hands on knowledge about various processes involved in the work of a tailor. During the visit you have to interact with Tailors and owner of the shop to understand how work is done in a tailor shop/boutique. Make sure that you keep a notebook handy and note down any important points that come up during your interaction at the tailor shop/boutique. When you go to an tailor shop/boutique, you should.
Recognize the different types of sewing machine and understand the different parts of a sewing machine.
Analyse how a tailor threads a sewing machine.
Understand the different types of hand sewing methods.
Recognize the different sewing machine problems.
Understand the different sewing methods.
Ask questions to Tailors/shop owners if you have any query.
Observe the sequence of sewing of a basic apron.