Shirt Stitching
Shirt stitching involves the process of constructing a garment that covers the upper body, typically with a collar, sleeves, and buttons down the front. In this class, we will explore the fundamentals of shirt construction, including fabric selection, pattern making, cutting, sewing techniques, and finishing touches. Understanding these elements will enable you to create well-fitted and professionally finished shirts tailored to your preferences.
1. Introduction to Shirt Stitching
Overview:
- Purpose: Shirts are versatile garments worn for various occasions, ranging from casual wear to formal attire.
- Styles: They come in different styles such as dress shirts, casual shirts, and tailored shirts, each with specific design features and construction techniques.
- Materials: Choosing the right fabric is crucial for comfort, durability, and the overall appearance of the shirt.
2. Materials Needed
A. Fabric Selection
1. Types of Fabrics:
- Cotton: Ideal for its breathability and comfort, making it suitable for both casual and formal shirts.
- Linen: Known for its lightweight and airy feel, perfect for warm climates.
- Polyester Blends: Offer durability and resistance to wrinkles, often used in dress shirts for a polished look.
- Flannel: Provides warmth and softness, suitable for casual or winter shirts.
- Silk: Luxurious and smooth, used for formal dress shirts or special occasions.
2. Fabric Considerations:
- Weight: Choose fabric weight based on the intended use of the shirt (lightweight for summer, heavier for winter).
- Pattern and Color: Consider patterns (stripes, checks, solids) and colors that suit your style and occasion.
B. Other Materials
1. Thread: High-quality polyester or cotton thread suitable for sewing seams and buttons. 2. Interfacing: Used to add structure and support to collar and cuffs. 3. Buttons: Choose buttons that complement the fabric and style of the shirt. 4. Sewing Notions: Pins, scissors, measuring tape, chalk or fabric marker, iron and ironing board.
3. Pattern Making and Cutting
A. Shirt Patterns
1. Commercial Patterns:
- Purchase patterns from sewing stores or online sources, which include instructions and templates for various shirt styles.
- Adjust patterns for size and fit using body measurements for a customized fit.
B. Drafting Your Own Pattern:
- Create a shirt pattern from scratch using basic pattern drafting techniques, such as using a shirt block or sloper.
- Customize the pattern to include style elements like collar types, sleeve lengths, and shirt hemline.
C. Cutting the Fabric
1. Layout: Place pattern pieces on the fabric following grain lines and pattern instructions. 2. Marking: Transfer pattern markings (darts, notches, button placements) onto the fabric using chalk or fabric marker. 3. Cutting: Use sharp fabric scissors or a rotary cutter to cut out pattern pieces accurately.
4. Sewing Techniques
A. Seams and Stitching
1. Seam Allowance: Typically ⅜ inch (1 cm) seam allowance is used for shirt construction. 2. Stitching Techniques:
- Straight Stitch: Used for most seams, such as side seams, shoulder seams, and sleeve seams.
- Zigzag Stitch: Used to finish raw edges to prevent fraying.
- Topstitching: Decorative stitching done on the right side of the fabric to secure seams and add detail.
B. Assembly Steps
1. Constructing the Body:
- Start by sewing shoulder seams, followed by side seams, to form the basic shirt structure.
- Press seams open or towards the back for a neat finish.

2. Collar and Collar Stand:
- Attach the collar to the collar stand, ensuring it is centered and aligns correctly with the neckline.
- Interface collar pieces to add stiffness and shape.
3. Sleeves:
- Set in sleeves by aligning sleeve cap with armhole, easing in fullness as needed.
- Sew sleeve seams and finish raw edges with zigzag stitch or serger.
4. Cuffs:
- Construct cuffs by sewing along the edges, folding and pressing, and attaching buttons and buttonholes or cufflinks as desired.
5. Button Placket:
- Create a button placket by folding and pressing fabric edges, then stitching down to form a neat opening for buttons.
- Sew buttonholes and attach buttons evenly spaced along the placket.
5. Finishing Touches
A. Hemming
1. Shirt Hem: Measure and fold shirt hem allowance evenly around the bottom edge of the shirt. 2. Topstitch or Blind Hem: Sew hem in place using a straight stitch or blind hem stitch for a clean finish.
B. Pressing and Ironing
1. Press Seams: Use an iron to press seams flat throughout the shirt construction process to ensure professional-looking results. 2. Final Press: Give the entire shirt a final press to smooth out any wrinkles and creases.
6. Customization and Style Options
A. Fit Adjustments:
- Make fit adjustments during the sewing process, such as taking in or letting out seams for a tailored fit.
- Customize shirt length, sleeve length, and collar size based on personal preferences.
B. Style Variations:
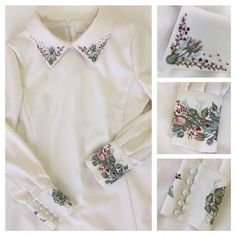
- Experiment with different collar styles (pointed collar, spread collar, mandarin collar) to suit different occasions.
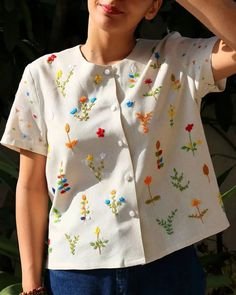
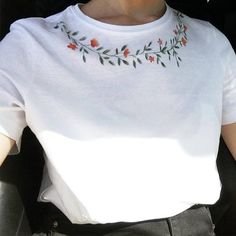
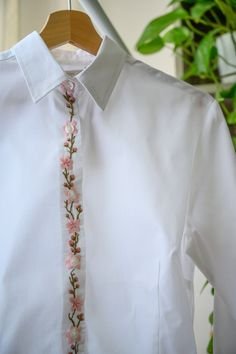
- Add personal touches such as contrast stitching, piping, or embellishments for a unique look.
7. Care and Maintenance
A. Washing Instructions:
- Follow fabric care instructions provided on the fabric bolt or pattern envelope to maintain fabric quality and color.
- Machine wash or hand wash shirts according to fabric type and construction.
B. Storage:
- Hang shirts on padded or wooden hangers to maintain their shape.
- Store shirts in a cool, dry place away from direct sunlight to prevent fading and damage.
8. Troubleshooting and Tips for Success
A. Common Issues:
- Ensure pattern pieces are cut accurately to prevent fitting issues.
- Take time to match plaids, stripes, or patterned fabrics for a professional finish.
B. Tips for Success:
- Practice sewing basic seams and techniques on scrap fabric before starting on the actual shirt.
- Take your time with pressing and ironing to achieve crisp seams and a polished appearance.
Conclusion
Shirt stitching is a rewarding sewing project that allows you to create customized garments tailored to your style and fit preferences. By mastering the fundamentals of fabric selection, pattern making, cutting, sewing techniques, and finishing touches, you can confidently embark on creating well-fitted shirts that showcase your craftsmanship and attention to detail. Whether sewing for casual wear, formal occasions, or as a creative endeavor, the skills learned in shirt stitching provide a foundation for expanding your sewing repertoire and exploring garment construction further. Enjoy the journey of creating personalized shirts that reflect your unique style and creativity!
