Pant Cutting and Stitching
Pants are essential garments worn for various occasions, providing comfort, style, and functionality. In this class, we will explore the process of cutting and stitching pants, covering essential topics such as fabric selection, pattern making, cutting techniques, sewing methods, fitting adjustments, and finishing touches. By mastering these skills, you will be able to create well-fitted pants tailored to your measurements and style preferences.
1. Introduction to Pants
Overview:
- Purpose: Pants serve as everyday wear for both casual and formal settings, offering versatility and comfort.
- Styles: Various pant styles include trousers, jeans, leggings, and shorts, each with distinct design features and construction methods.
- Materials: Choosing the right fabric is crucial for the drape, durability, and overall appearance of the pants.
2. Materials Needed
A. Fabric Selection
1. Types of Fabrics:
- Cotton: Breathable and versatile, suitable for casual and semi-formal pants.
- Denim: Durable and rugged, ideal for jeans and casual wear.
- Wool: Provides warmth and structure, suitable for tailored trousers.
- Polyester Blends: Offer durability and wrinkle resistance, often used in dress pants.
- Stretch Fabrics (e.g., spandex blends): Provide flexibility and comfort, ideal for leggings and fitted pants.
B. Other Materials
1. Thread: High-quality polyester or cotton thread matching the fabric color. 2. Interfacing: Used to reinforce waistbands, pockets, and other areas for structure. 3. Buttons, Zippers, or Hooks: Depending on the closure type chosen for the pants. 4. Sewing Notions: Pins, fabric marker or chalk, scissors, measuring tape, iron and ironing board.
3. Pattern Making and Cutting
A. Using Commercial Patterns
1. Choosing a Pattern:
- Select a pant pattern from a sewing pattern company or adjust a basic block pattern to fit your measurements.
- Consider the style (e.g., slim fit, wide-leg, high-waisted) and closure (e.g., zipper fly, elastic waist) options provided in the pattern.
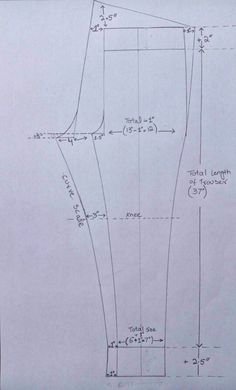
B. Drafting Your Own Pattern
1. Taking Measurements:
- Measure waist circumference, hip circumference, inseam length, and desired pant length.
- Record these measurements accurately to draft a pattern that fits well.
2. Drafting Steps:
- Use pattern drafting tools or a basic pants block to draft front and back pant pieces.
- Add seam allowances (typically ⅜ inch or 1 cm) to all edges for sewing.
- Test the pattern by creating a mock-up (muslin toile) to ensure fit before cutting into the final fabric.
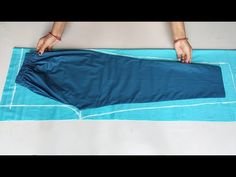
4. Cutting Techniques
A. Fabric Preparation
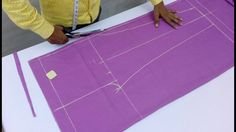
1. Layout:
- Place pattern pieces on the fabric following grain lines and pattern instructions.
- Pin pattern pieces securely to prevent shifting during cutting.
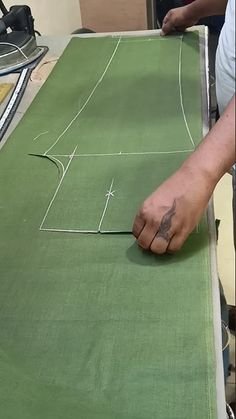
B. Cutting Process
1. Marking:
- Transfer pattern markings (darts, notches, pocket placements) onto the fabric using fabric marker or chalk.
- Double-check markings for accuracy before cutting.
2. Cutting Tools:
- Use sharp fabric scissors or a rotary cutter and cutting mat to cut out pattern pieces accurately.
- Pay attention to cutting along marked lines and maintaining smooth edges.
5. Sewing Techniques
A. Seam Construction
1. Seam Allowance:
- Use a ⅜ inch (1 cm) seam allowance unless otherwise specified in the pattern instructions.
- Finish seam allowances with a zigzag stitch, serger, or by pressing open for a neat interior finish.
B. Assembly Steps
1. Constructing the Front and Back Panels:
- Sew front and back panels together at the inseam and side seams, matching raw edges.
- Press seams open or towards the back for a professional finish.
2. Adding Pockets:
- Attach pocket pieces to the front or back panels before sewing side seams.
- Finish pocket edges with a zigzag stitch or serger to prevent fraying.
3. Waistband Construction:
- Attach waistband pieces to the top edge of the pants, ensuring the fit is snug and secure.
- Interface waistband pieces for added structure, following pattern instructions.
4. Closure Methods:
- Zipper Fly: Insert an invisible or standard zipper along the front or side seam for pants with a zipper closure.
- Elastic Waist: Create a casing for elastic at the waistband top edge, leaving an opening to insert and secure elastic for pull-on pants.
- Button or Hook Closure: Sew buttonholes and attach buttons or hooks at the waistband for a tailored closure.
6. Fitting Adjustments
A. Fitting Techniques
1. Fitting the Waist:
- Adjust waistband fit by taking in or letting out seams as needed for a comfortable fit.
- Use fitting pins or baste stitches to temporarily adjust fit before permanent stitching.
B. Altering Length
1. Hemming:
- Measure and mark the desired pant length, allowing for hem allowance.
- Sew a narrow hem using a straight stitch or blind hem stitch for a clean finish.
7. Finishing Touches
A. Pressing and Ironing
1. Press Seams:
- Use an iron to press seams flat throughout the pant construction process to ensure professional-looking results.
- Press seam allowances open or to the side according to pattern instructions.
B. Final Pressing
1. Press the Finished Pants:
- Give the entire pair of pants a final press to smooth out any wrinkles and creases.
- Ensure hems are even and pant legs are straight for a polished appearance.
8. Care and Maintenance
A. Washing Instructions
1. Fabric Care:
- Follow fabric care instructions provided on the fabric bolt or pattern envelope to maintain fabric quality and color.
- Machine wash or hand wash pants according to fabric type and construction details.
B. Storage
1. Hanging or Folding:
- Hang pants on padded hangers to maintain their shape and prevent creasing.
- Fold pants neatly and store in a cool, dry place away from direct sunlight to preserve fabric integrity.
9. Troubleshooting and Tips for Success
A. Common Issues
1. Fit Issues:
- Check the fit of the pants during the sewing process and make adjustments promptly to avoid fit issues.
- Use a fitting buddy or dress form to assess fit and make alterations as necessary.
B. Tips for Success
1. Practice Techniques:
- Practice sewing basic seams, pockets, and closures on scrap fabric before starting on the actual pants.
- Take your time with pattern cutting and sewing to ensure accurate construction and a professional finish.
Conclusion
Learning to cut and stitch pants involves mastering fundamental sewing skills such as pattern making, cutting techniques, seam construction, and fitting adjustments. By following the steps outlined in this class, you can confidently create pants that fit well, suit your style preferences, and showcase your sewing craftsmanship. Whether sewing trousers for everyday wear, jeans for casual outings, or tailored pants for formal occasions, the skills acquired through pant cutting and stitching provide a foundation for expanding your sewing repertoire and creating personalized garments. Enjoy the process of designing and sewing pants that fit perfectly and reflect your unique style!
