Knowledge of Basic Embroidery Stitches
Unit Objectives
At the end of this unit, you will be able to:
1.Understand flat stitches, loop stitches and knotted stitches.
2. Carry out flat stitches, loop stitches and knotted stitches.
Flat Stitches
Flat stitches are simple embroidery stitches in which individual stitches are made without crossing or looping the thread. These stitches are used to form broken or unbroken lines or starbursts, fill shapes and create geometric designs.
Commonly used types of Flat Stitches and their techniques are given below:
. Running Stitch
. Back Stitch
. Stem Stitch
. Satin Stitch
. Kashmiri Stitch
. Couching Stitch
.Cross Stitch
. Herringbone Stitch
Steps of Carrying out Running Stitch
This stitch can be worked in straight or curved lines, or for assembly when finishing an embroidery project. The stitch is worked by passing the needle in and out of the fabric. Running stitches may be of varying length, but typically more thread is visible on the top of the sewing than on the underside.
Step 1: Work from right to left of the fabric and insert your needle through the back side of the fabric at your starting point.
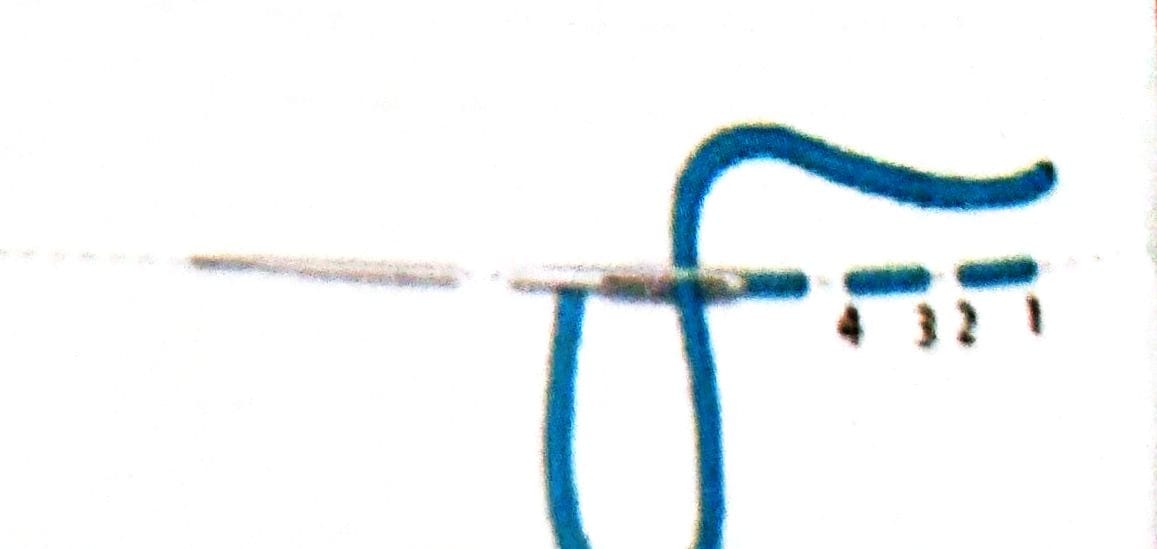
Step 2: Bring thread up at 1 then down at 2, up at 3 and down at 4 and continue.
Step 3: The spaces between the stitches can be the same length as the stitches or shorter for a different look.
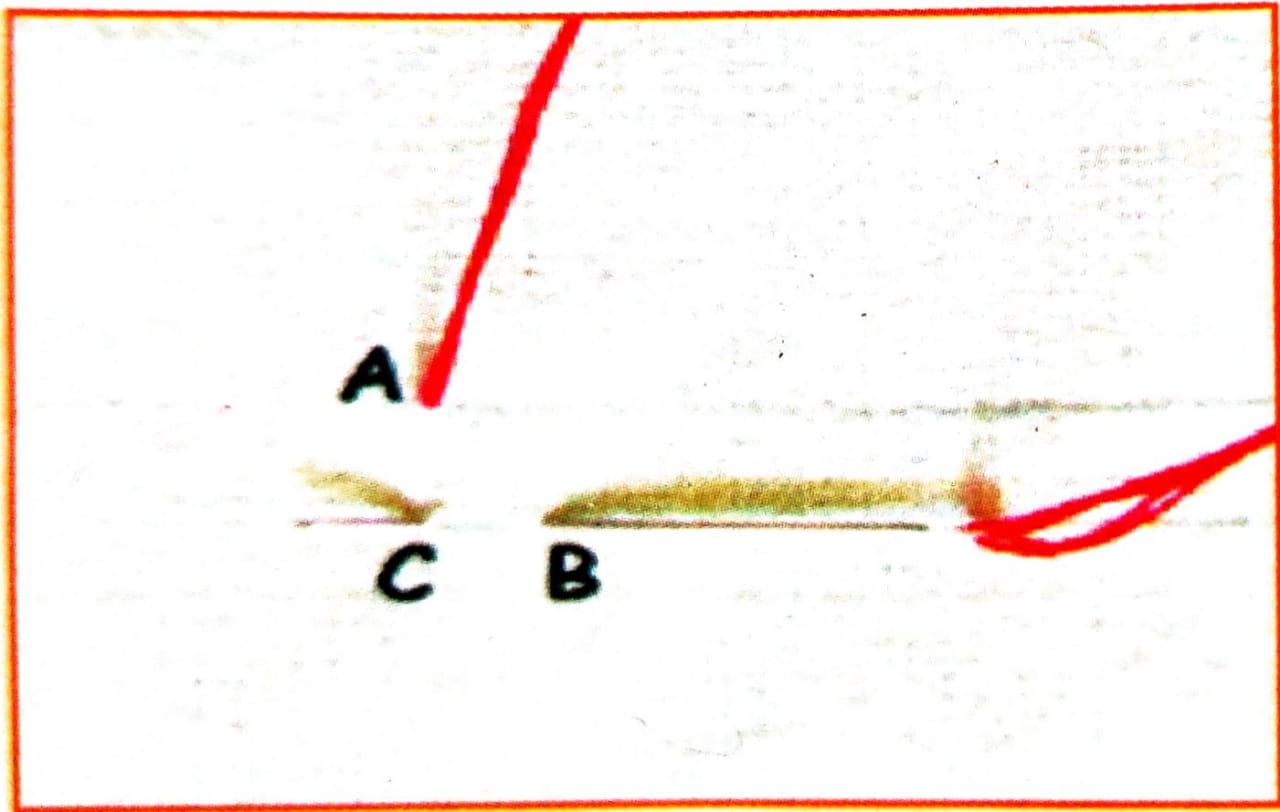
Steps of Carrying out Back Stitch
The back stitch is a basic embroidery and sewing stitch used to produce a thin line of stitching, to outline shapes that will be filled with satin stitch, or to stitch fabric pieces together.
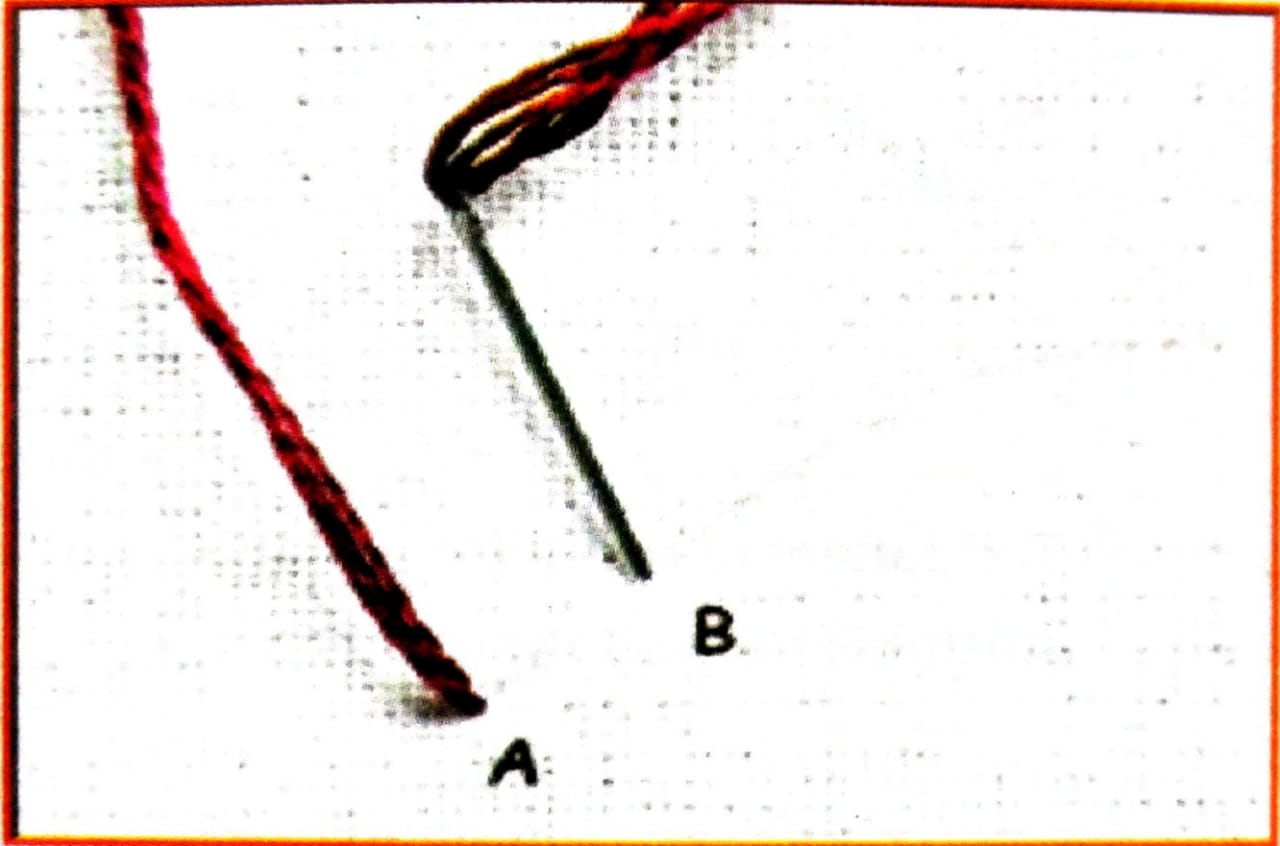
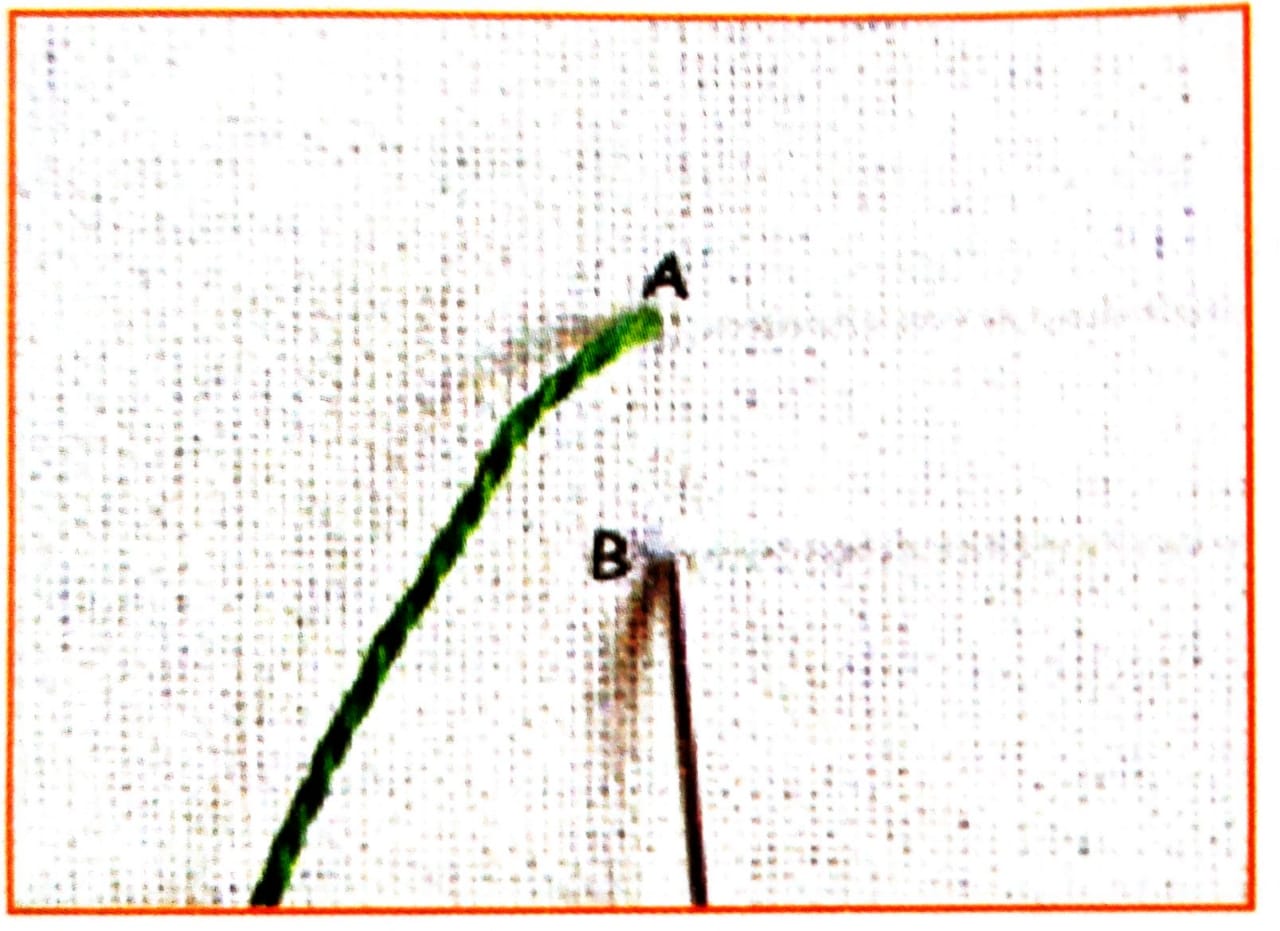
Step 1: Bring the thread through A and take it in through B. This creates one stitch.
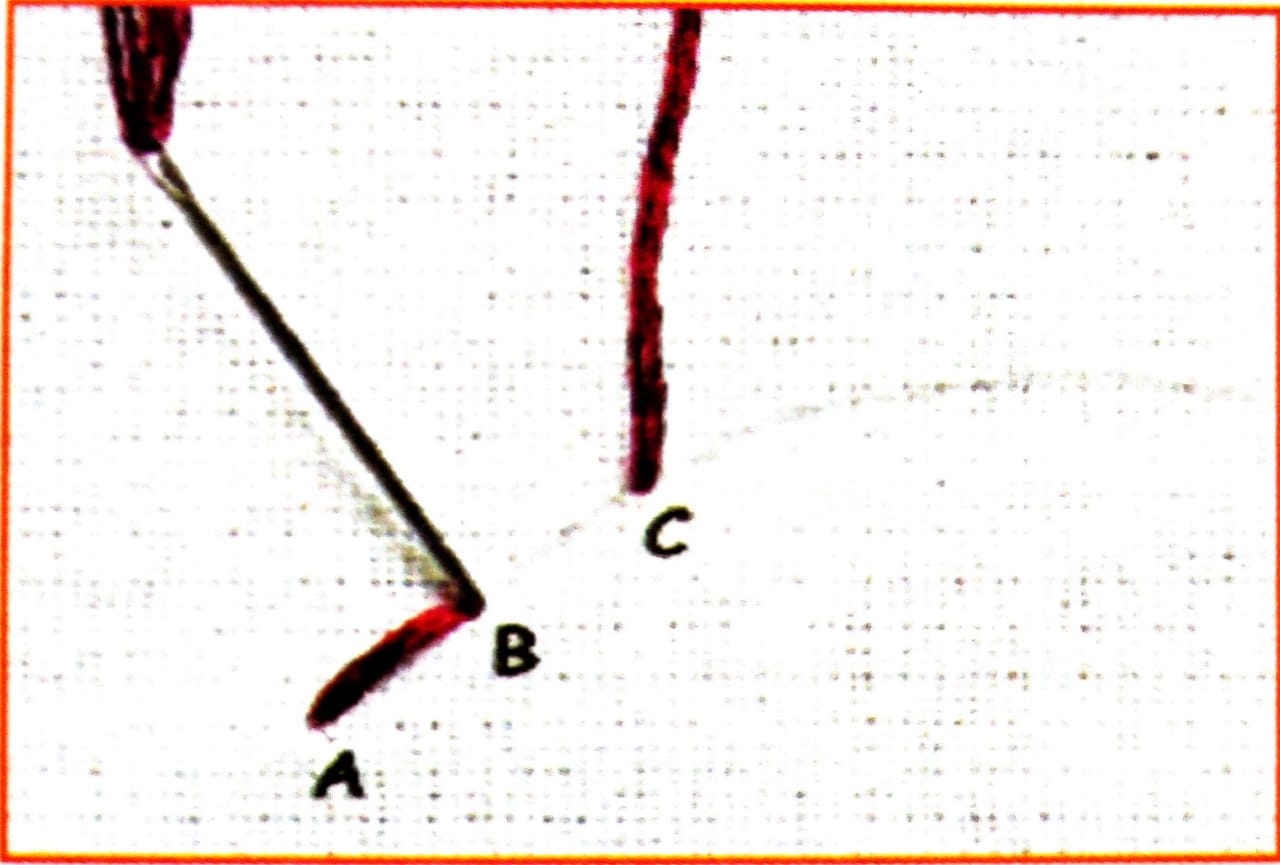
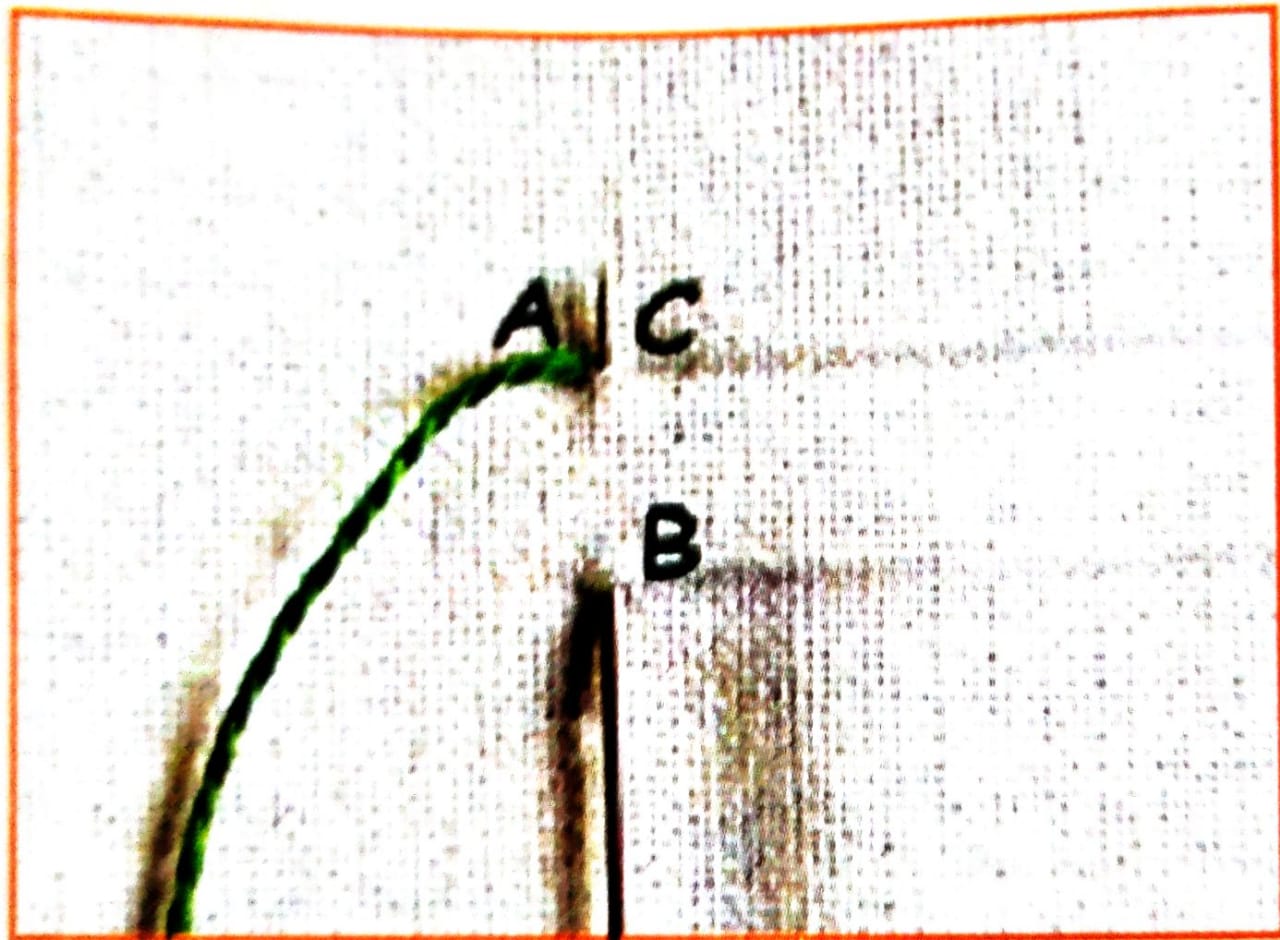
Step 2: Bring the thread through C and take it in through B. This way, we are creating a stitch by taking the thread backward.
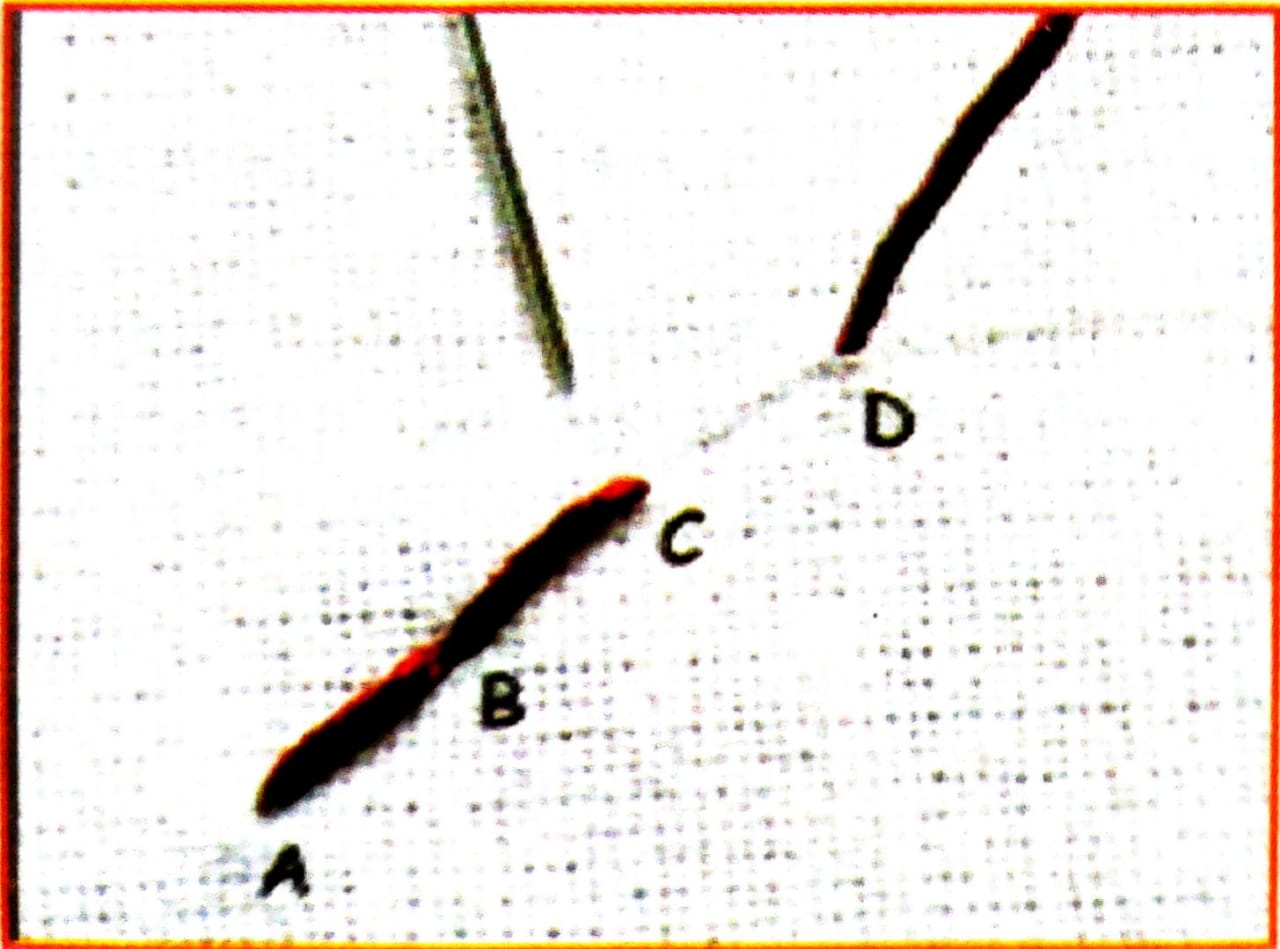
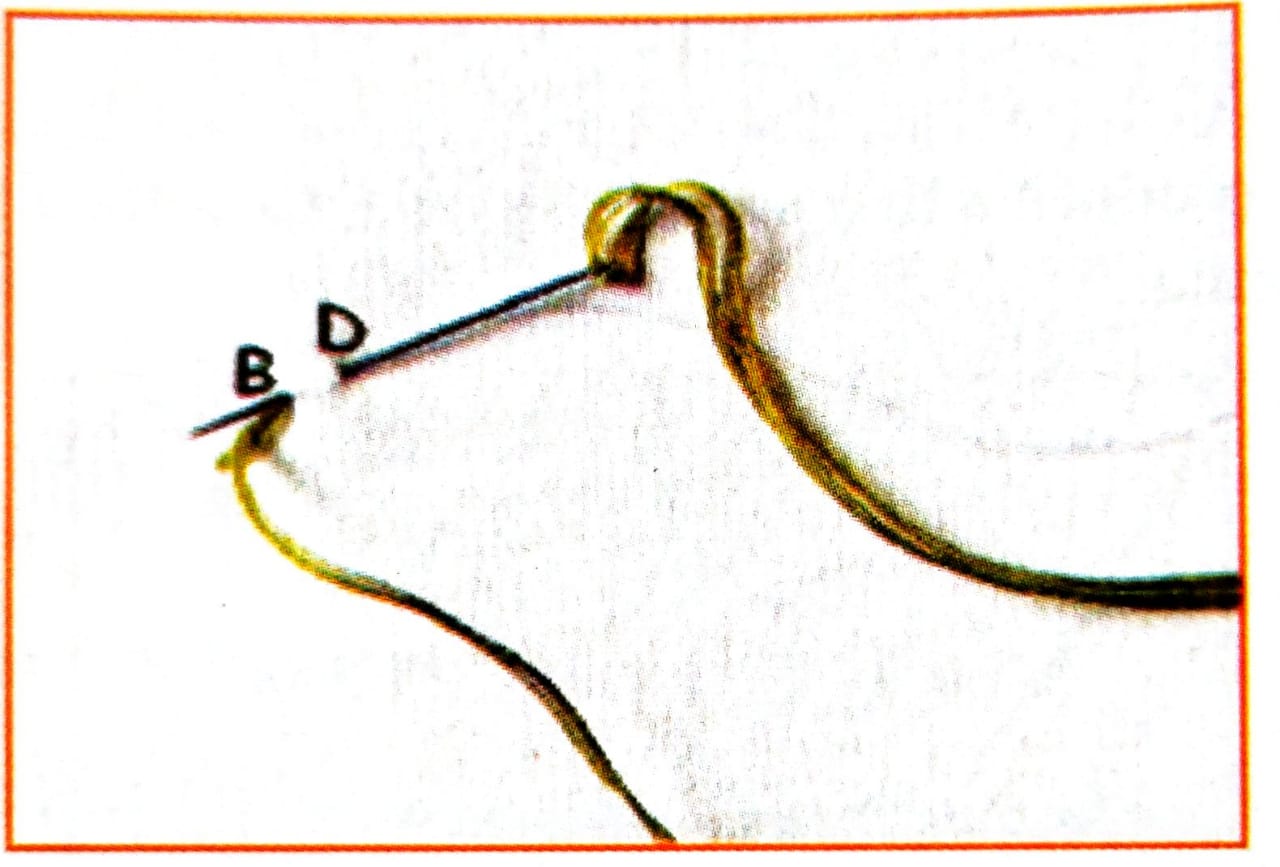
Step 3: Bring the thread through D and take it in through C. Continue this pattern to finish the design.
Steps of Carrying out Stem Stitch
Stem stitch, and its variations, are worked as a thin line and can be used to outline embroidered shapes, stitch lines and curves, and embroidered letters. This stitch creates a rope like appearance
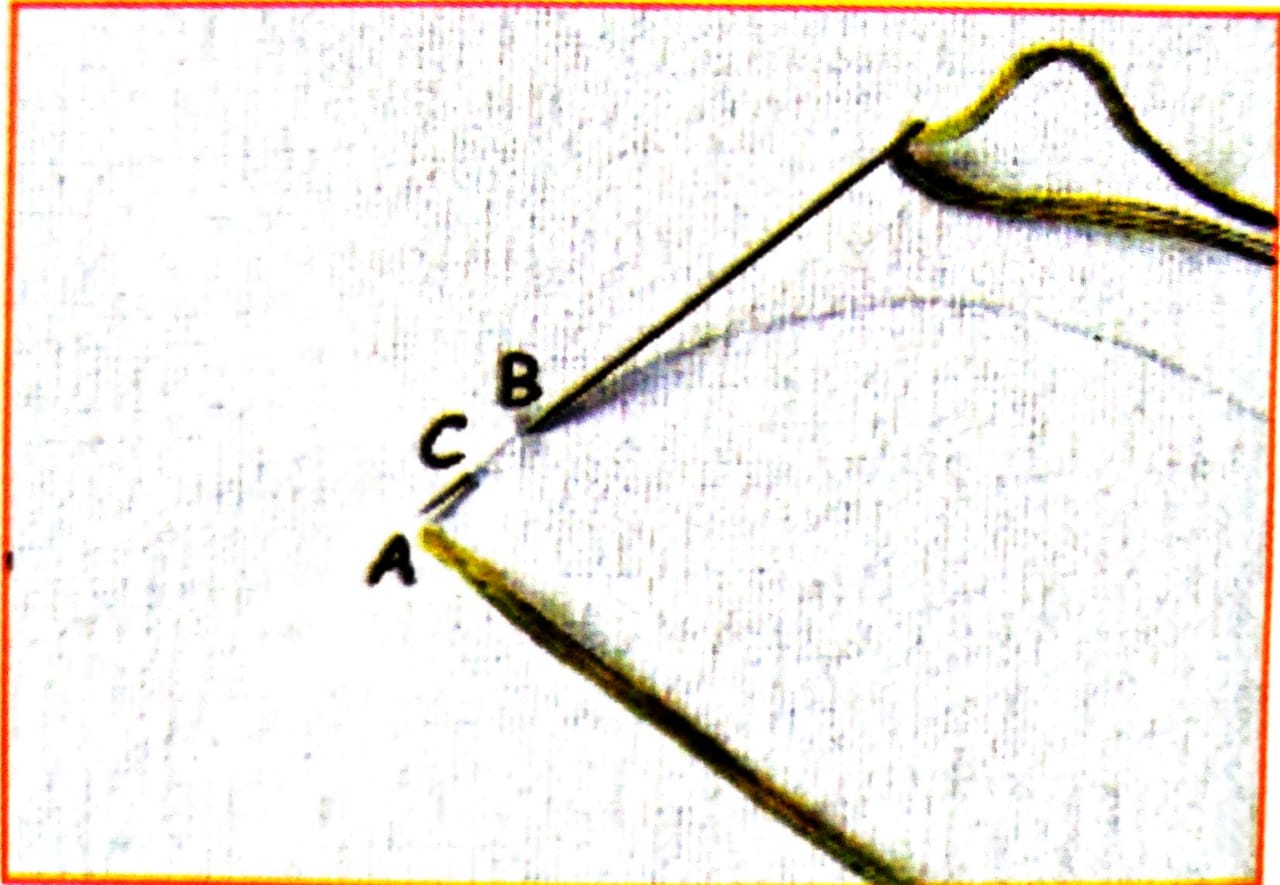
Step 1: Bring out the thread through A and take it in through B. Take the needle backwards and bring the thread out through C. Make sure the point C lies over the stitch A-B.
Step 2: Note that the point C lies about half way through A and B. Also note that C lies on top of the stitch A-B. So, all the subsequent stitch points will lie on top their previous stitch.
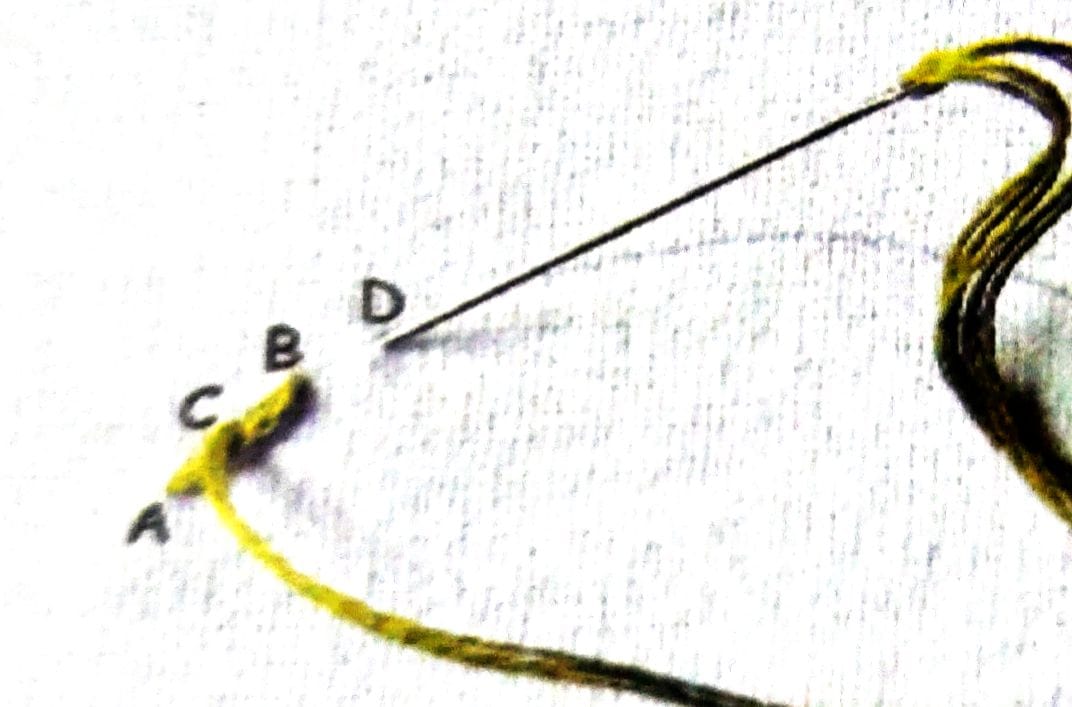
Step 3: Take the needle in through D. Try to mark D in such a way that the point B will lie half way through CD. Bring the needle out through B.
Step 4: The pattern of two stitches of the stem stitch will be as shown in figure.
Step 5: Continue this pattern of stitching with the needle coming out through the top of the previous stitch always.
Steps of Carrying out Satin Stitch
This stitch is primarily used for Solid filling for shapes and monogram. Often, a satin stitch is outlined using one of the straight stitches like, the split stitch, the outline stitch, back stitch, chain stitch, or any other similar stitches .This helps in containing the satin stitch within the parameters of the pattern/design easily.
Step 1: Bring the needle out through A and put it in through B. So, that makes a stitch which covers a small area
between the stitch.
Step 2: Bring the needle back through C, a point very close to A. Continue this action over the two stitch lines.
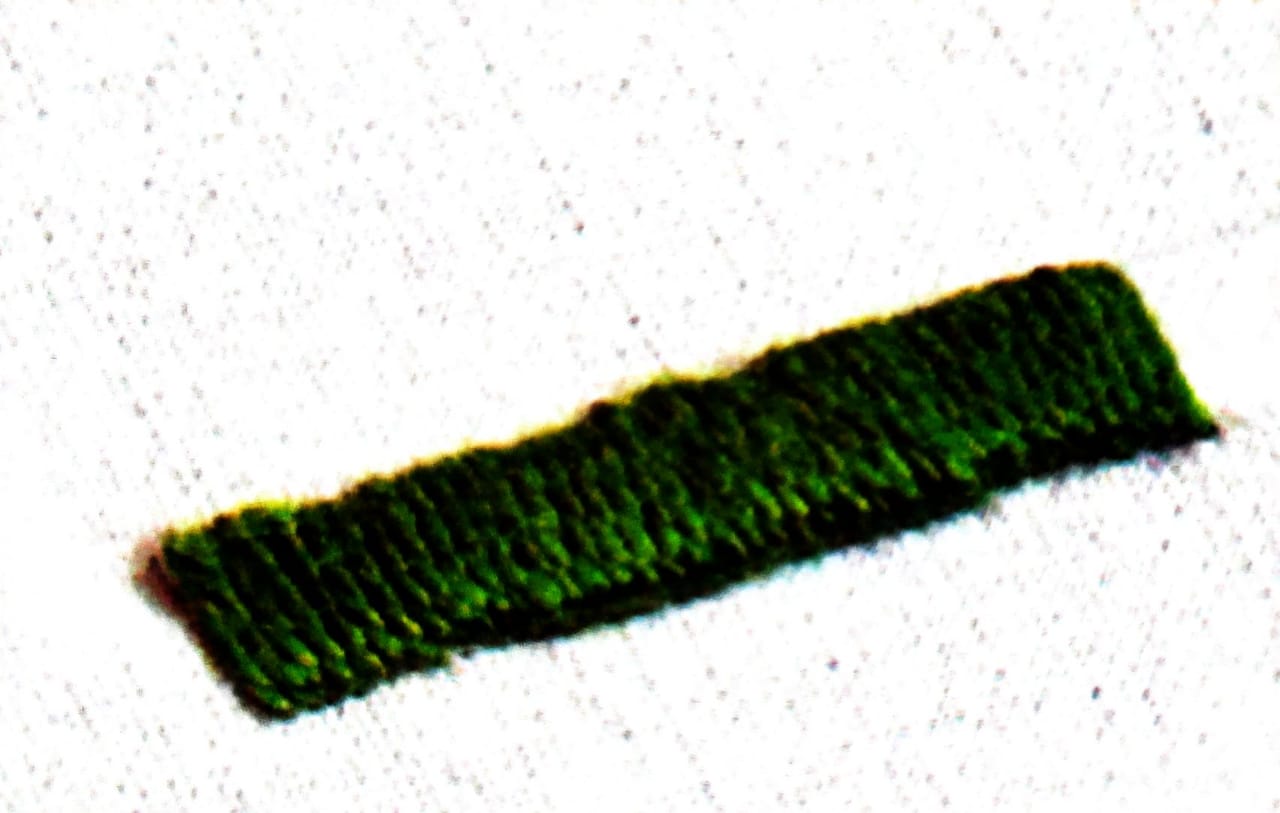
Step 3: Once finished, the area is filled as in figure: Almost same amount of thread will be spent on the reverse side as on the actual side of the fabric.
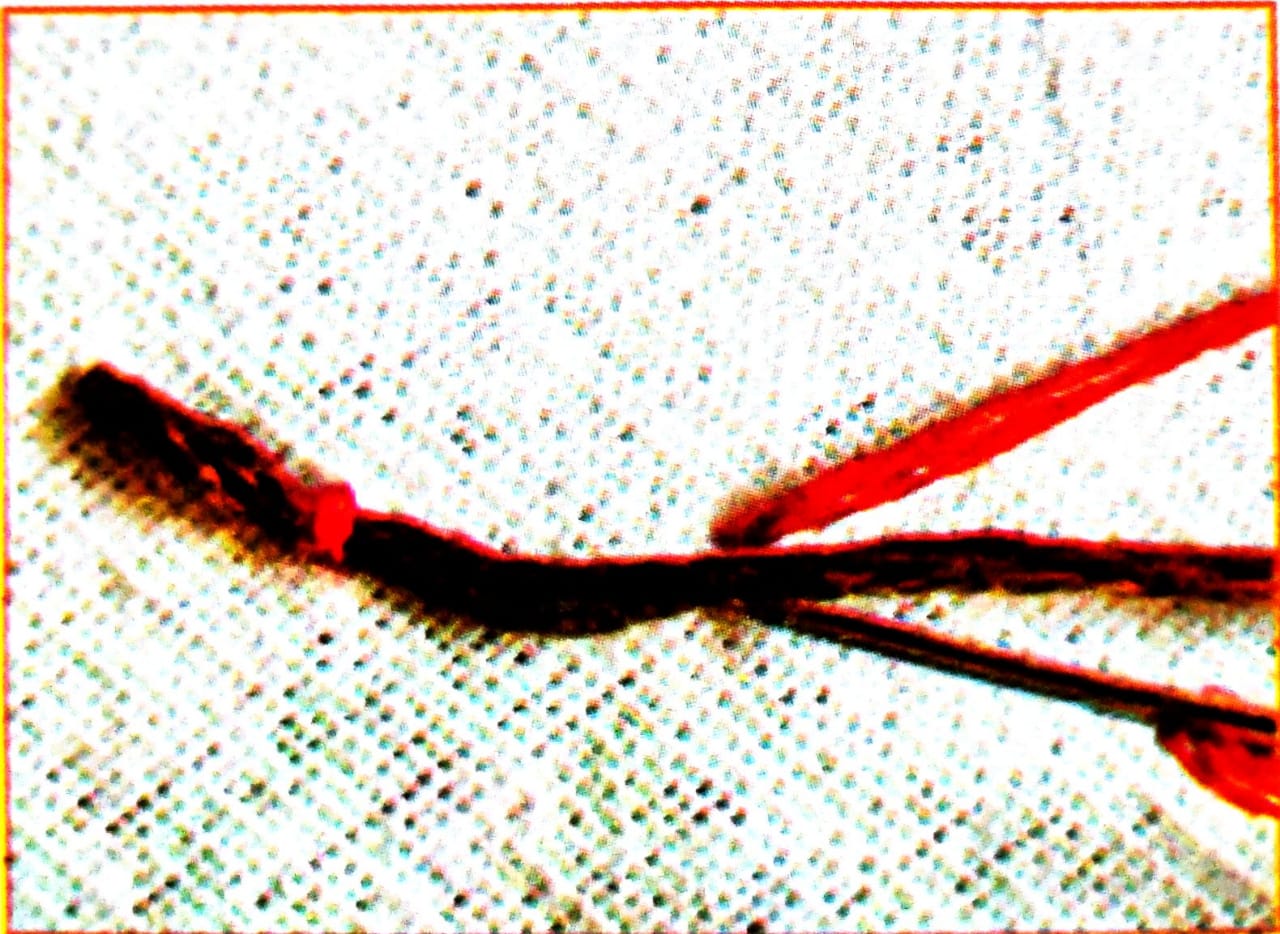
Steps of Carrying out Couching Stitch
This stitch is usually used to make outlines, or layers of this stitch can be made to fill in patterns. This stitch involves two threads: a thicker foundation thread, (also called the laid thread) and a thinner thread (called the couching thread).
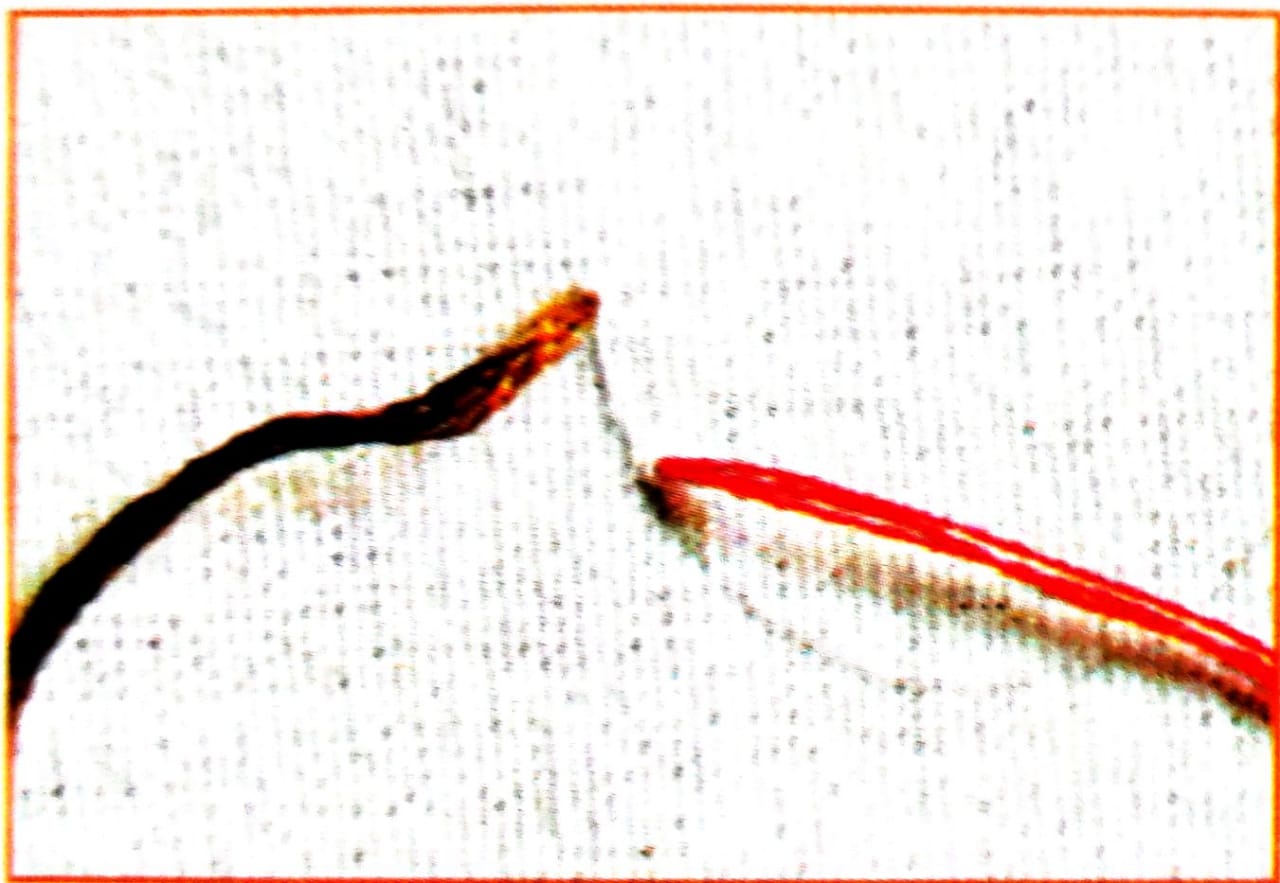
Step 1 Start by bringing out a thread (brown) in the figure) for laying from one end of the stitch line Keep it open. Now, bring another thread (red in the figure) out, a little outside the stitch line, and away from the other thread.
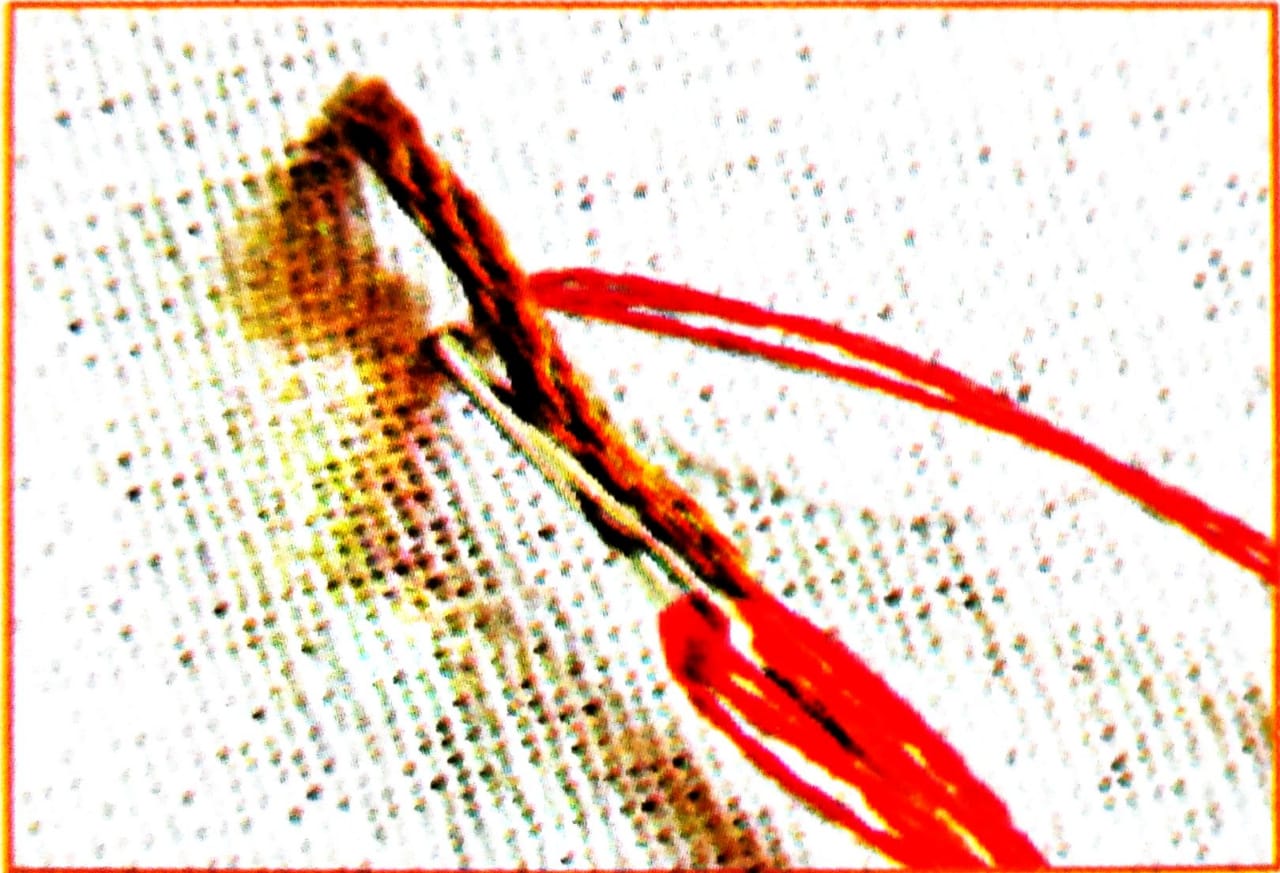
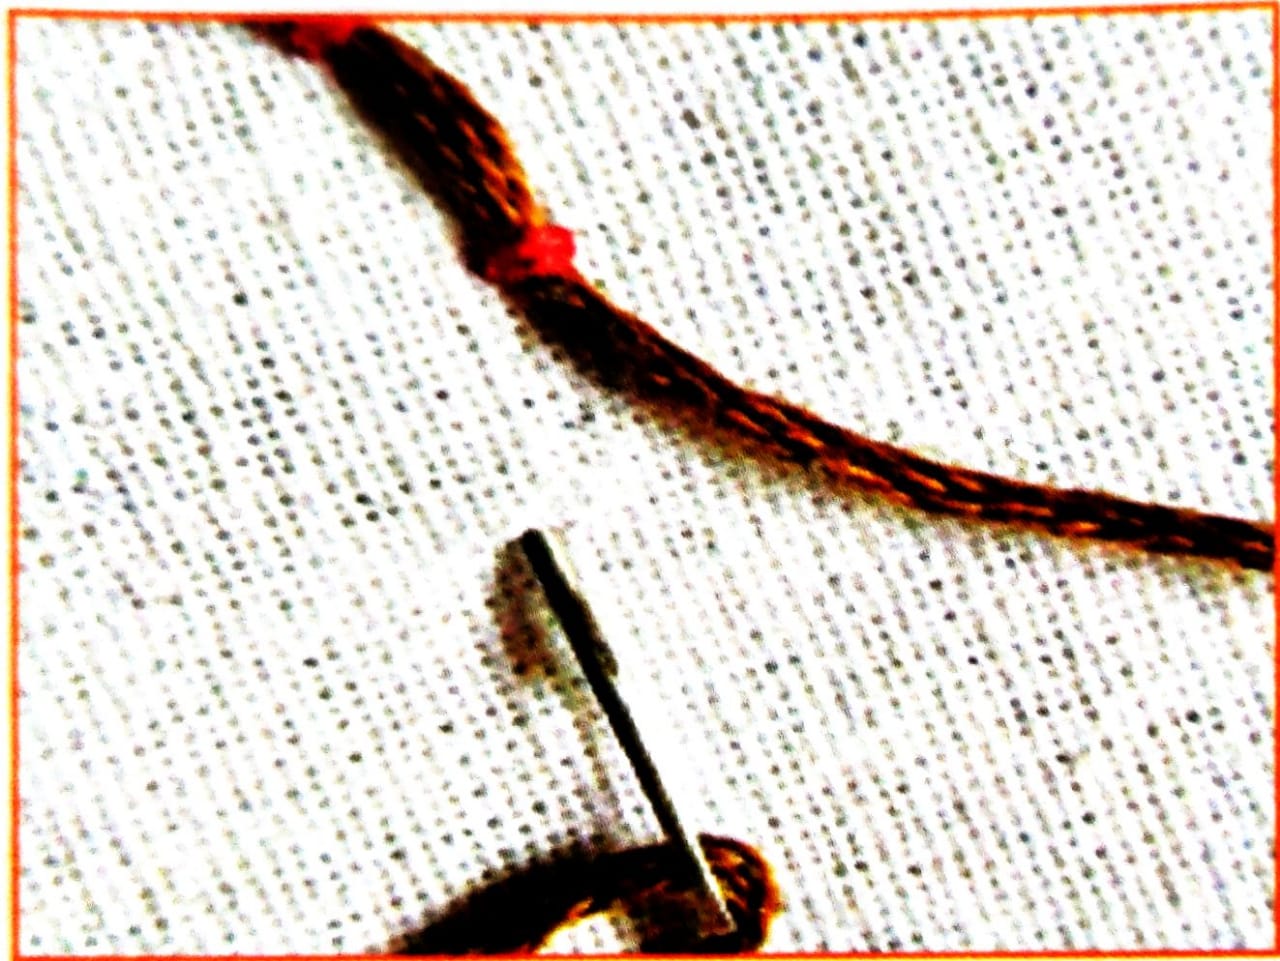
Step 2 Keep the laid thread over the stitch line Use the other thread to fasten the laid thread down using a small stitch.
Step 3: After fastening, the stitch will look like as in the figure.
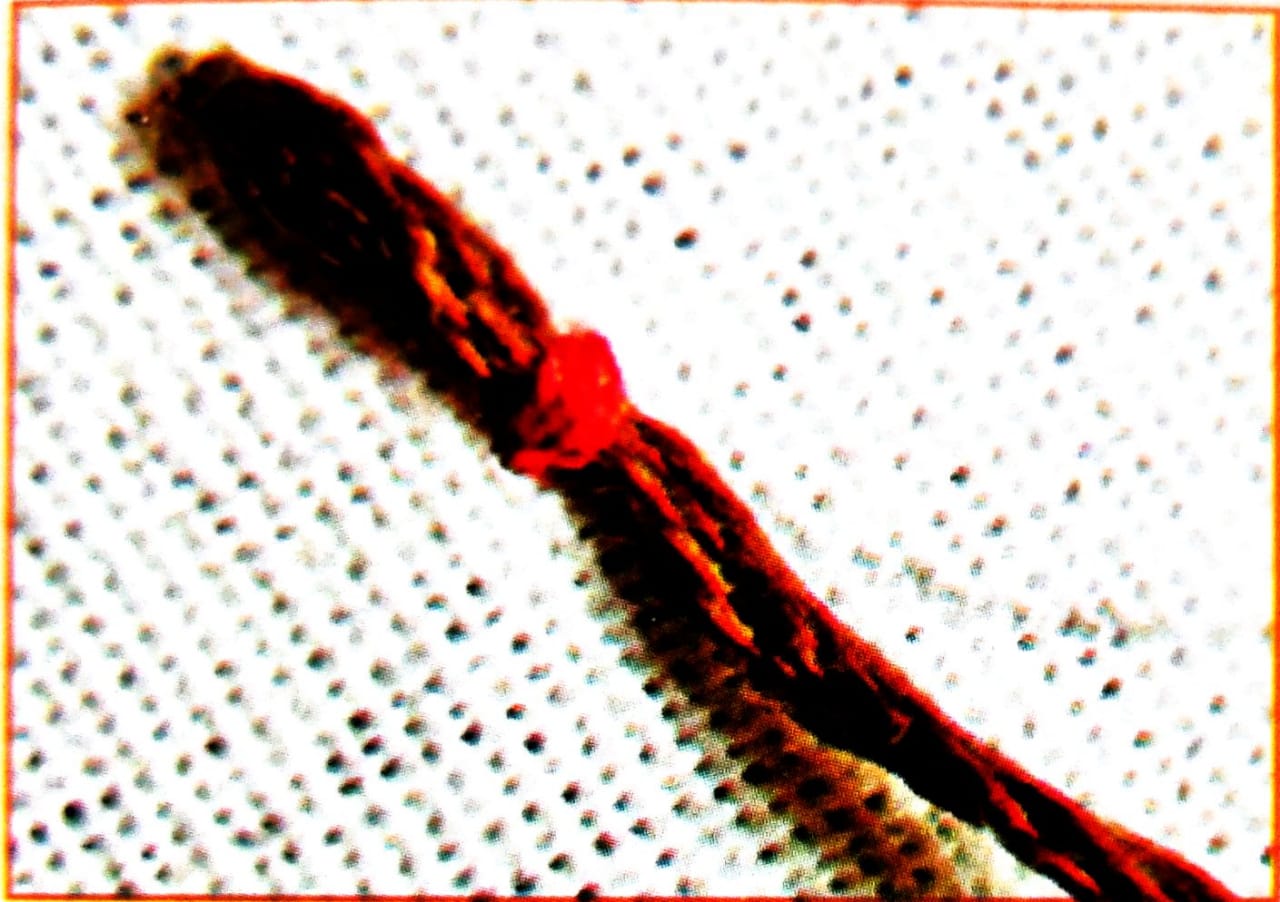
Step 4: Bring the fastening thread out as a short distance from the earlier stitch. Lay the open thread over the stitch line, and again fasten it down with a small stitch.
Step 5: Continue with this method for the entire stitch line. To finish up, pass the laid thread through the fabric and knot it. Make sure the fastening thread is brought out at regular intervals to make it look elegant
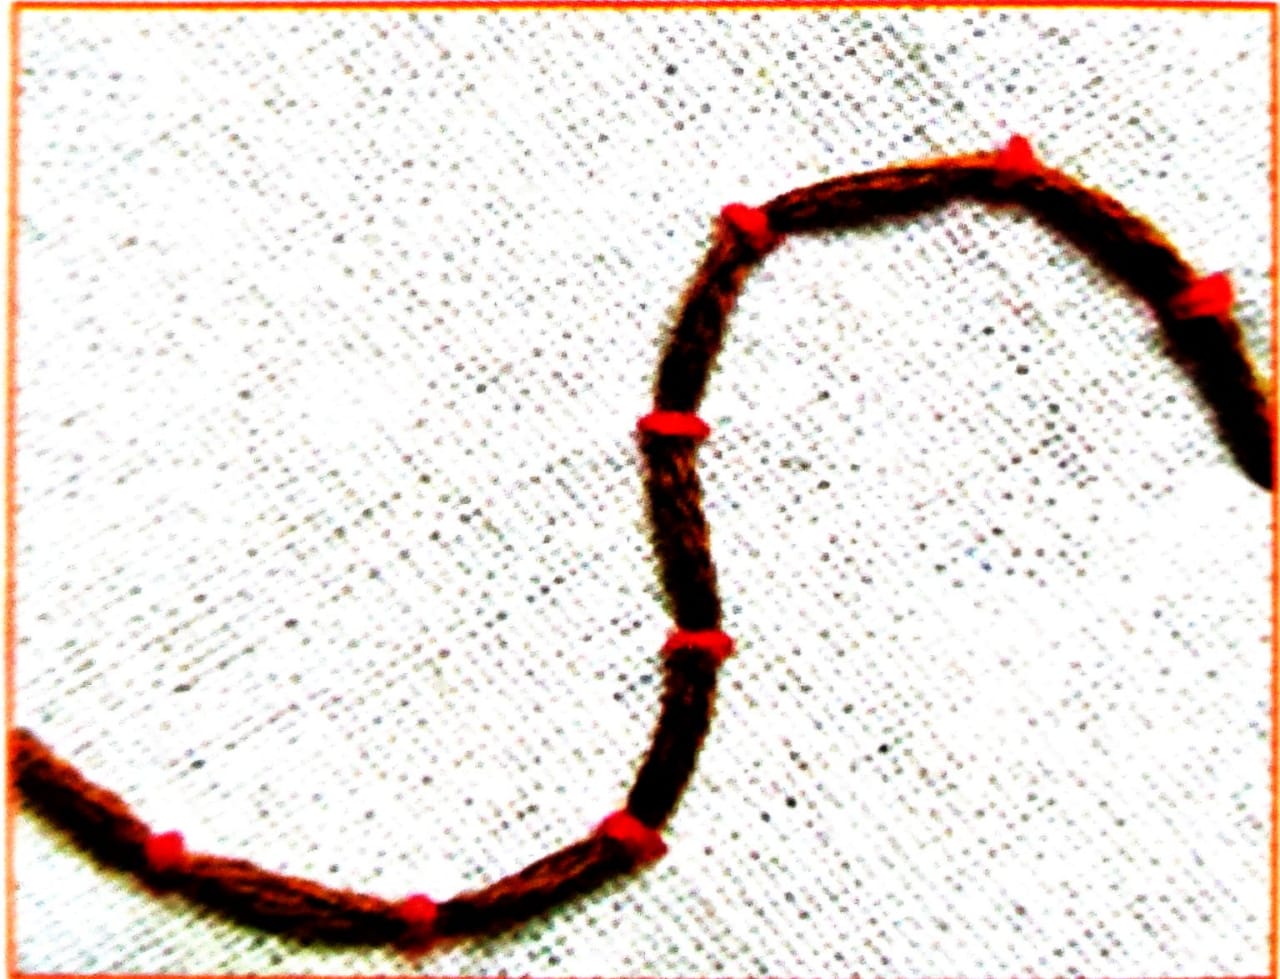
Step 6: A finished couched line will look like this.
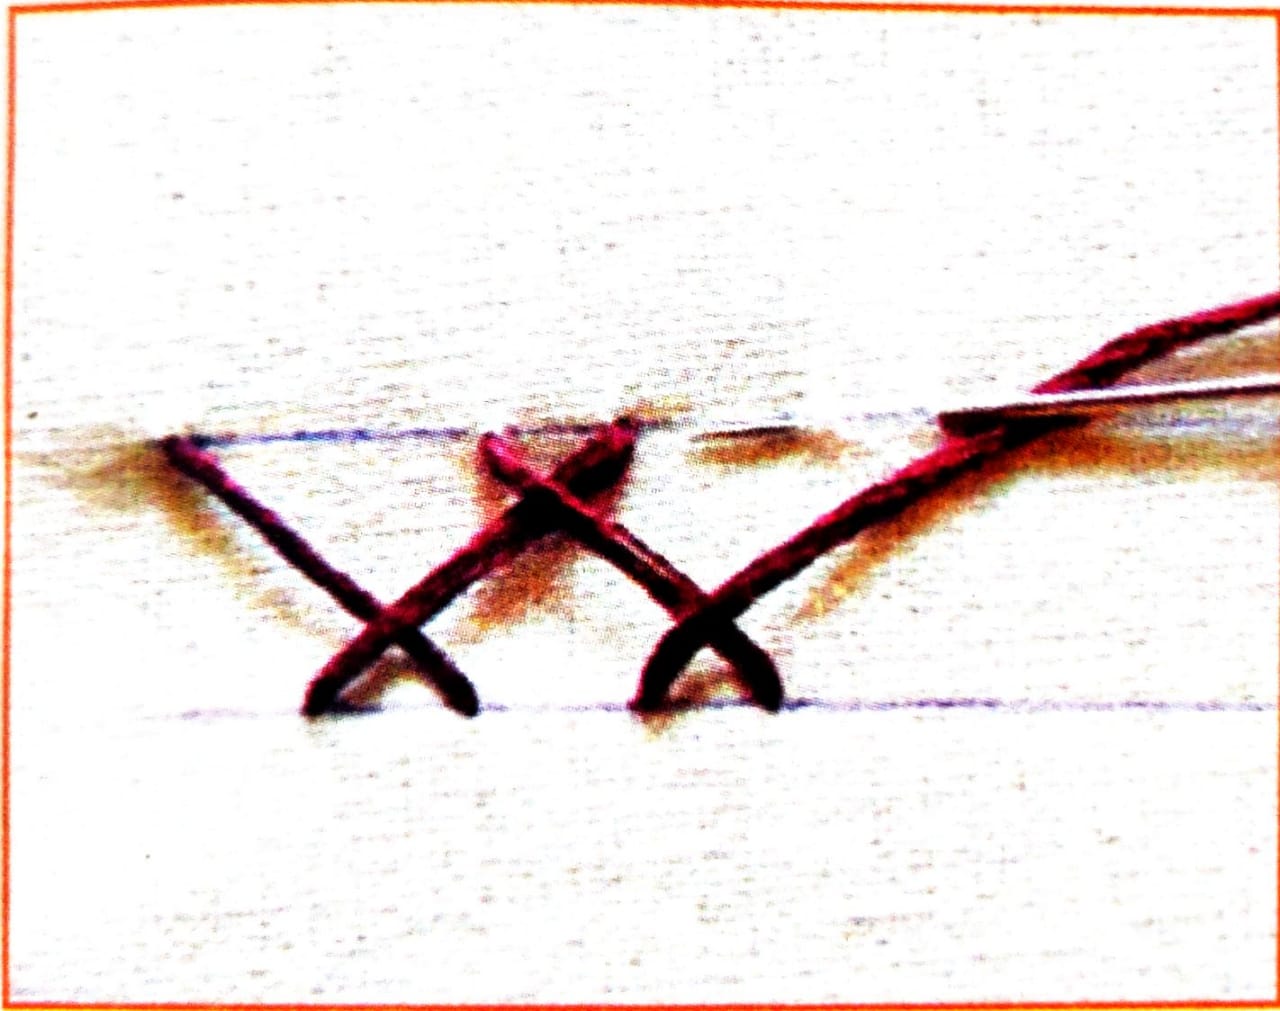
Steps of Carrying out Cross Stitch
This stitch is used for borders and filling if worked in adjacent rows.
Step 1 Bring the needle out through A and take it diagonally across to B. Bring it back again through C which lies vertically below A
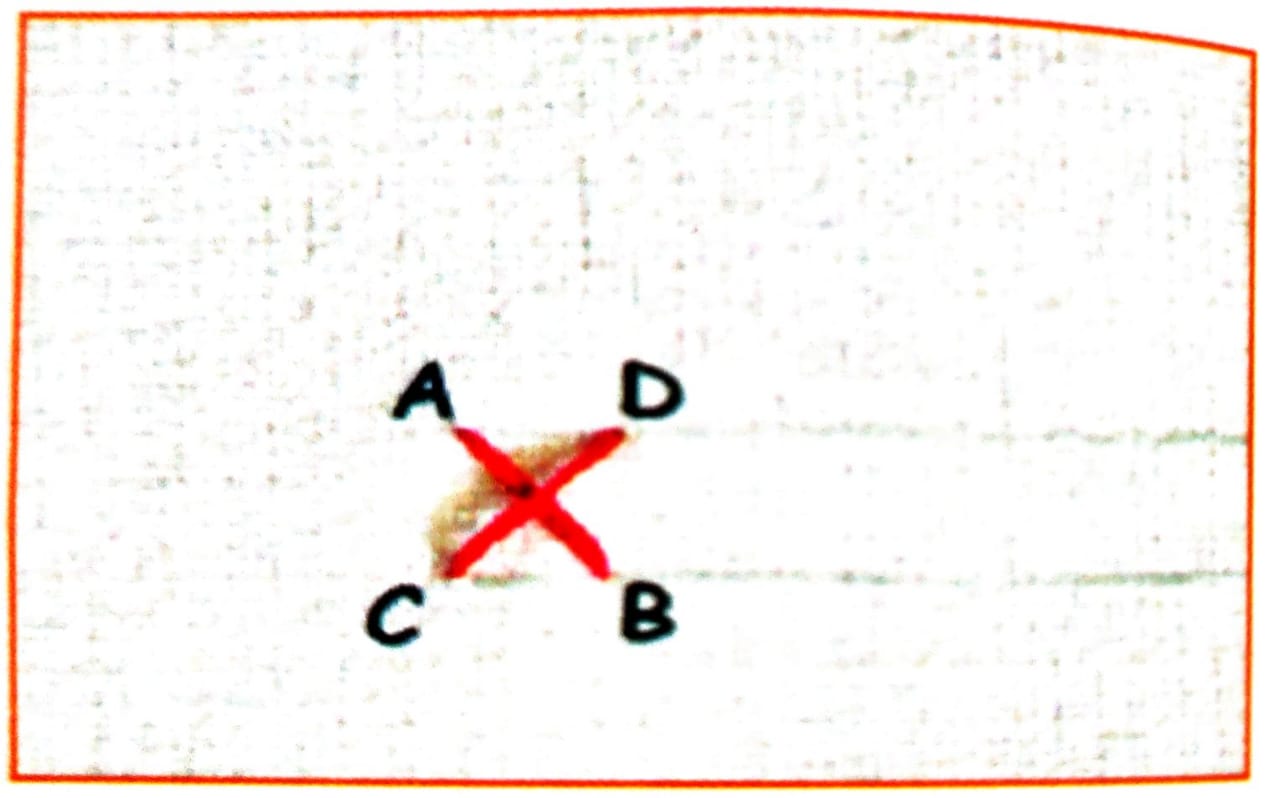
Step 2 Now put the needle in through D, which lies vertically above B. You have made a single cross.
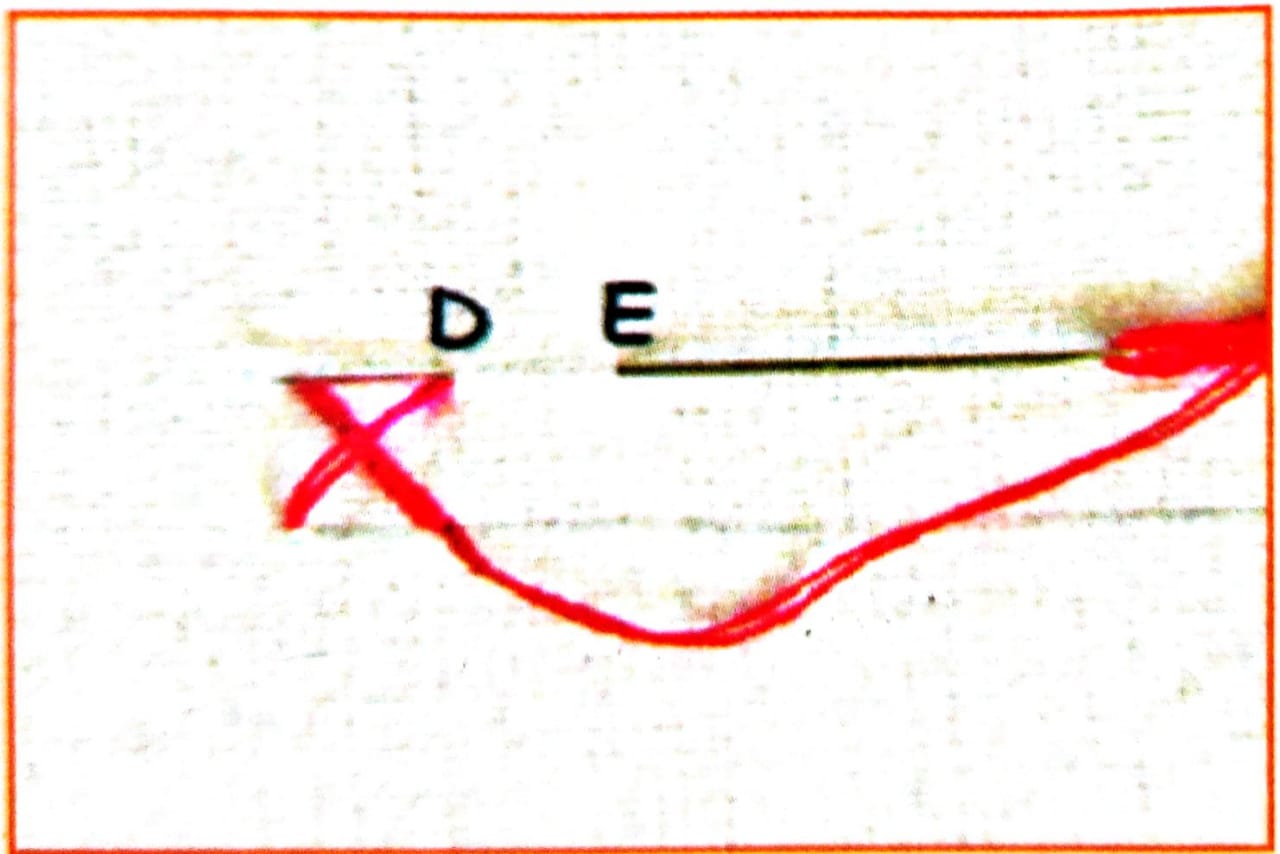
Step 3 Continue by putting the needle in through Eand bring it out through the previous point D.
Step 4: Put the needle in through F to complete the second cross. Now bring the needle out through the previous point E to begin for the third cross. Continue this process.


Step 5: A row of cross stitch would appear like this. The same technique is followed for a vertical row.
Steps of Carrying out Herringbone Stitch
This type of stitch is used to create border, edging, can be stitched over a ribbon or braid to hold it down. It is ked along parallel lines on an evenweave fabric.
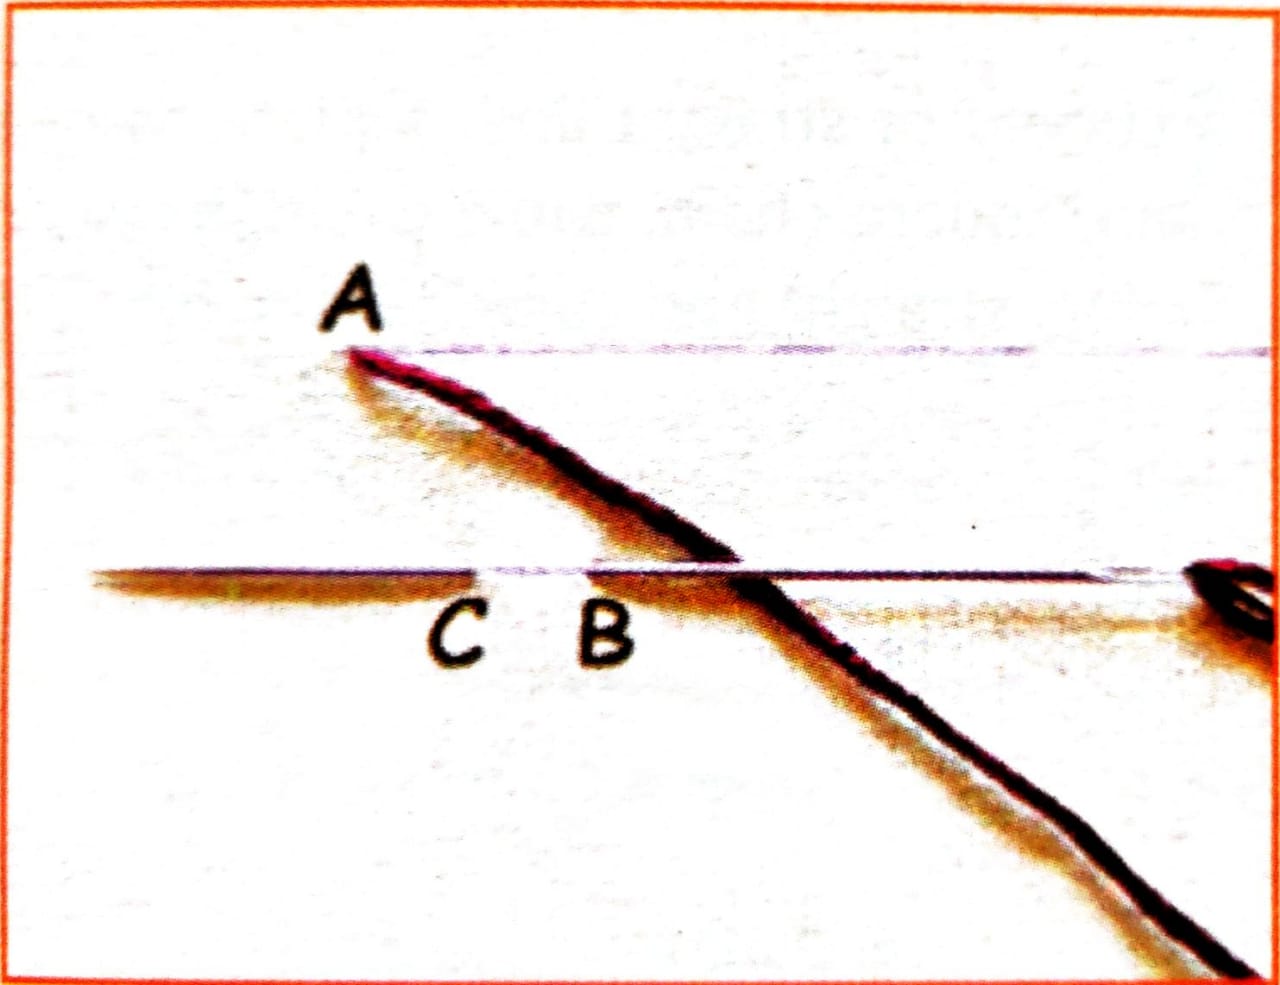
Step 1 Doing the needle out through the first stach line at A Now take the needle in through which lies diagonally across A on the second stitch line. Then take the needle backwards out through which lies near B.
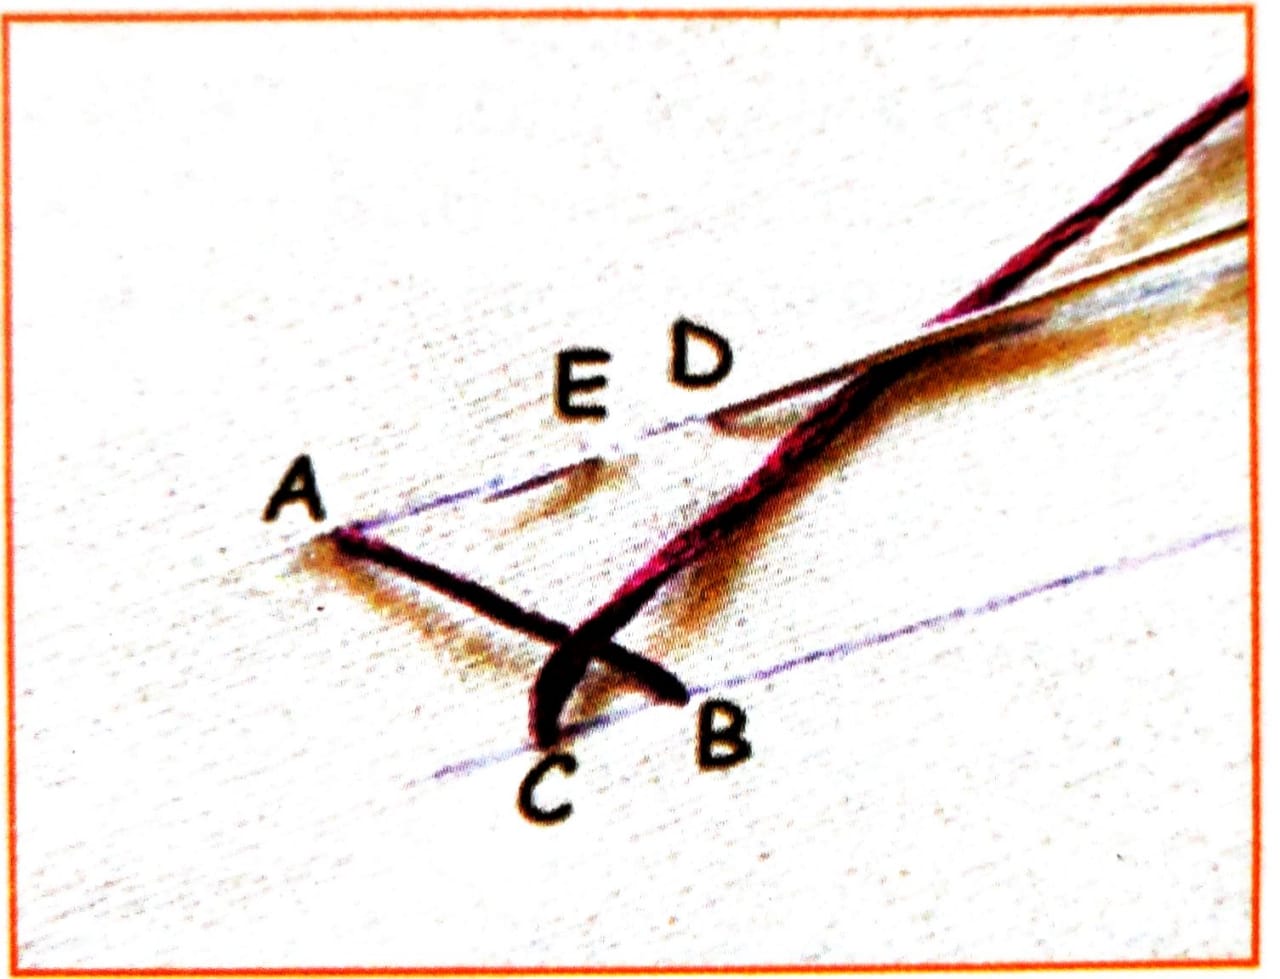
Step 2 How the same procedure will be worked on fost such how Take the needle diagonally aces to D and bring the needle backwards out through E.
Step 3: Continue to make such crosses on both stitch lines alternately. Make sure the diagonal stitches are parallel to each other to bring out the best look.
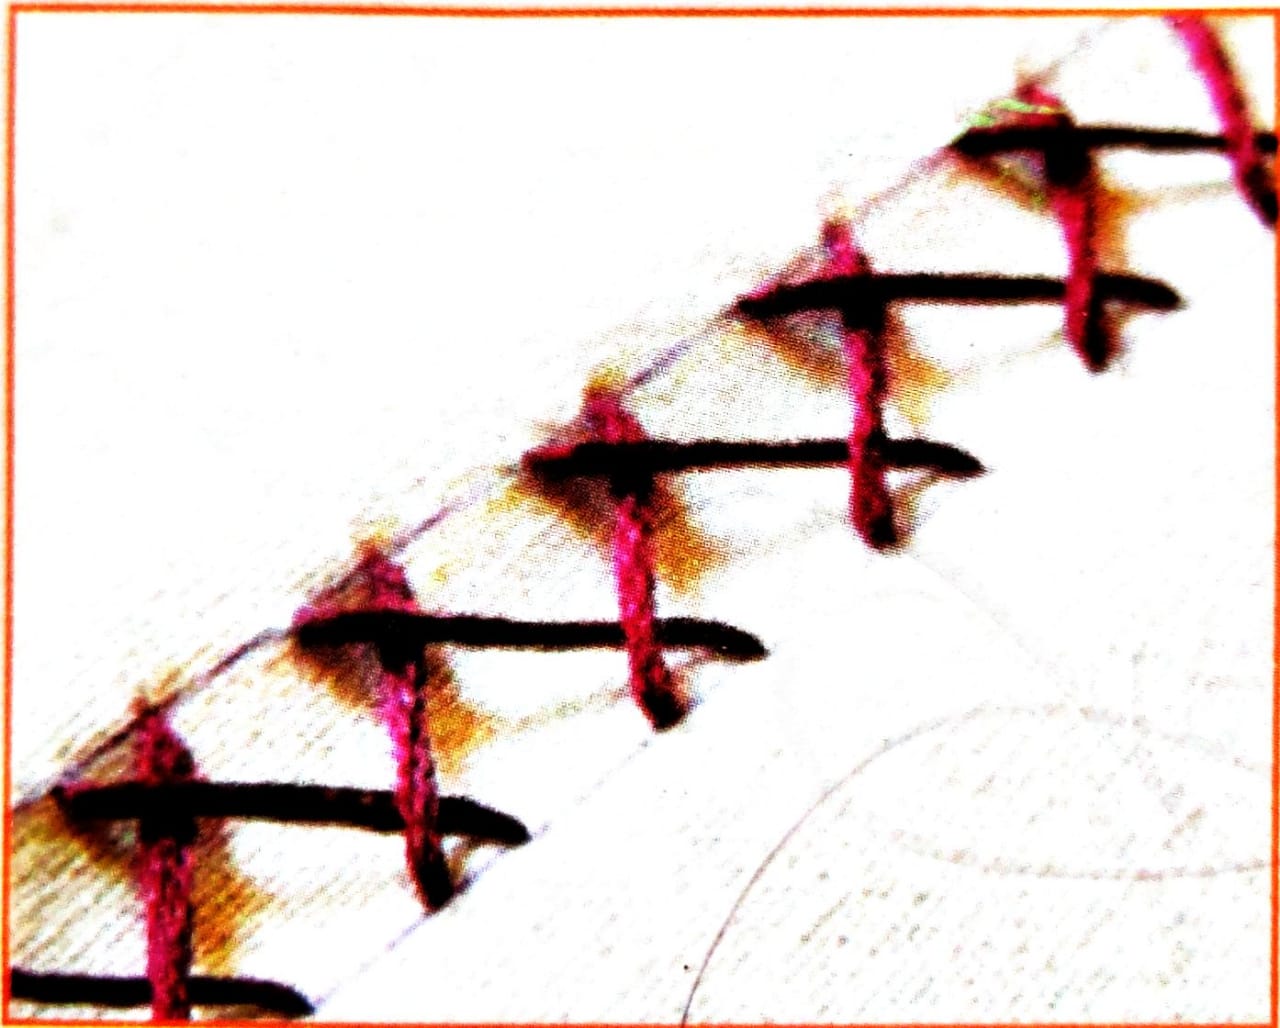
Step 4: A finished sequence of herringbone stitch would look like this.