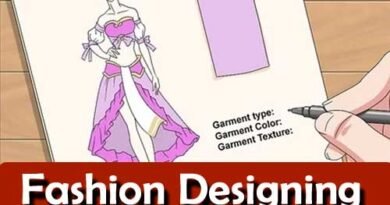
Draw a Dress on Model
Drawing a dress on a fashion model is a fundamental skill in fashion design illustration. It involves understanding garment construction, fabric behavior, and figure proportions to create an accurate and aesthetically pleasing representation. This class note explores the step-by-step process and essential techniques for drawing dresses on fashion models, emphasizing both artistic expression and technical accuracy.

1. Understanding Figure Proportions
Before starting to draw a dress, it’s crucial to understand the proportions of the fashion figure. Fashion figures are typically elongated and stylized, emphasizing the length of legs and the slender silhouette to showcase clothing effectively. Key proportions to consider include:
- Head-to-body ratio: Fashion figures often have elongated necks and torsos compared to the head size.
- Leg length: Legs are typically longer to create a more elegant and elongated appearance.
- Shoulder width and waist placement: Shoulders are narrow, and the waist is high to accentuate the garment’s fit and style.
Understanding these proportions helps in creating a realistic yet stylized base for your dress illustration.
2. Sketching the Fashion Figure
Begin by lightly sketching the basic outline of the fashion figure. You can use a croquis (pre-drawn figure template) or sketch freehand using simple shapes to map out the pose and proportions. Pay attention to:
- Pose and gesture: Decide on the pose that best complements the dress design. The pose should emphasize the garment’s silhouette and movement.
- Basic shapes: Use ovals or circles for the head and joints (shoulders, elbows, hips, knees), and straight lines for the spine and limbs.
This initial sketch serves as the framework upon which you will build the dress design.

3. Designing the Dress
When designing the dress, consider the following elements:
- Silhouette: Decide on the overall shape of the dress—whether it’s fitted, A-line, sheath, etc. The silhouette defines the outline and style of the garment.
- Neckline and sleeves: Choose the neckline (e.g., scoop, V-neck, sweetheart) and sleeve style (e.g., sleeveless, cap sleeves, long sleeves) based on the dress’s design concept and aesthetic.
- Details and embellishments: Plan any details such as ruffles, pleats, lace, or embellishments like buttons or sequins that will enhance the dress’s design.
Sketch rough outlines and details lightly to finalize the dress design before proceeding with the final illustration.
4. Drawing the Dress on the Fashion Figure
Once you have the dress design finalized, follow these steps to draw it on the fashion figure:
- Outline the dress: Start with light, confident strokes to outline the dress on the figure. Pay attention to how the garment drapes and conforms to the body’s contours.
- Define folds and creases: Use curved lines to indicate folds and creases in the fabric where it bends or gathers. This adds realism and movement to the dress.
- Detailing: Add details such as seams, buttons, zippers, and any embellishments. These details contribute to the garment’s realism and showcase its construction.

Ensure the dress design complements the figure’s proportions and pose, enhancing the overall visual impact of the illustration.
5. Rendering Fabric and Textures
To bring the dress illustration to life, consider how different fabrics and textures behave:
- Shading and highlighting: Use shading techniques to create depth and volume, especially where light hits and casts shadows on the fabric.
- Texture representation: Different fabrics (e.g., silk, chiffon, denim) have distinct textures. Use lines and shading to depict the texture realistically, conveying the tactile qualities of the fabric.
Experiment with different shading techniques such as hatching, cross-hatching, and stippling to achieve the desired effects.
6. Adding Color (Optional)
Color can enhance the visual appeal and realism of your dress illustration:
- Color palette: Choose colors that complement the dress design and convey the mood or theme. Consider factors like seasonality and fashion trends.
- Color application: Use markers, colored pencils, watercolors, or digital tools to apply color. Start with light layers and gradually build up to darker shades and details.
Color adds vibrancy and context to your dress illustration, making it more engaging and expressive.

7. Final Touches and Presentation
- Refine details: Review your illustration for any areas that need refinement or adjustment. Ensure all elements (proportions, details, textures) are cohesive and well-executed.
- Background and context: Consider adding a simple background or contextual elements (e.g., accessories, shoes) to complement the dress and enhance the overall composition.
- Presentation: Present your dress illustration professionally, whether digitally or on paper. Consider framing or mounting it for a polished presentation.
Conclusion
Drawing a dress on a fashion model requires a blend of artistic skill, technical knowledge, and creative vision. By mastering figure proportions, sketching techniques, dress design principles, fabric rendering, and presentation, you can create compelling dress illustrations that effectively communicate your design concepts and showcase your talent as a fashion illustrator.
Through practice and experimentation with different styles and techniques, you can develop a distinctive drawing style and expand your repertoire in fashion illustration. Remember, each dress illustration is an opportunity to showcase creativity, innovation, and storytelling in the dynamic world of fashion design.
