Kurti Stitching with Different Neck
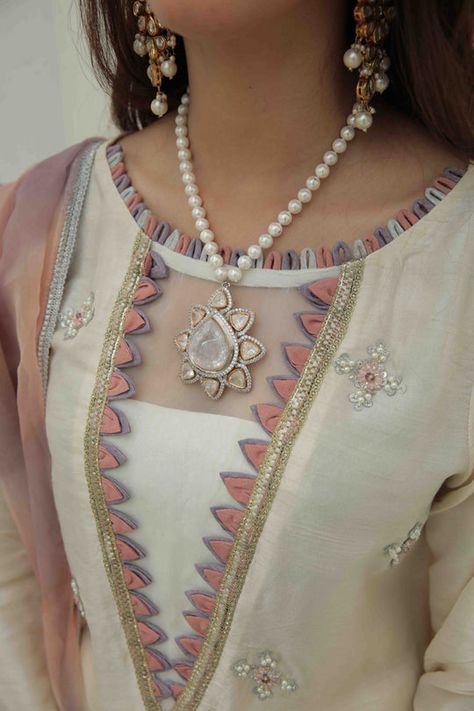
A kurti is a versatile garment worn by women in South Asia, characterized by its tunic-like appearance. One of the key design elements that can greatly enhance the aesthetic appeal of a kurti is its neckline. Different neck designs offer varied styles, from traditional to modern, and cater to different preferences and occasions. In this class note, we will explore various types of neck designs for kurtis and the step-by-step process of stitching a kurti with each design.
Tools and Materials Needed
Before starting, gather the following tools and materials:
- Fabric: Choose a suitable fabric for your kurti project, such as cotton, silk, or georgette, depending on the desired look and comfort.
- Matching Thread: High-quality thread that complements the fabric.
- Scissors: Sharp scissors for cutting fabric and thread.
- Measuring Tape and Ruler: Essential for taking measurements and ensuring accuracy.
- Needles and Pins: Sewing needles for hand stitching and pins for holding fabric in place.
- Embroidery Materials (optional): If adding embellishments or embroidery to the neckline.
Step-by-Step Guide: Stitching a Kurti with Different Neck Designs
1. Basic Round Neck Kurti
Measurement and Cutting:
- Measurement: Measure the circumference of your neck and add seam allowance (usually 1 inch).
- Cutting: Decide the depth of the neckline (e.g., 3 inches) and mark it on the fabric. Cut out the front and back pieces of the kurti accordingly.
Stitching:
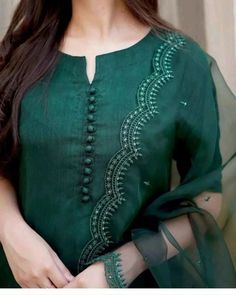
- Joining Shoulder Seams: Place the front and back pieces with right sides together. Stitch the shoulder seams.
- Finishing Neckline: Fold the raw edge of the neckline inwards (about 1/4 inch) and press. Fold again to enclose the raw edge completely and stitch in place. You can add bias tape or a facing for a neat finish.
- Adding a Keyhole: Optionally, create a keyhole at the back neckline for ease of wearing. Finish the edges with a narrow hem or bias tape.
2. V-Neck Kurti
Measurement and Cutting:
- Measurement: Determine the depth and width of the V-neck.
- Cutting: Mark and cut out the front piece of the kurti with the V-shaped neckline. Ensure the V is symmetrical and flattering.
Stitching:
- Joining Shoulder Seams: As with the round neck kurti, join the shoulder seams.
- Finishing Neckline: Finish the raw edges of the V-neckline by folding and stitching similar to the round neck kurti. Ensure the V-shape is clean and smooth.
- Adding Facing or Binding: For a professional finish, add a facing or binding to the neckline. This technique reinforces the neckline and adds structure.
3. Mandarin Collar Kurti
Measurement and Cutting:
- Measurement: Measure the circumference of the neck and decide the height of the mandarin collar.
- Cutting: Cut out the front piece of the kurti with a straight neckline. Cut a separate piece for the mandarin collar (height plus seam allowance).
Stitching:
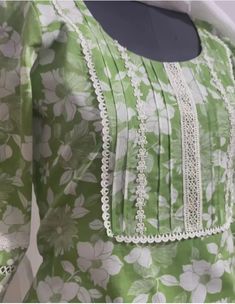
- Attaching the Collar: Fold the collar piece in half lengthwise with right sides together and stitch along the outer edge, leaving the inner edge open. Turn the collar right side out and press.
- Joining Shoulder Seams: Stitch the shoulder seams of the kurti front and back.
- Attaching the Collar: Pin the collar to the neckline, aligning the raw edges. Stitch in place, ensuring the collar stands up neatly.
- Finishing: Finish the raw edges of the collar and neckline as desired. Topstitch around the collar for a polished look.
4. Boat Neck Kurti
Measurement and Cutting:
- Measurement: Measure the circumference of the shoulders and determine the width of the boat neck.
- Cutting: Cut out the front and back pieces of the kurti with a wide, boat-shaped neckline. Ensure the neckline is flattering and not too deep.
Stitching:
- Joining Shoulder Seams: Stitch the shoulder seams together.
- Finishing Neckline: Finish the raw edges of the boat neckline with bias tape or a facing. Ensure the neckline maintains its shape.
- Adding Embellishments (optional): Embroider or add decorative elements around the neckline for a stylish touch.
5. Collared Kurti
Measurement and Cutting:
- Measurement: Measure the circumference of the neck and decide on the collar height and width.
- Cutting: Cut out the front and back pieces of the kurti with a neckline suitable for adding a collar.
Stitching:
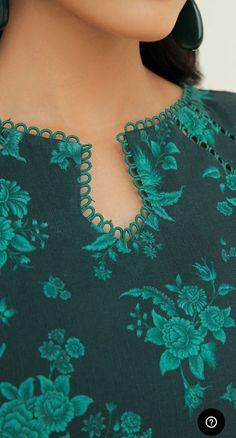
- Creating the Collar: Cut out a collar piece (height plus seam allowance) and a collar band piece (width plus seam allowance).
- Joining Shoulder Seams: Stitch the shoulder seams of the kurti.
- Attaching the Collar: Stitch the collar band to the neckline of the kurti, sandwiching the collar piece in between. Ensure the collar lays flat and the edges are neat.
- Finishing: Finish the raw edges of the collar and neckline. Optionally, topstitch around the collar for reinforcement and a decorative finish.
Conclusion
Stitching a kurti with different neck designs allows you to explore various styles and customize garments according to your preferences and occasions. By mastering these techniques and designs, you can create kurtis that are not only stylish but also perfectly tailored to fit and flatter. Practice these steps with different fabrics and embellishments to enhance your sewing skills and create unique pieces that showcase your creativity and craftsmanship.
By following this class note, you will gain the confidence and skills needed to experiment with different neck designs and elevate your kurti stitching projects to new heights of elegance and sophistication.
This class note provides a comprehensive guide to stitching a kurti with different neck designs, covering essential techniques and steps for each style. Adjustments can be made based on individual preferences and creative ideas, allowing for versatility in garment construction.
