Loop Stitches
Loop stitch gets its name from the long loops it leaves behind
Commonly used types of Loop Stitches and their techniques are given below :
Chain stitch
Button-hole stitch
. Blanket Stitch
Fishbone stitch
Feather stitch
Fly stitch
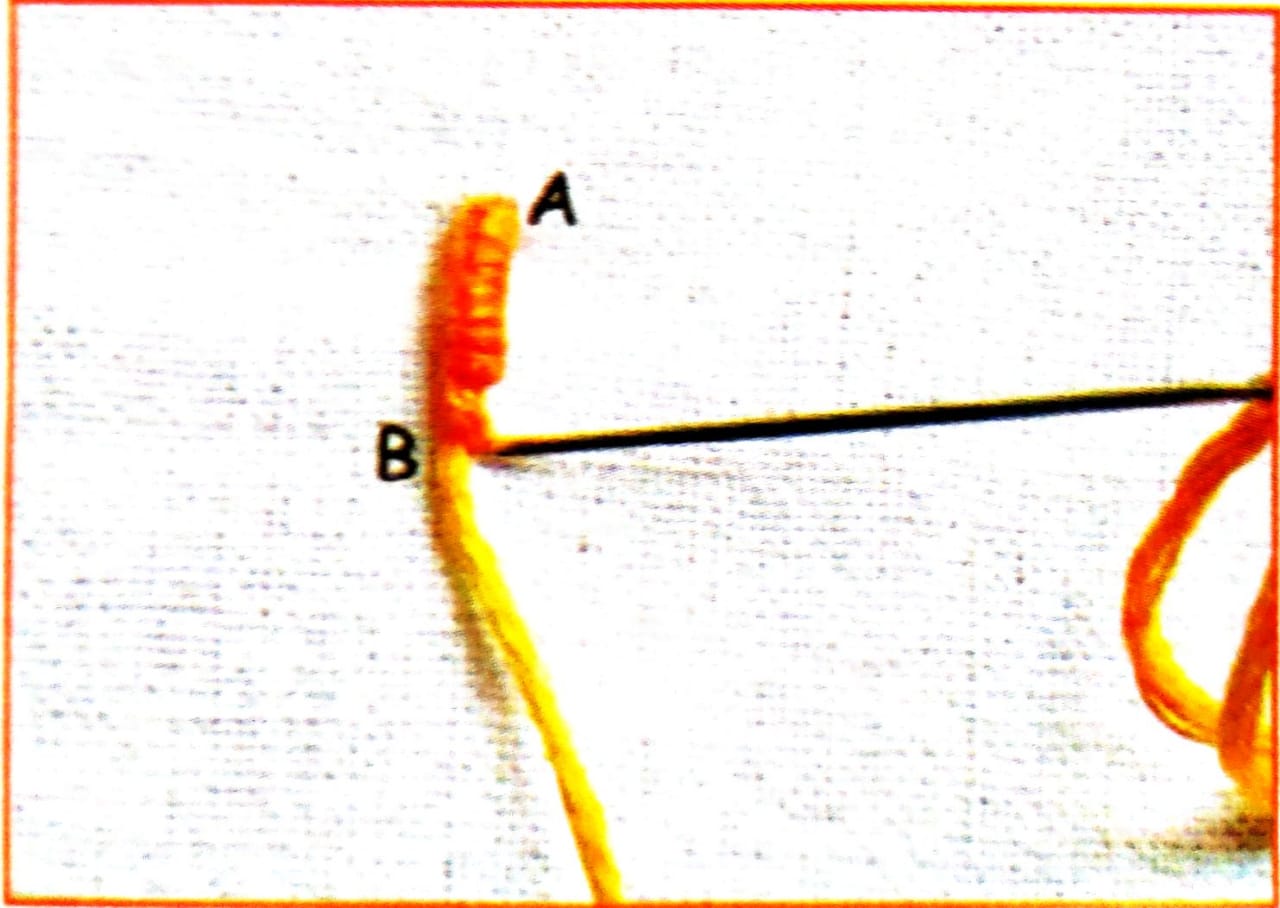
Steps of Carrying out Chain Stitch
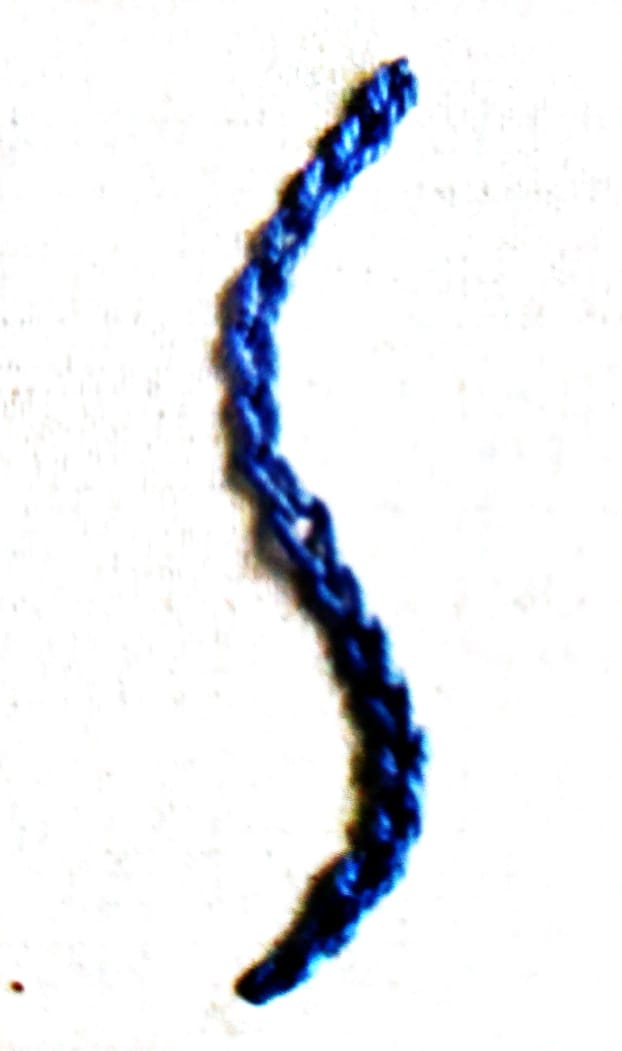
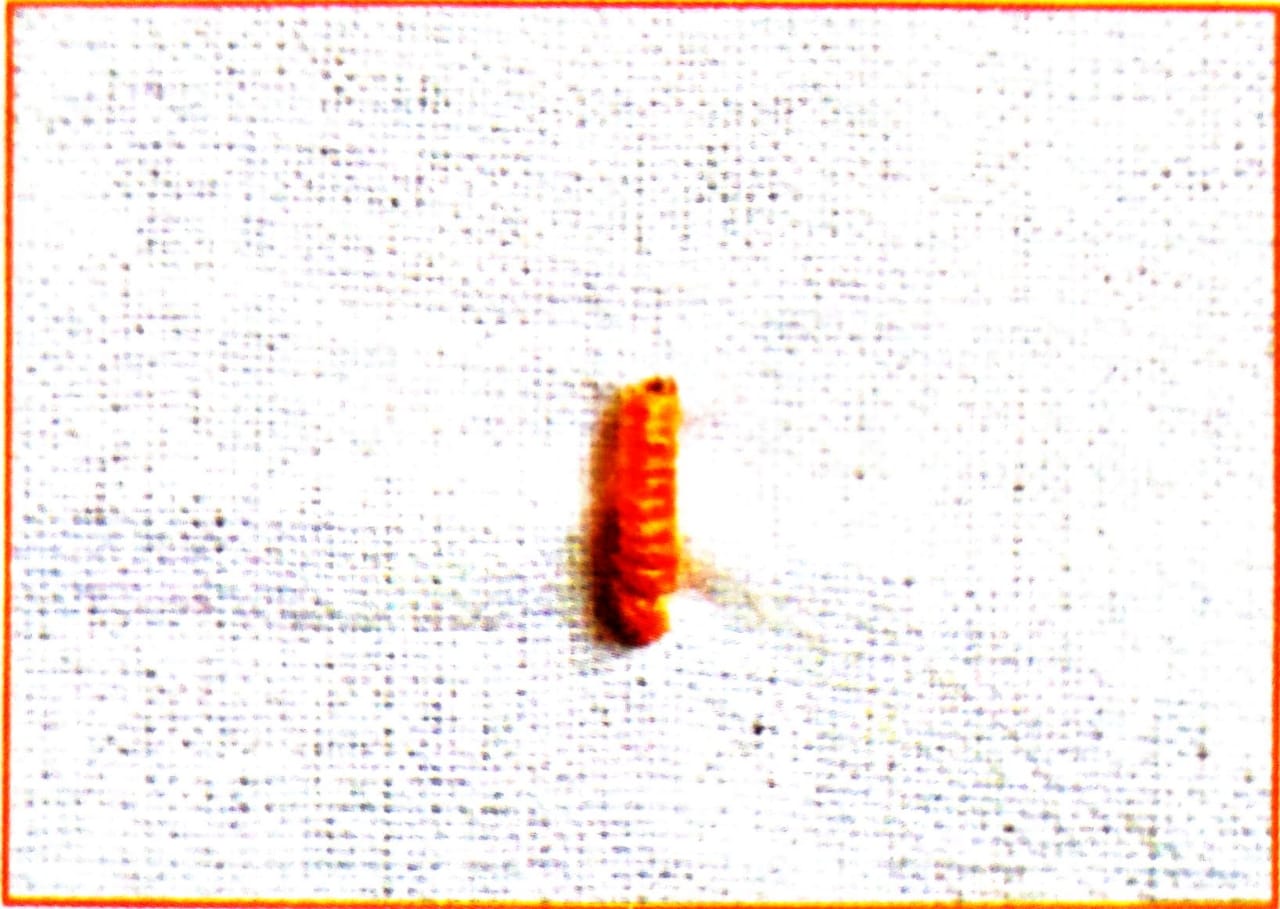
The chain stitch is a looped stitch that can be worked along a curved or straight line Variations of this stitch including the single or detached chain, lazy daisy, feathered chain, square chain, cable chain, heavy chain, zig zag chain and many more. This stitch is commonly used for outlining, straight and curved lines, filling if rows are stitched closely together
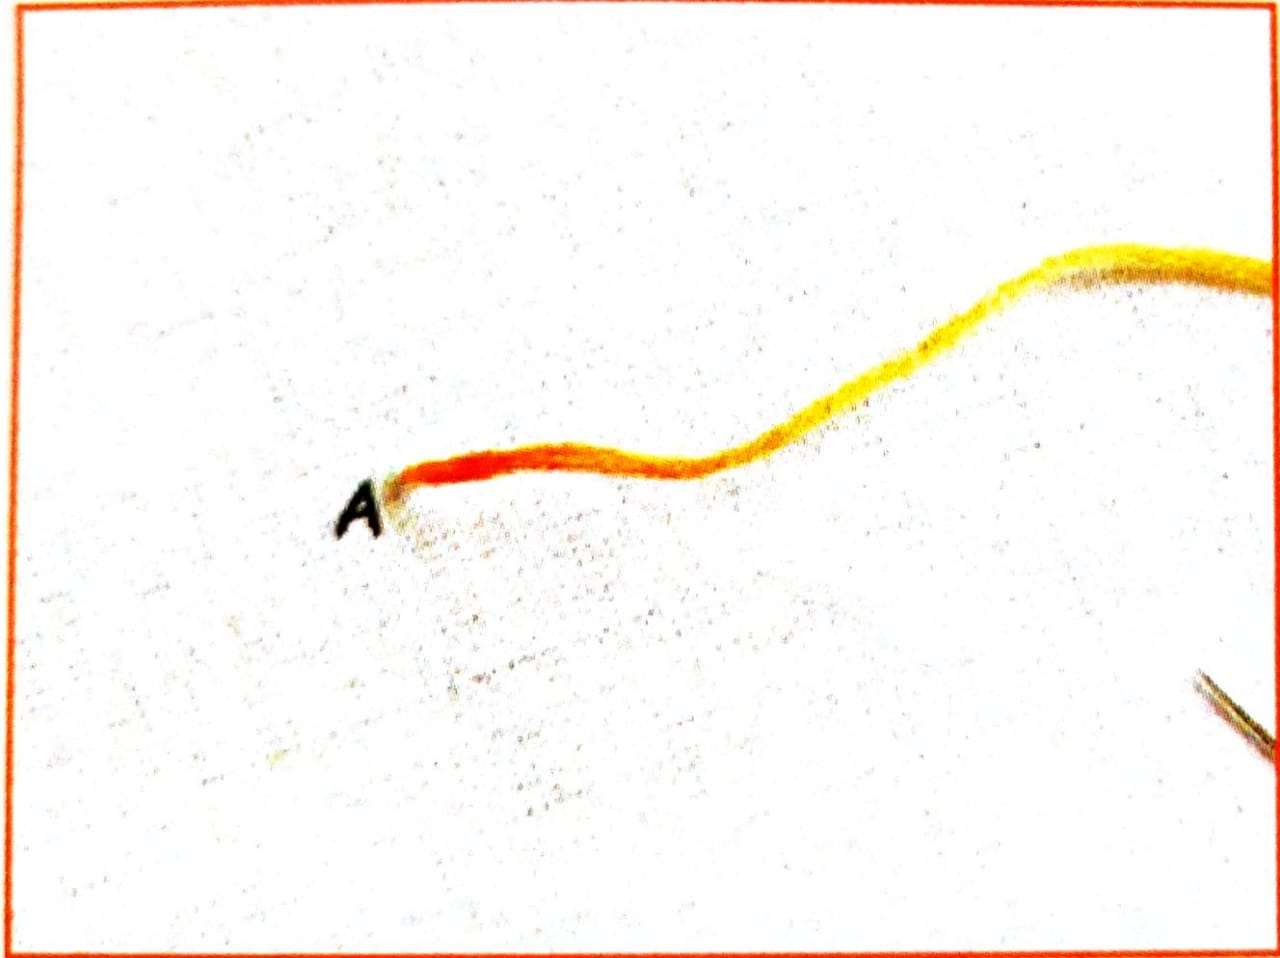
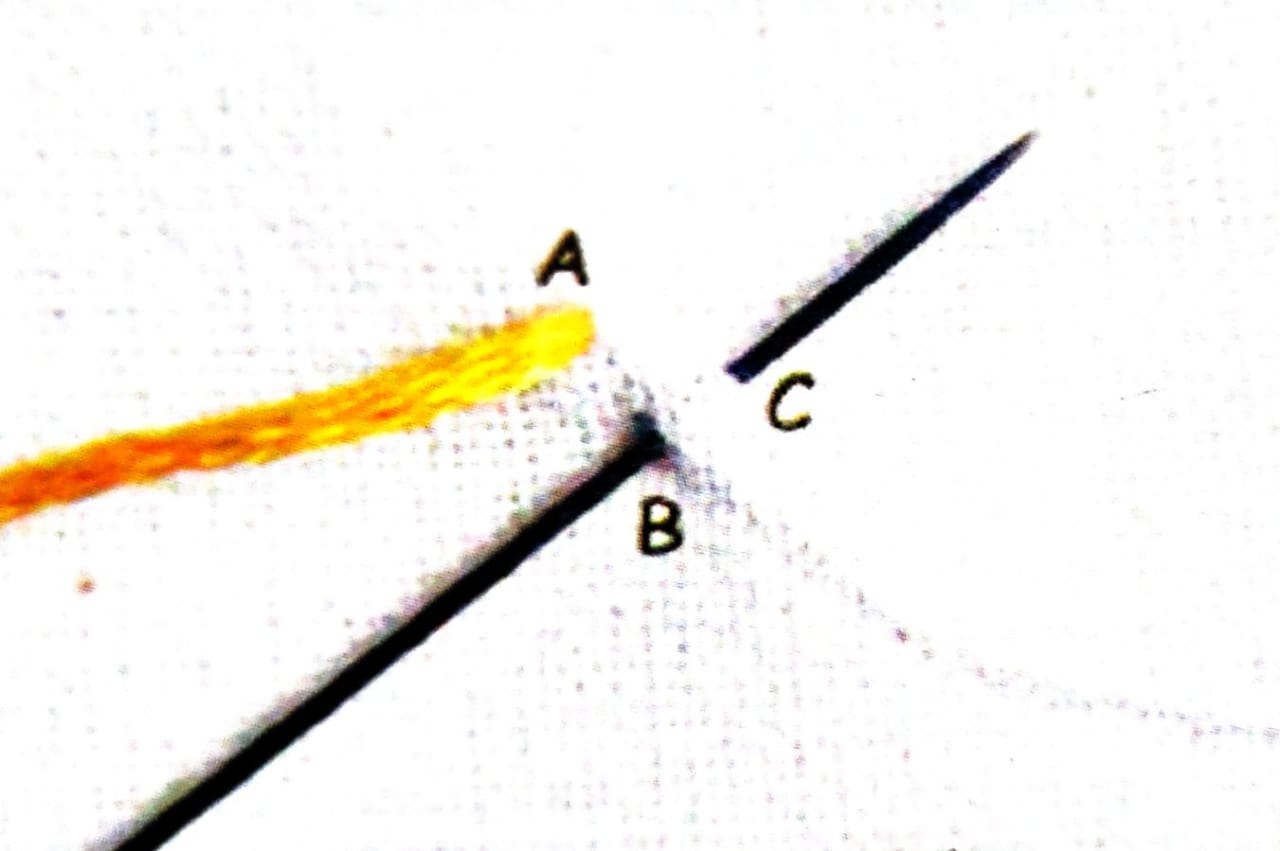
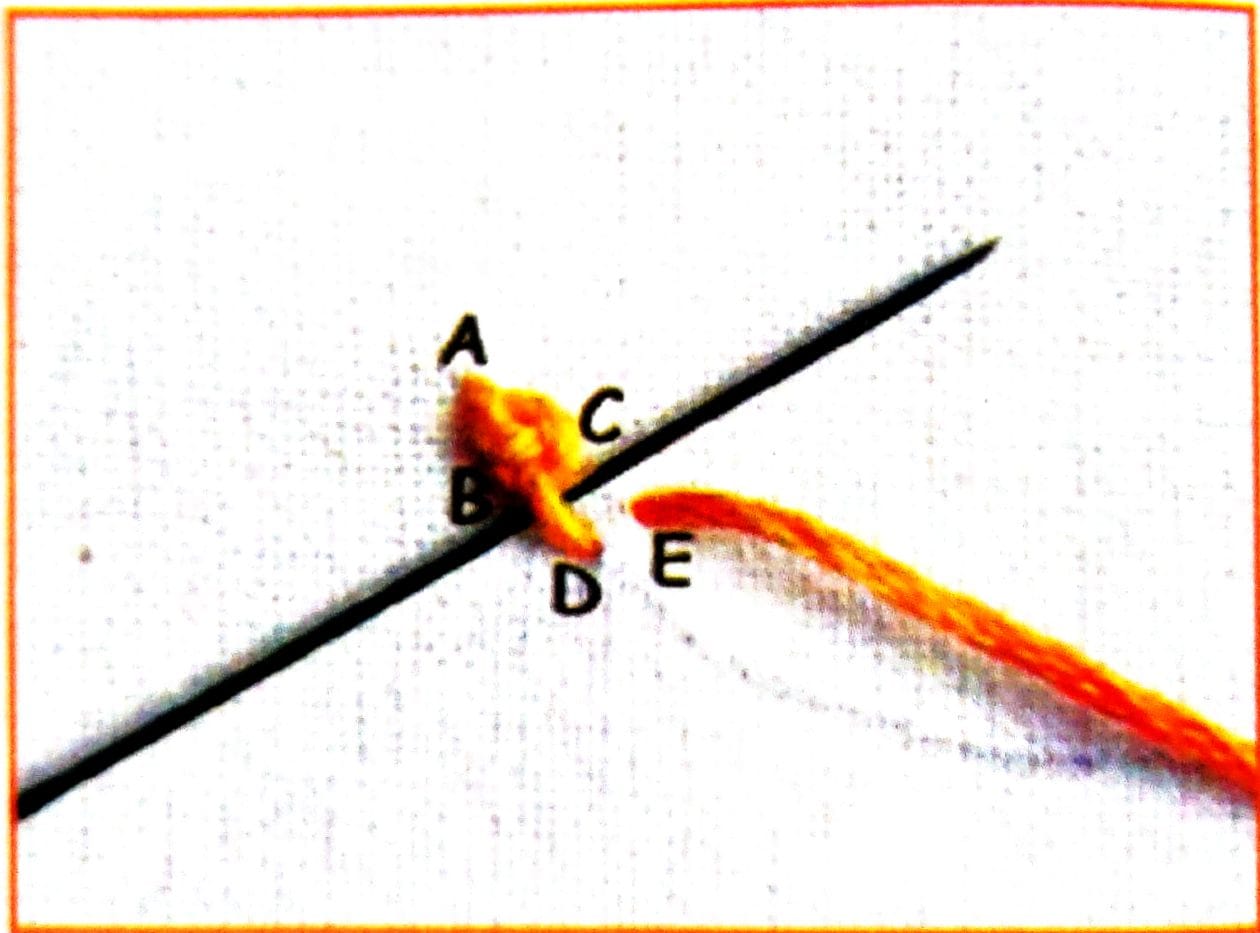
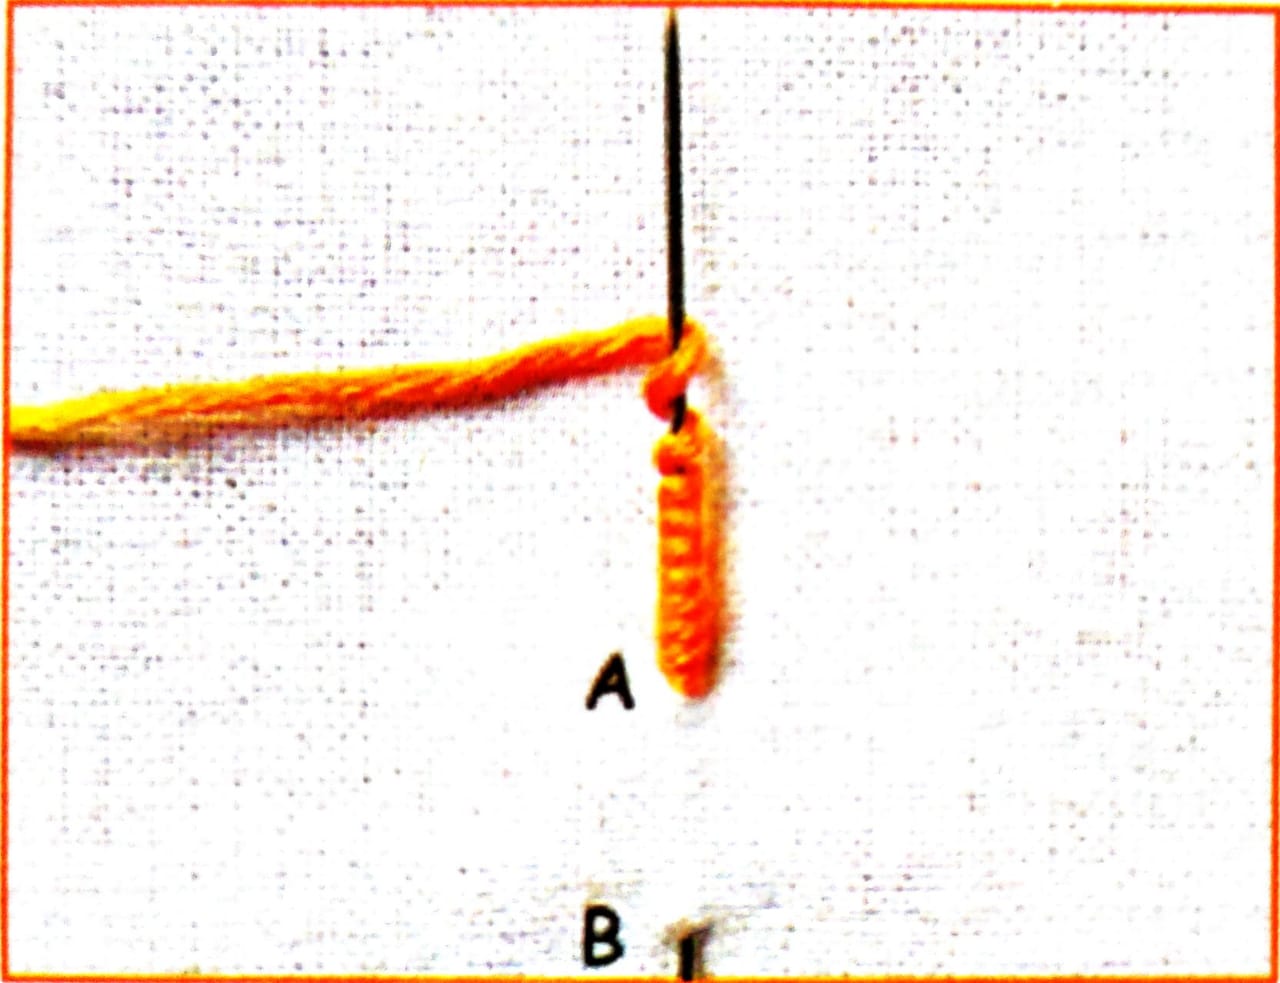
Step 1: Bring the thread out through A. Put the needle back in A and bring it out through the point B but don’t pull the needle out completely.
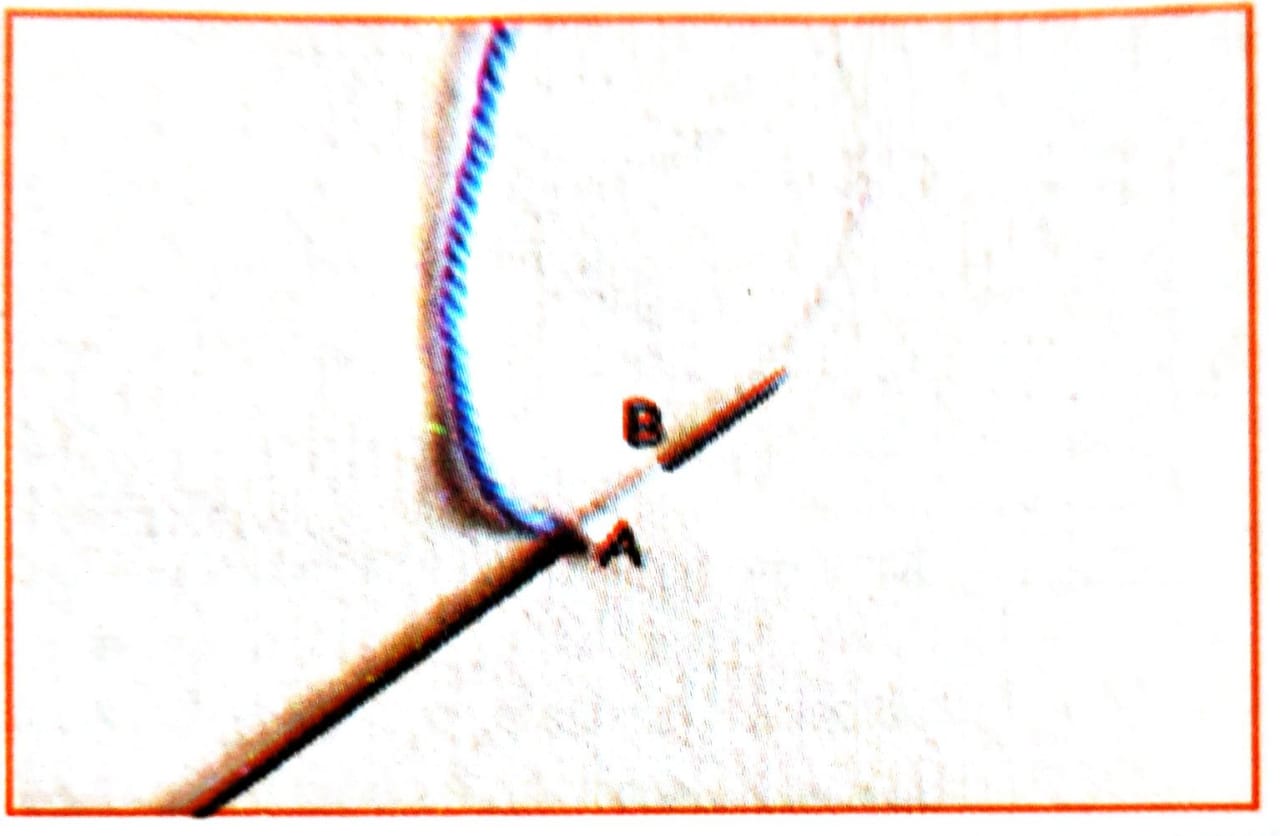
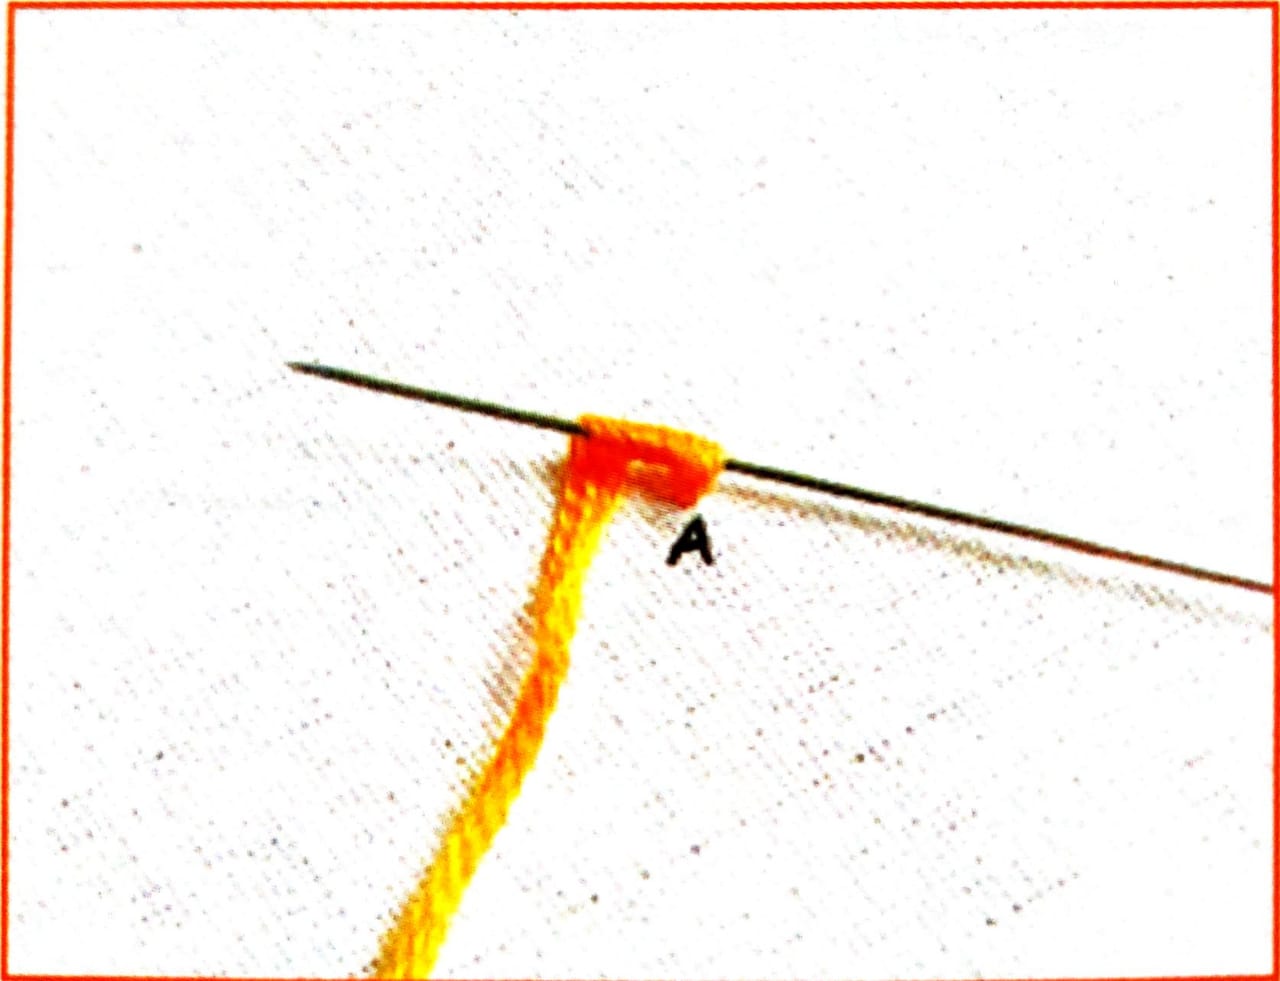
Step 2 Take the thread around the needle from left to right to form a loop.
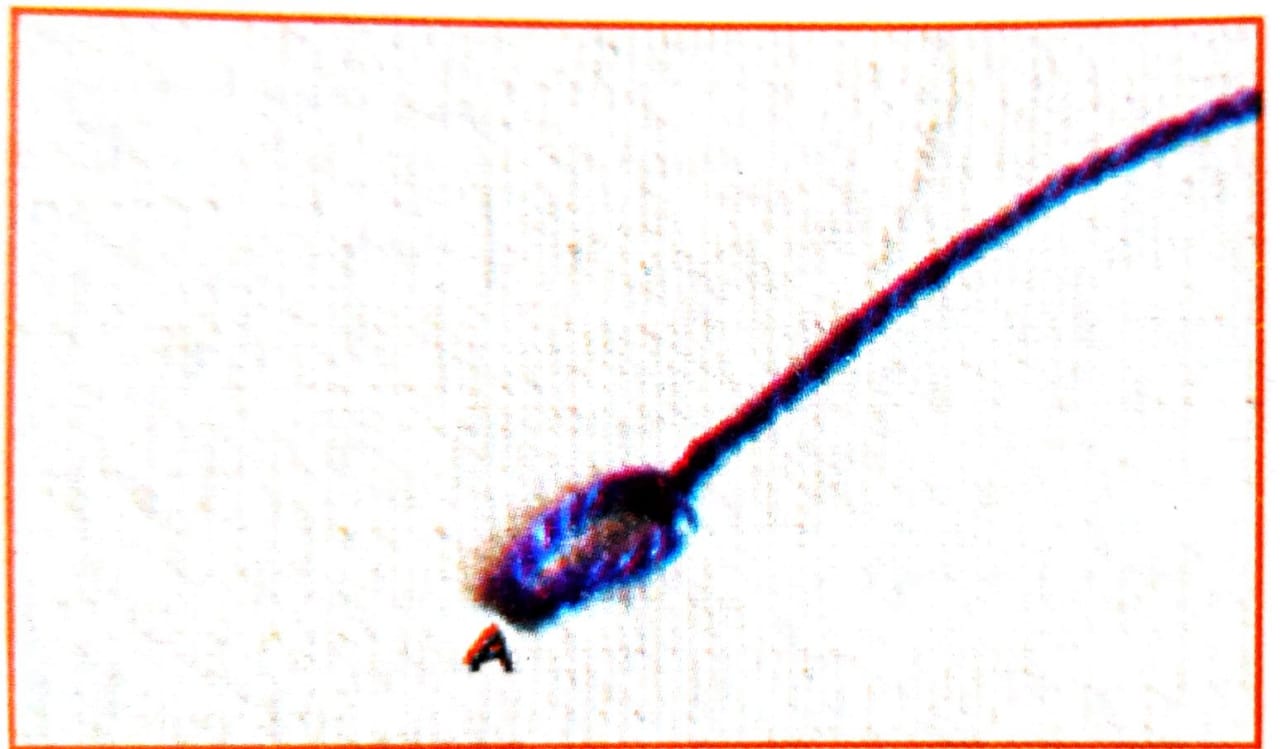
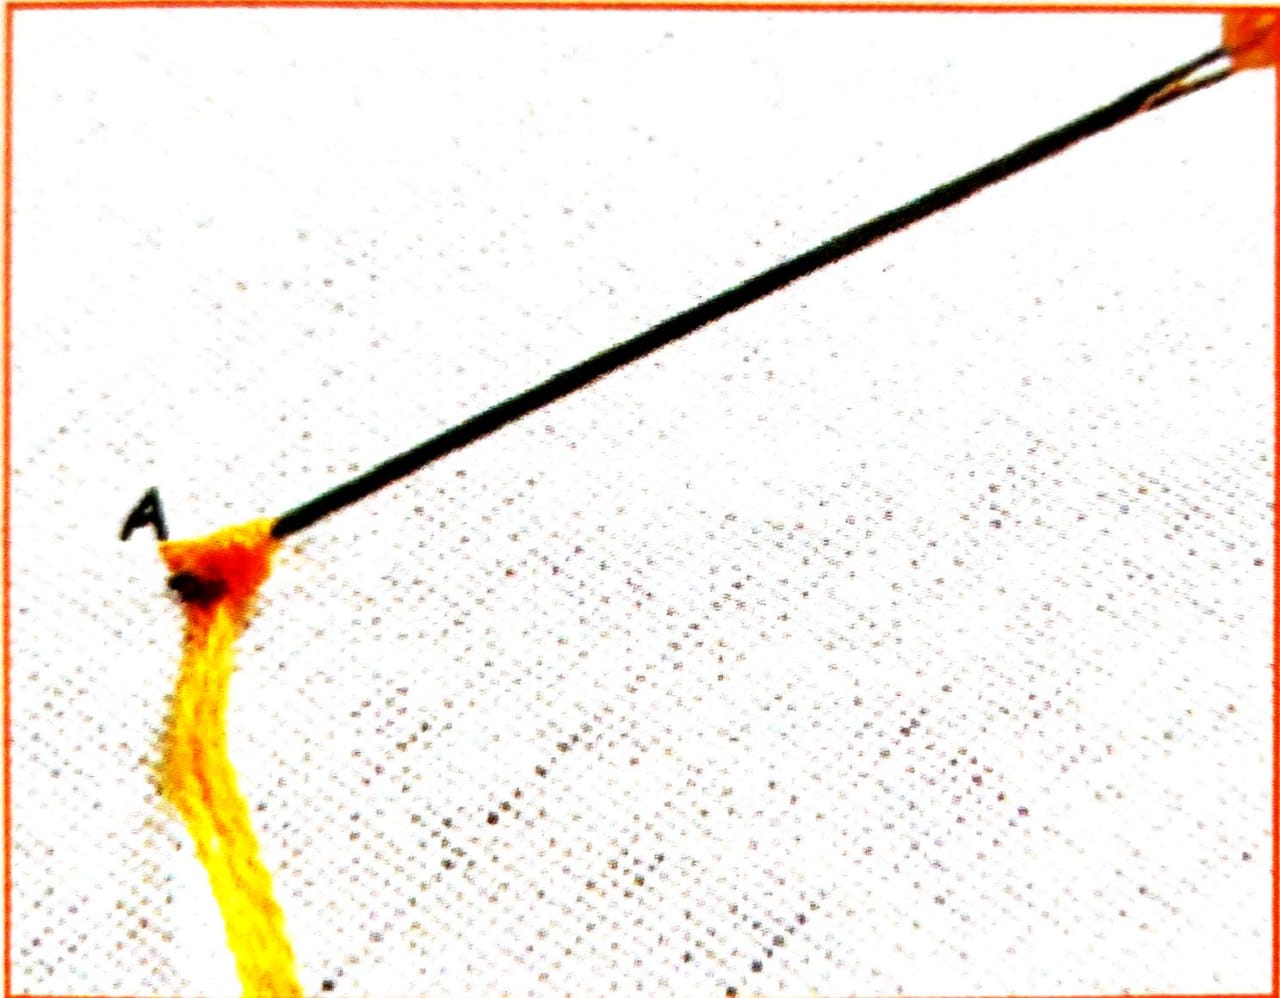
Step 3: Pull out the needle now to tighten the loop and you will get the first part of the chain.
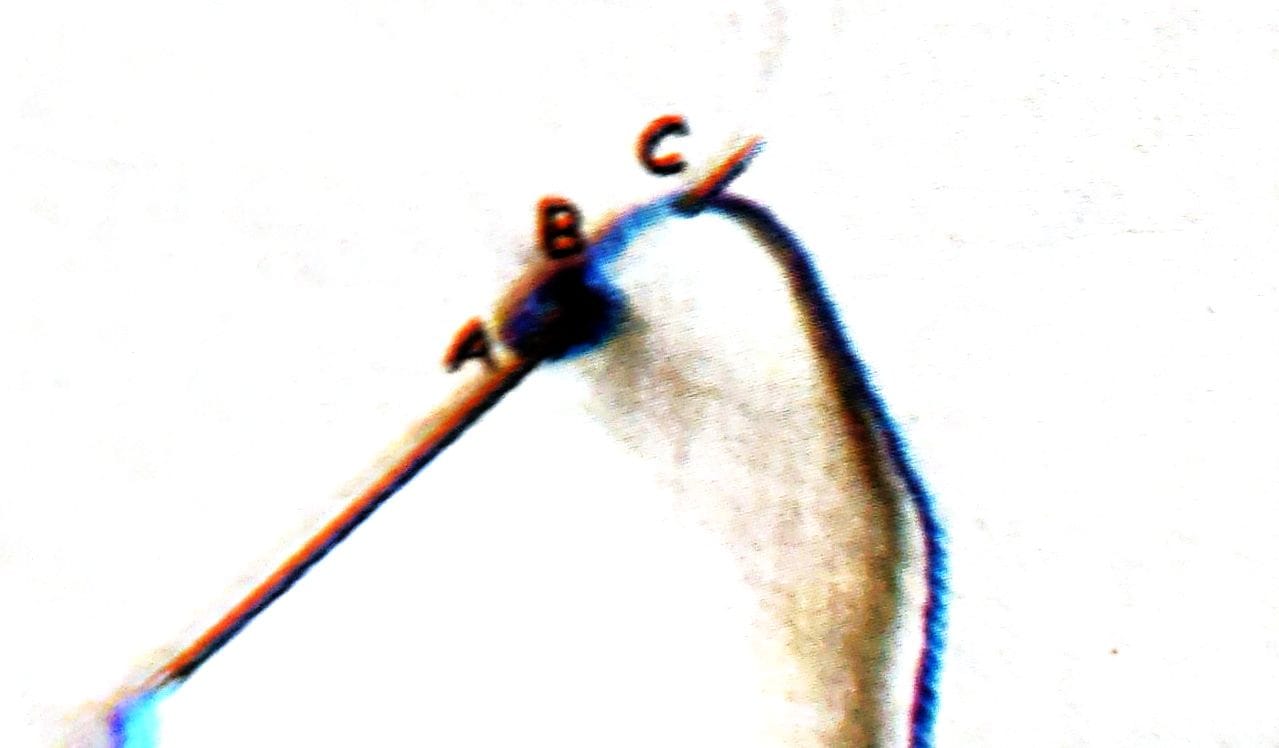
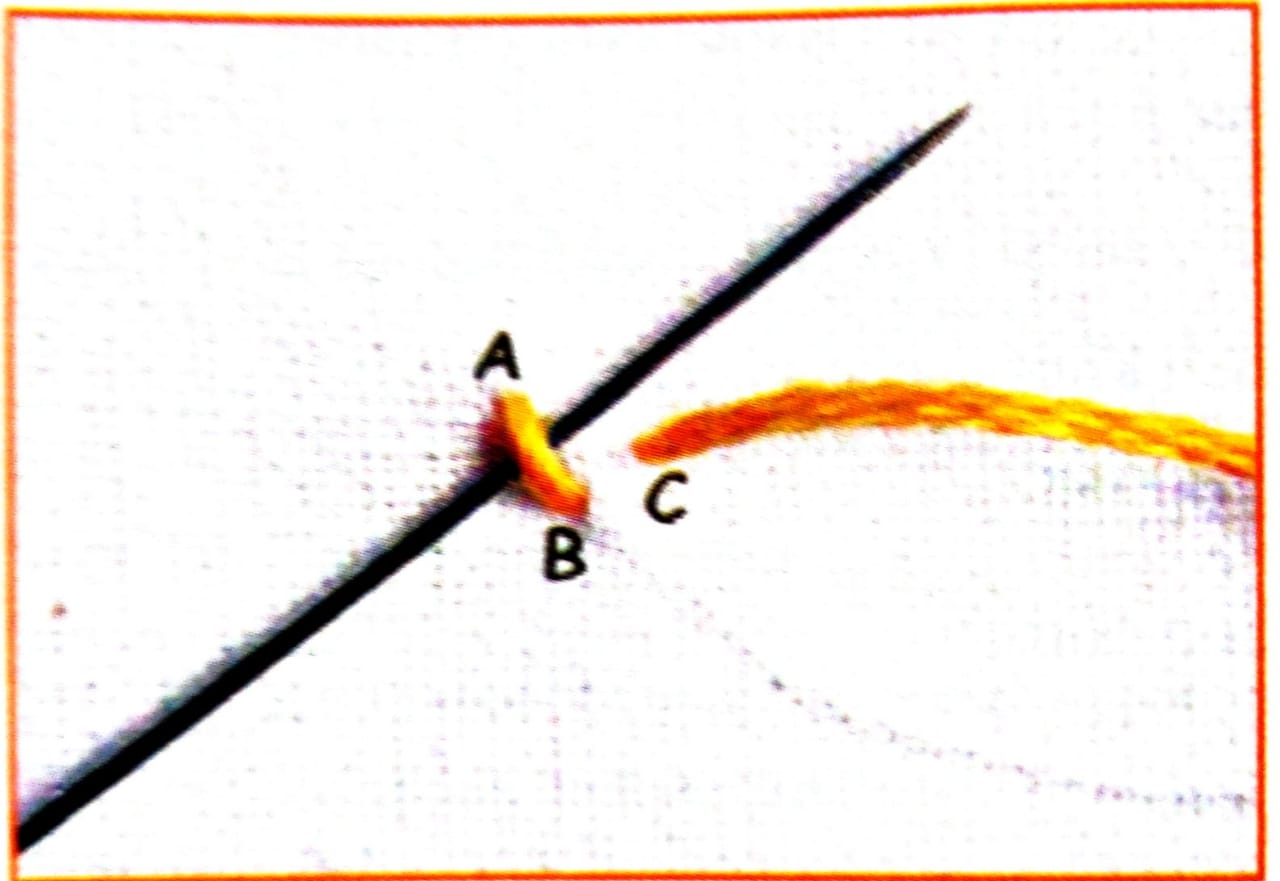
Step 4: Put the needle in through B (now inside the loop) and bring it out on C(outside of the loop).
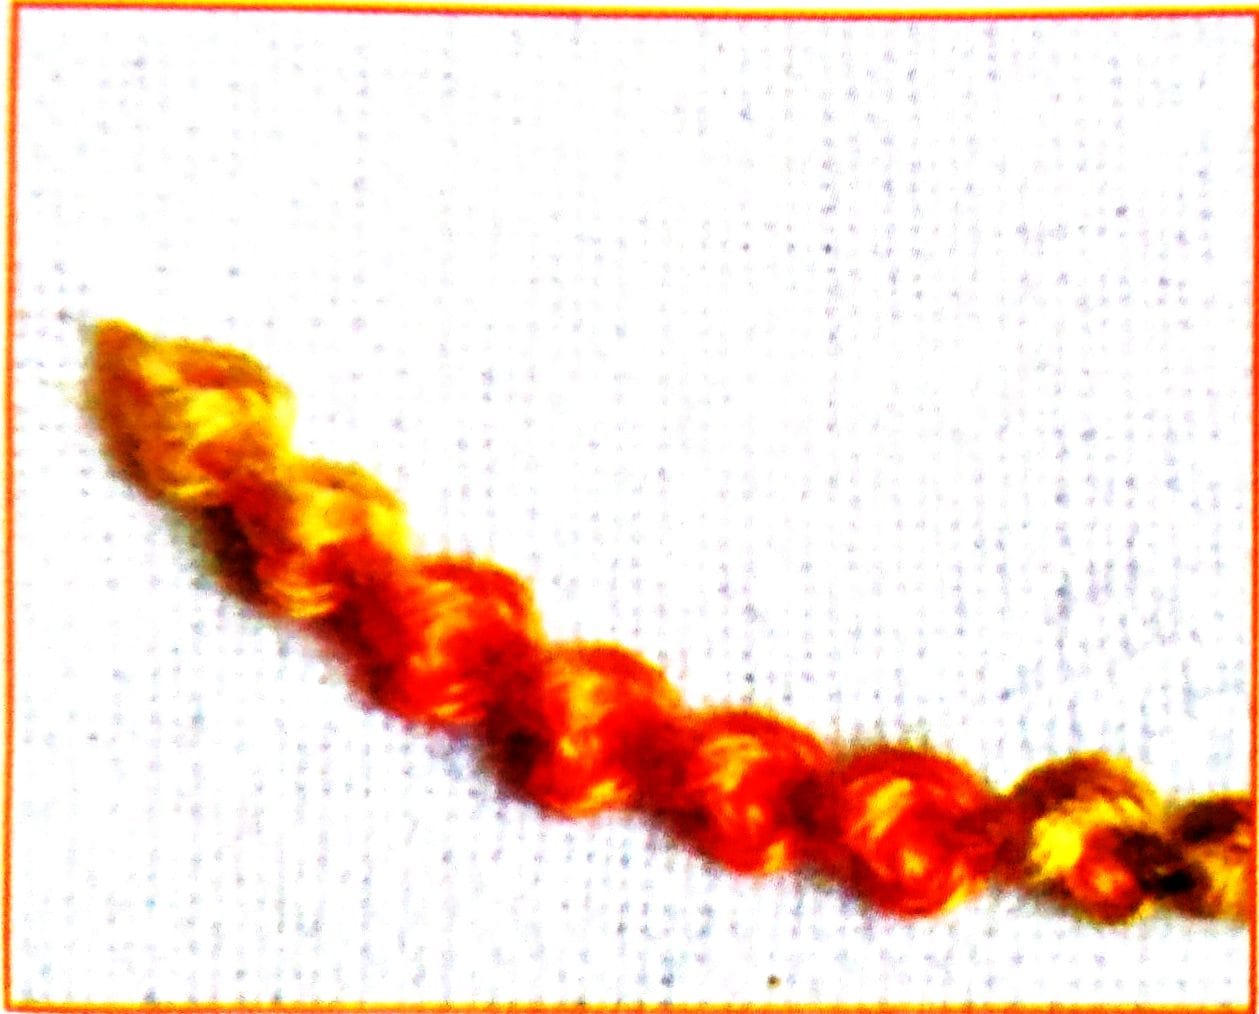
Step 5 Continue the action by taking the thread around the back of the needle from left to night to form a loop and pull out the needle to get the next loop of the chain. Keep on with this procedure to finish the design.
Steps of Carrying out Button Hole Stitch
This stitch is used to secure the edges of buttonholes as it gives a much sturdier stitch due to the knots it makes.
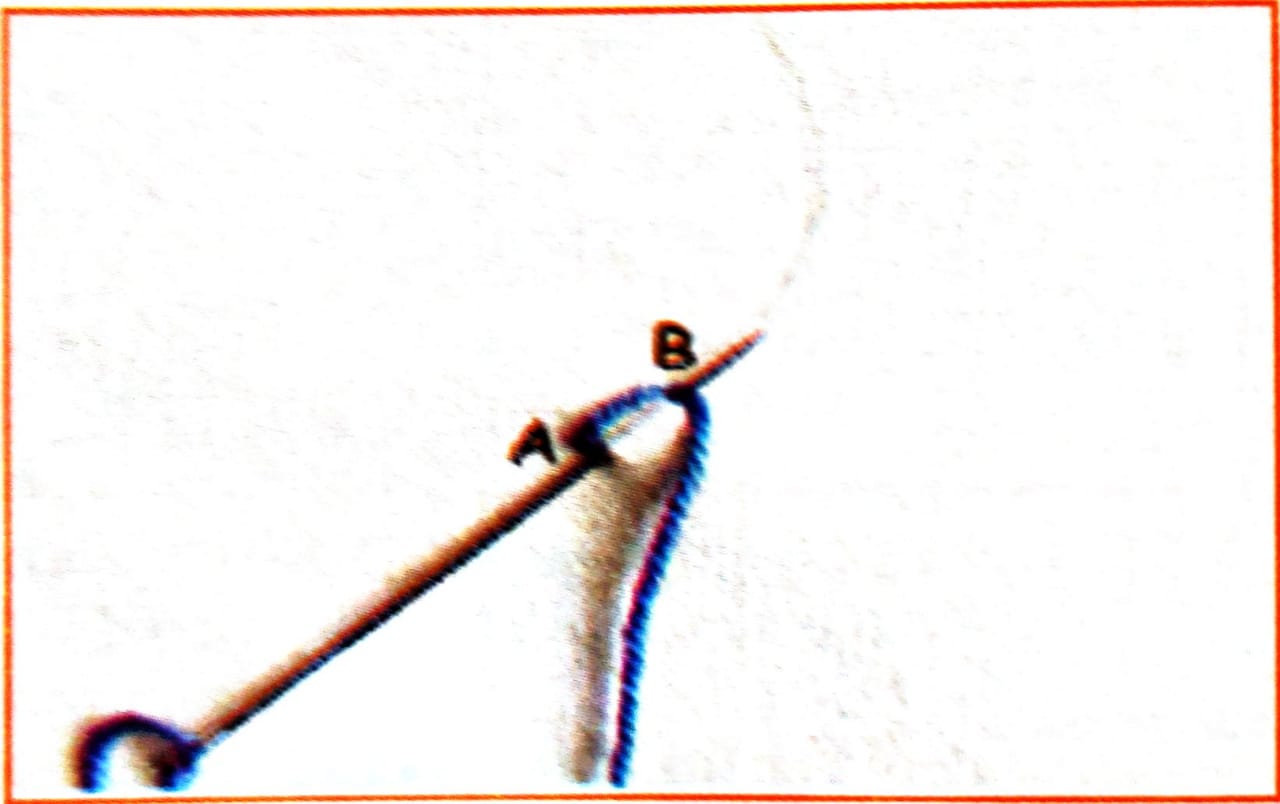
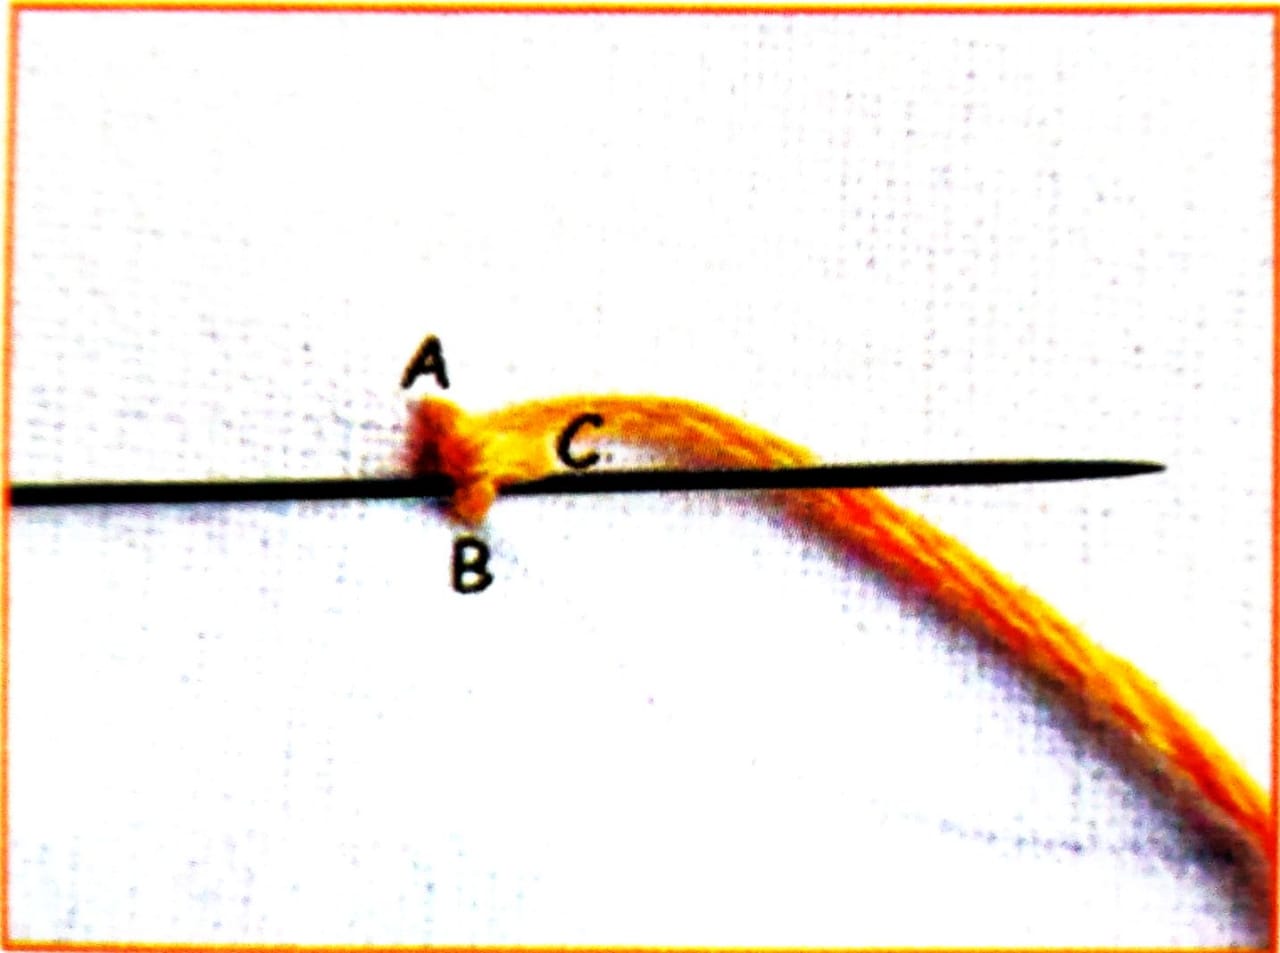
Step 1: Bring the needle out through A. Now loop the thread around from left to right. Take the needle in through B and bring it out from C Keep the thread below the needle always.
Step 2: Pullout the needle towards the top. This cates a small knot near the point & Do not pull the needle downwards as it will not give the desired results.
Step 3: A finished portion of the buttonhole stitch would look like as in figure.
Steps of Carrying out Blanket Hole Stitch
This stitch is called blanket stitch as traditionally it is used to stitch the edges of blankets. it is used to create straight and gently curved lines, borders and finishing edges.
Step 1: Bring the needle out through A Take the needle in through B. Take tout through C,a point in the same stitch line as A Loop the thread under the needle.
Step 2 : Pull out the needle. Continue with this process till the end of the line.
Step 3: A Portion of the freed blanket woul kook e as in the figure.
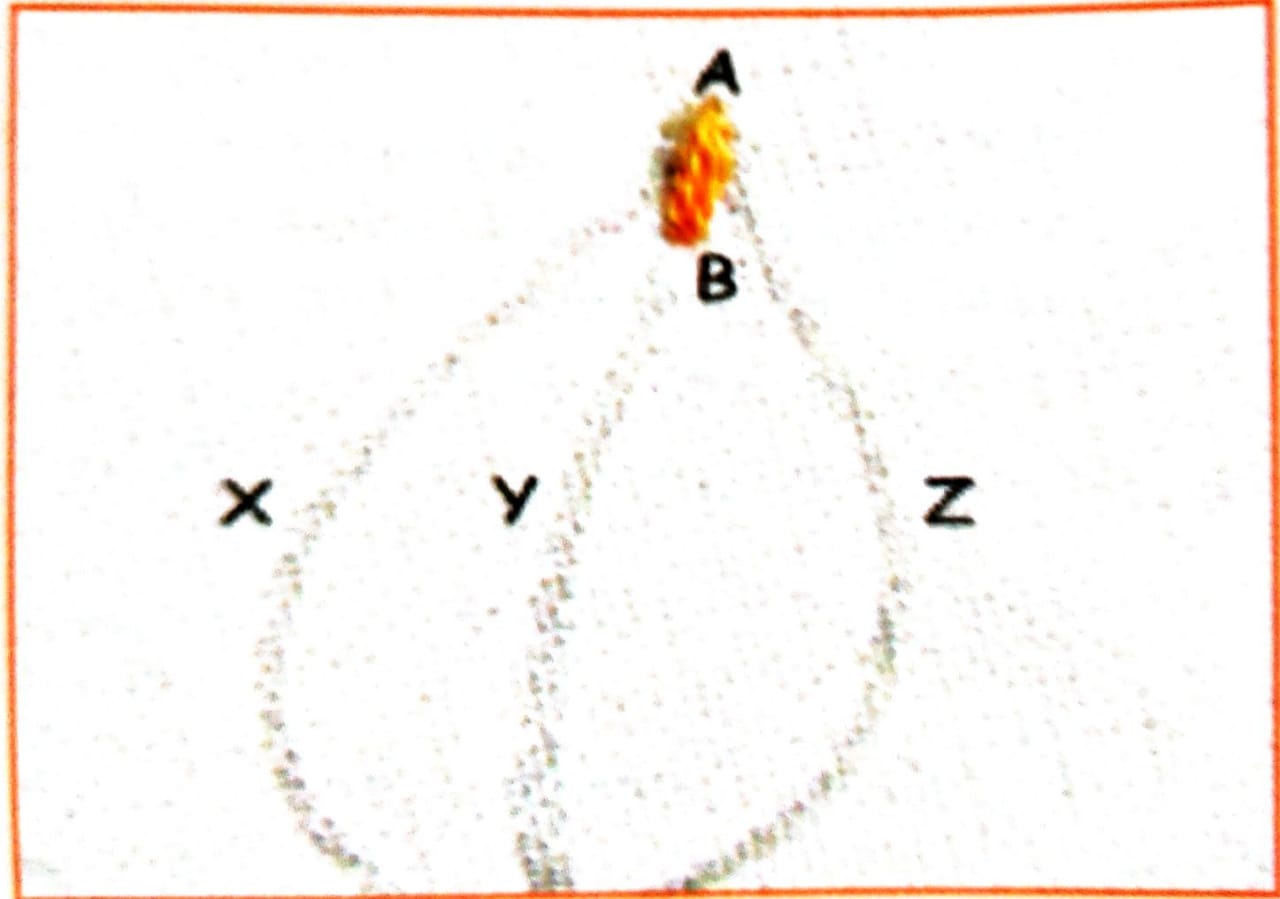
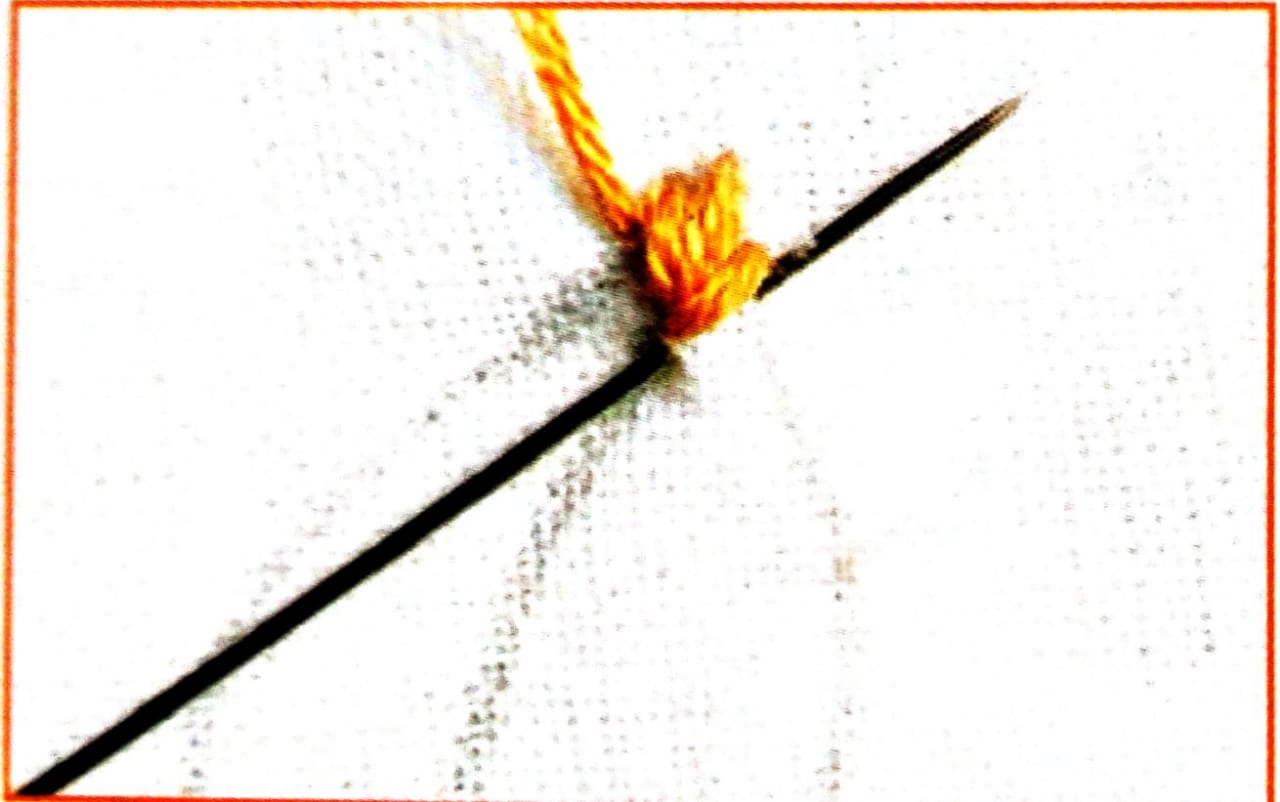
Steps of Carrying out Fishbone Stitch
This stitch is a type of filling stitch and is used for making leaves and feathers
Step 1: To begin with bring the needle out through point A which is the top tip of line Y Put it in through & to make a single straight stitch.
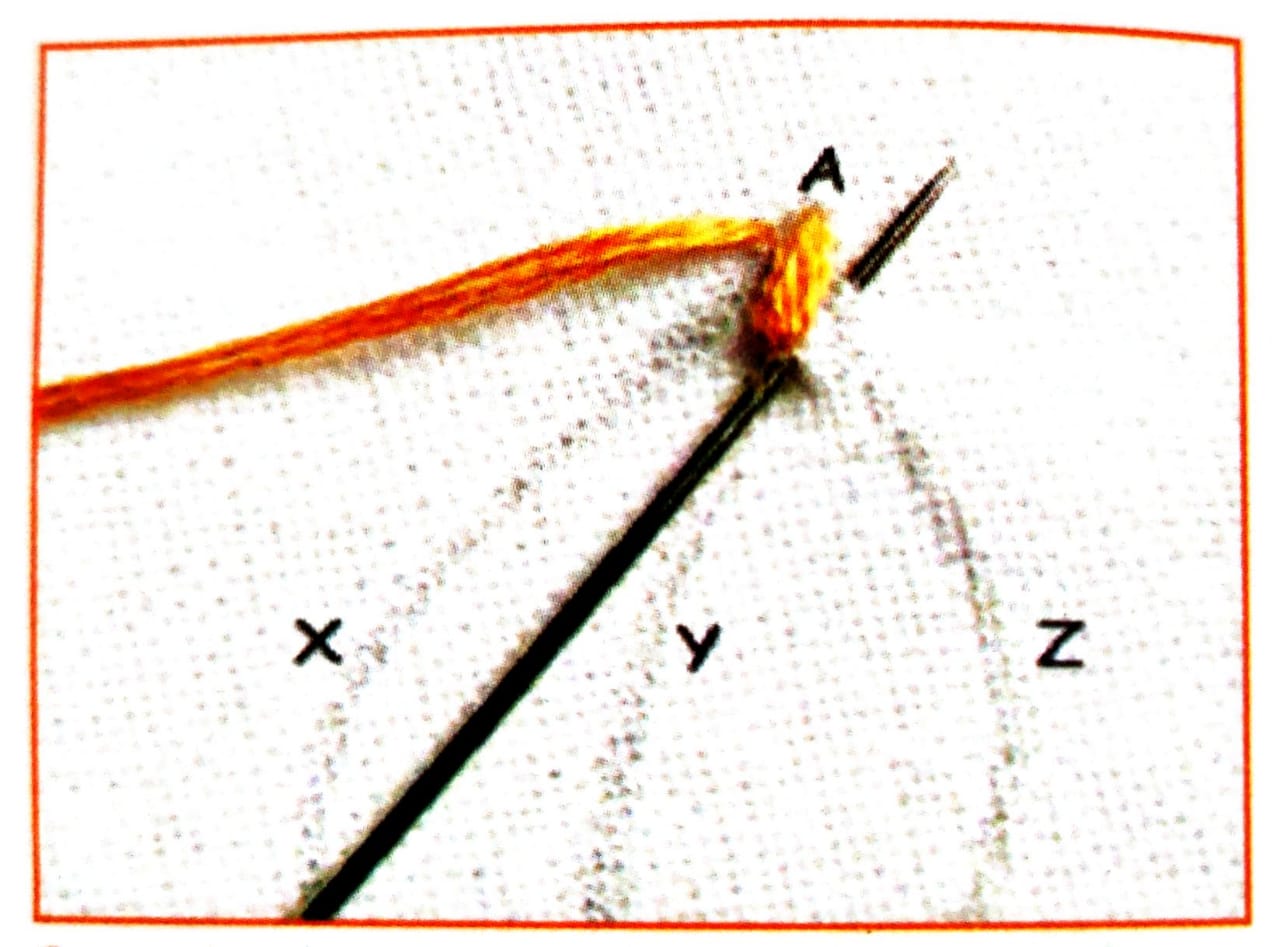
Step 2: Now bring the needle out from a point very close to A on the line X. Put it in through a point very close to B on line Y. Again pull out the needle through a point very close to A on Ine Z.
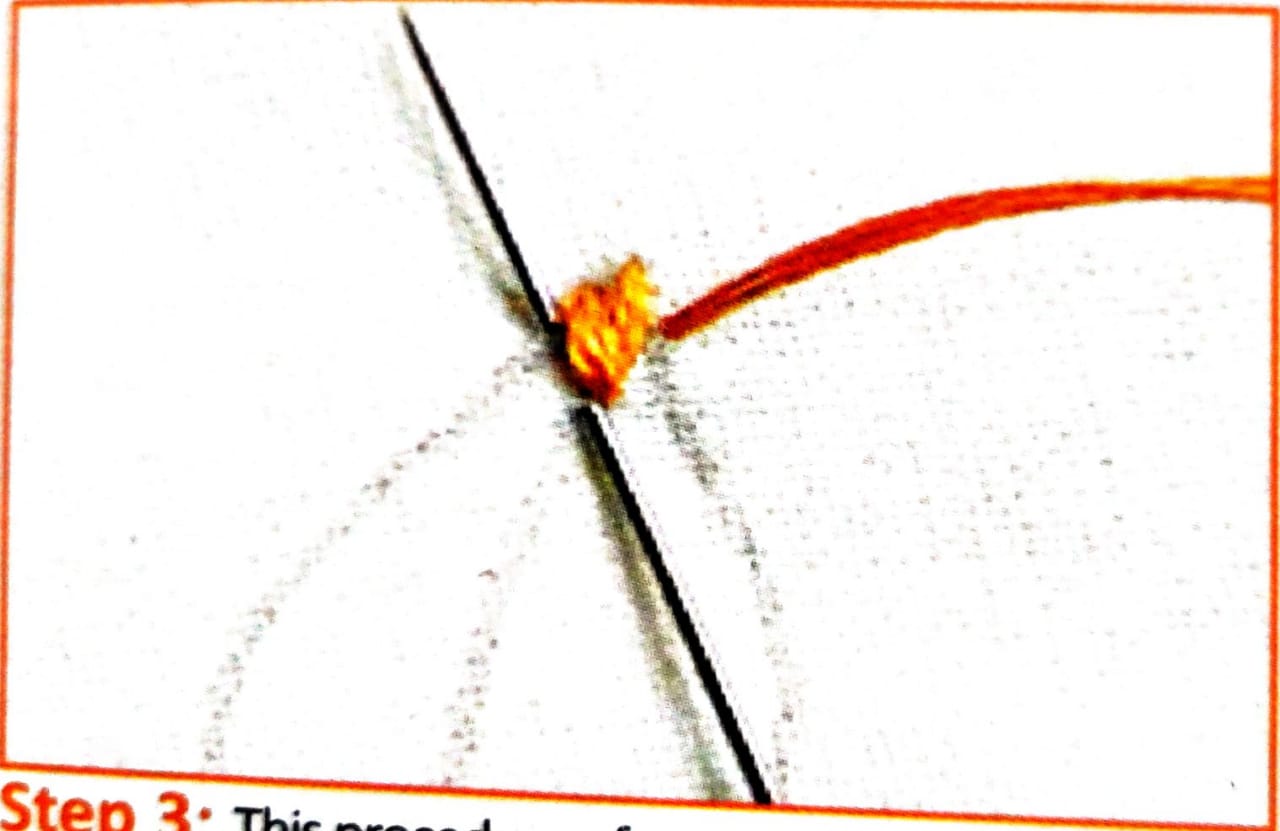
Step 3: The procedure of putting in the neede through X and Z alternatively will follow Each time you will be connecting XY and Z.
Step 4: Make sure all the stitch points lie dose to each other to avoid any visible spaces.
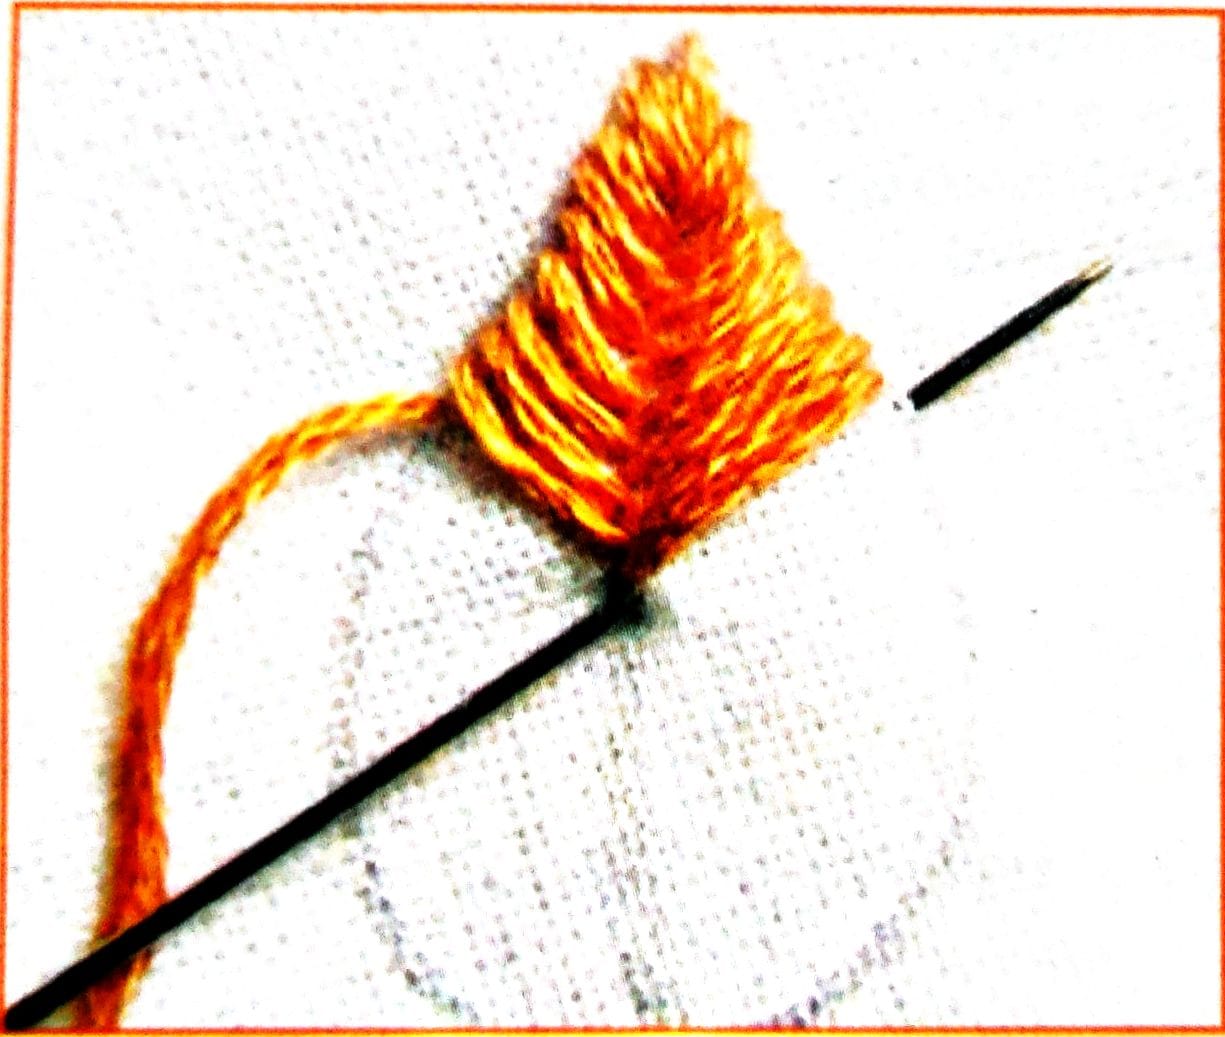
Step 5: Half way through, the leaf design would look like as in the image.
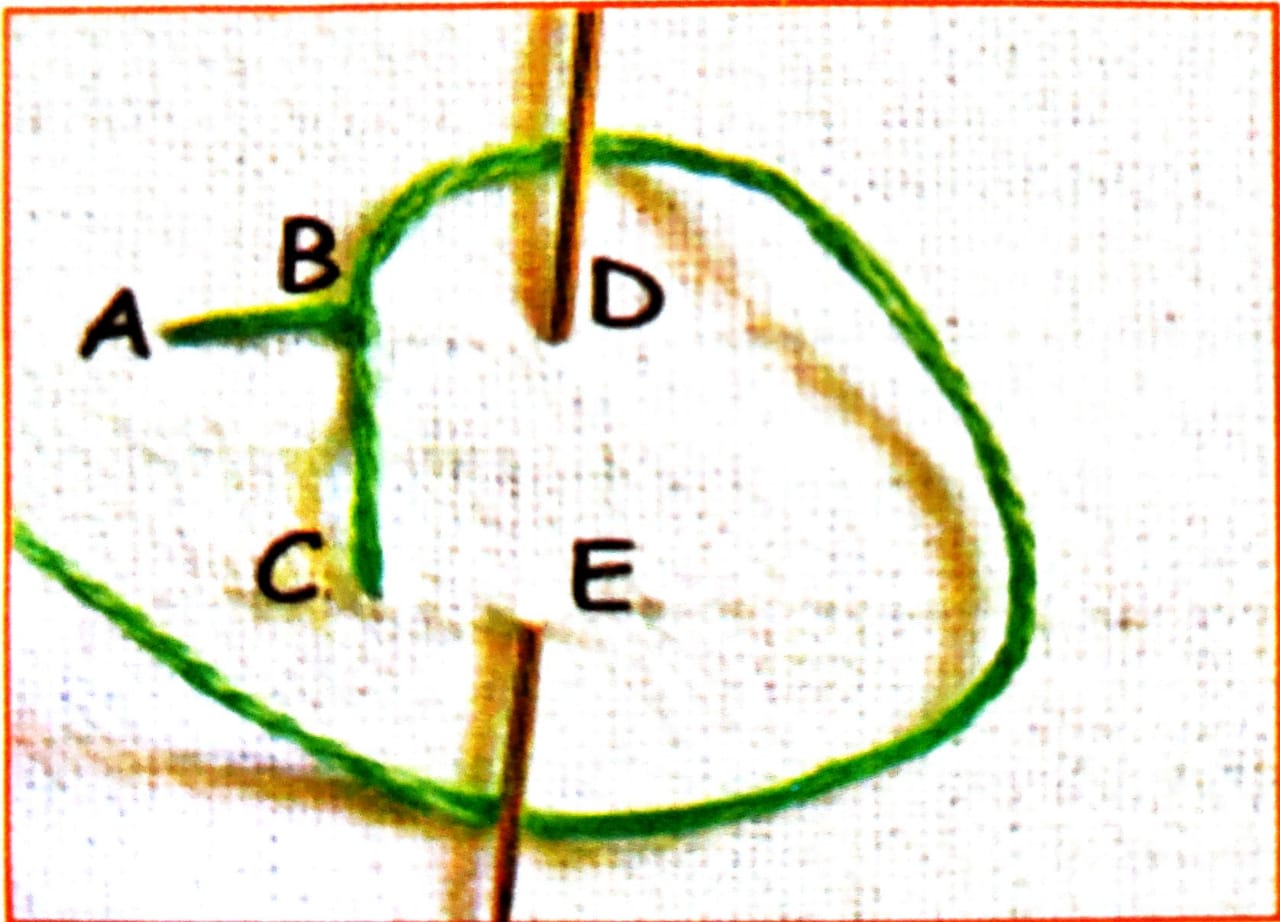
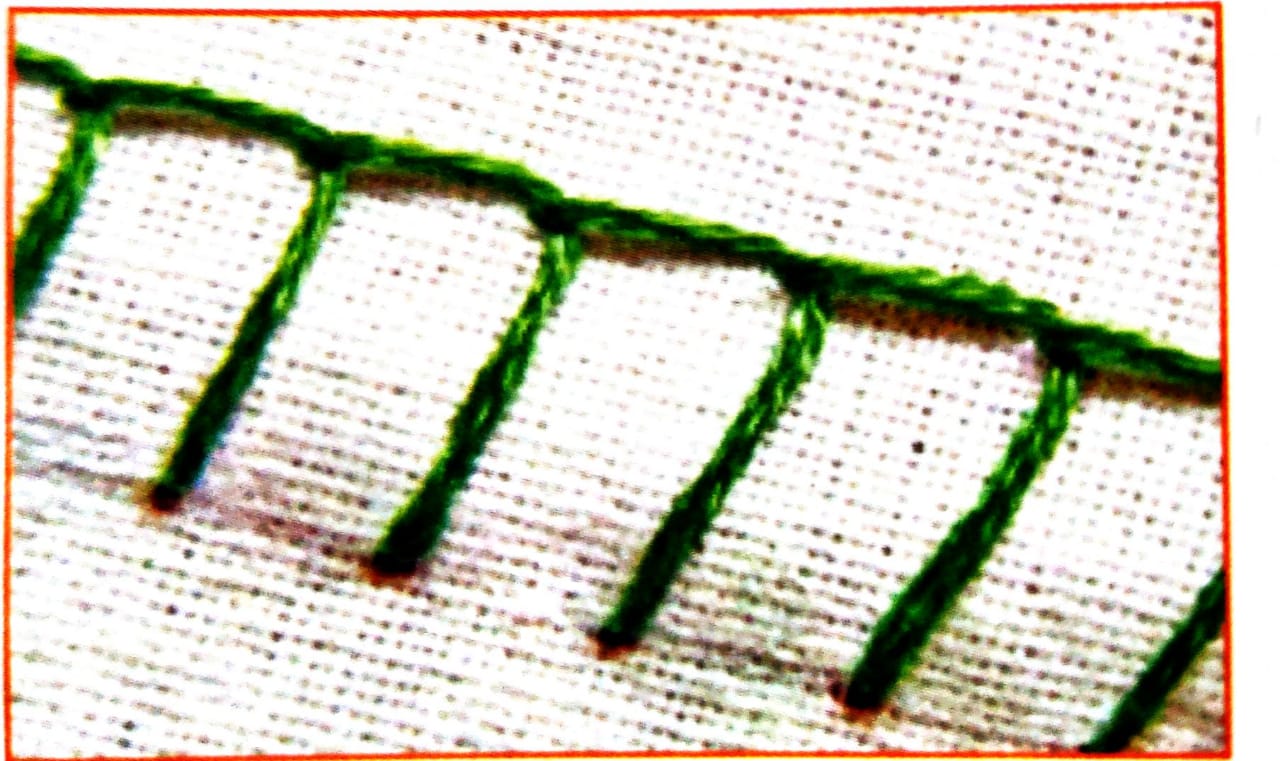
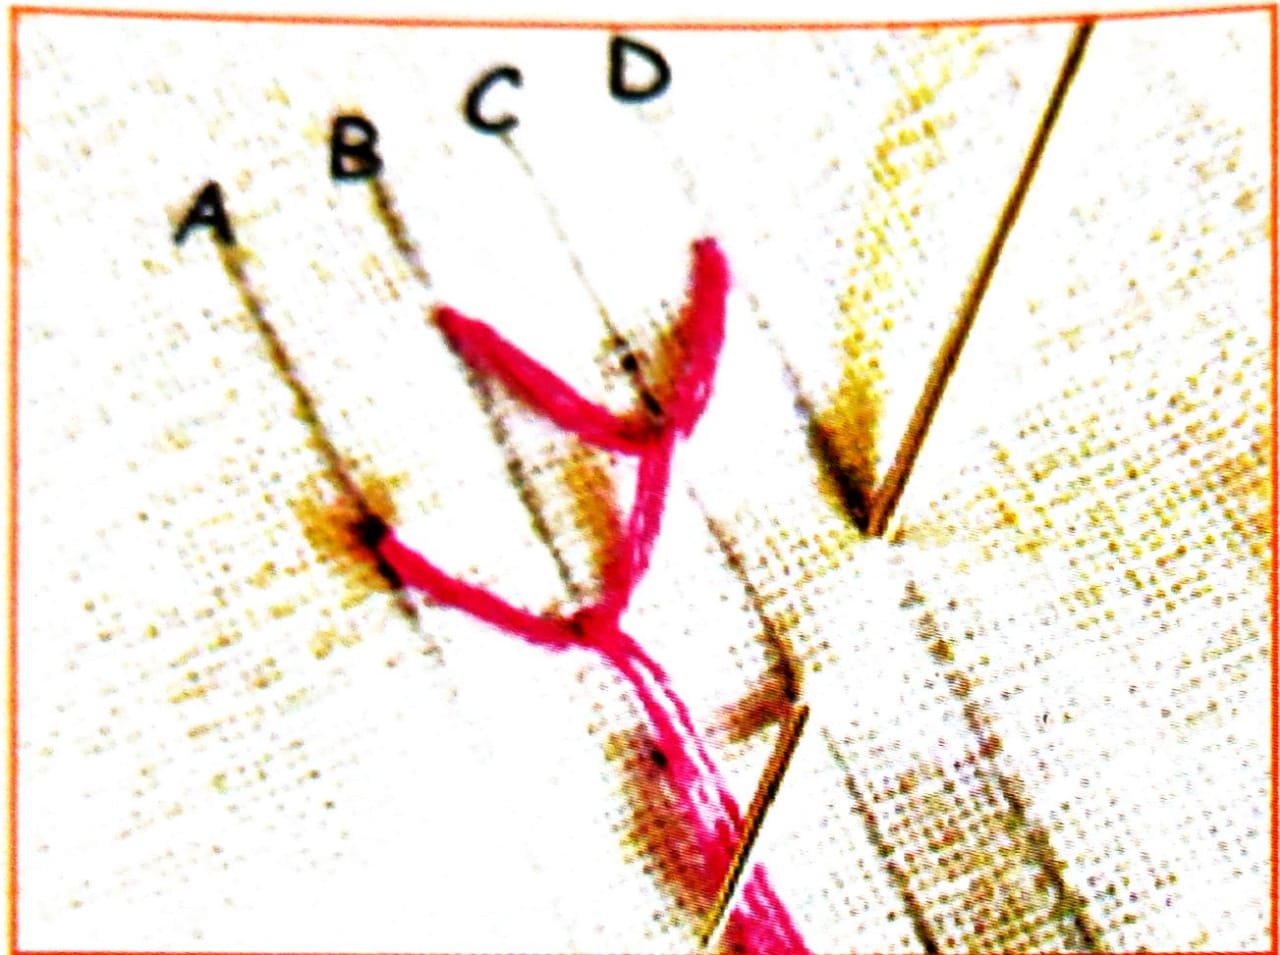
Steps of Carrying out Feather Stitch
Feather stitch is a decorative stitch, usually, used to accompany it with embellishments or other forms of stitches like the French knot. It can be used to make borders, horizontal or vertical fillings, or designs with curves. It looks like a series of interconnected ‘V’s.
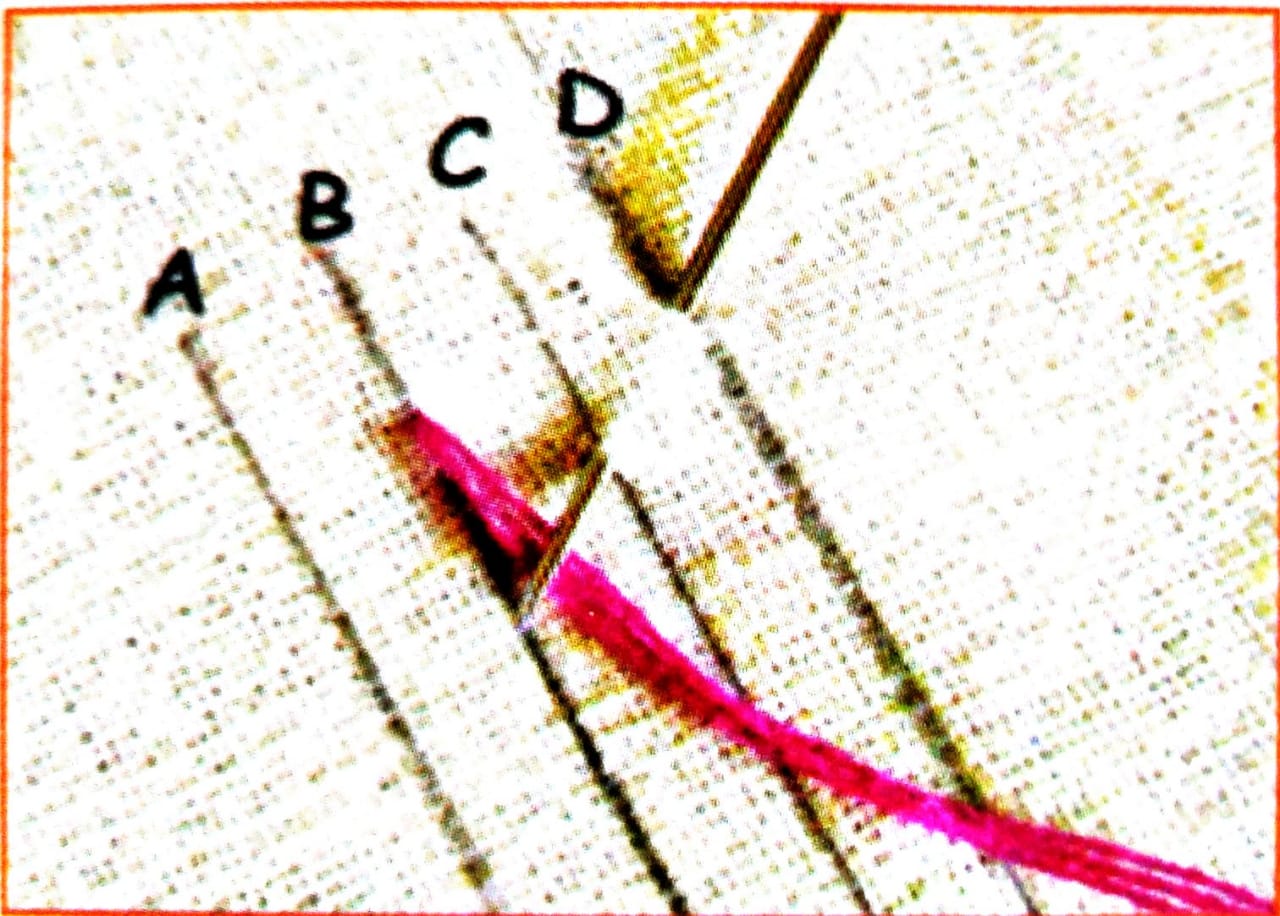
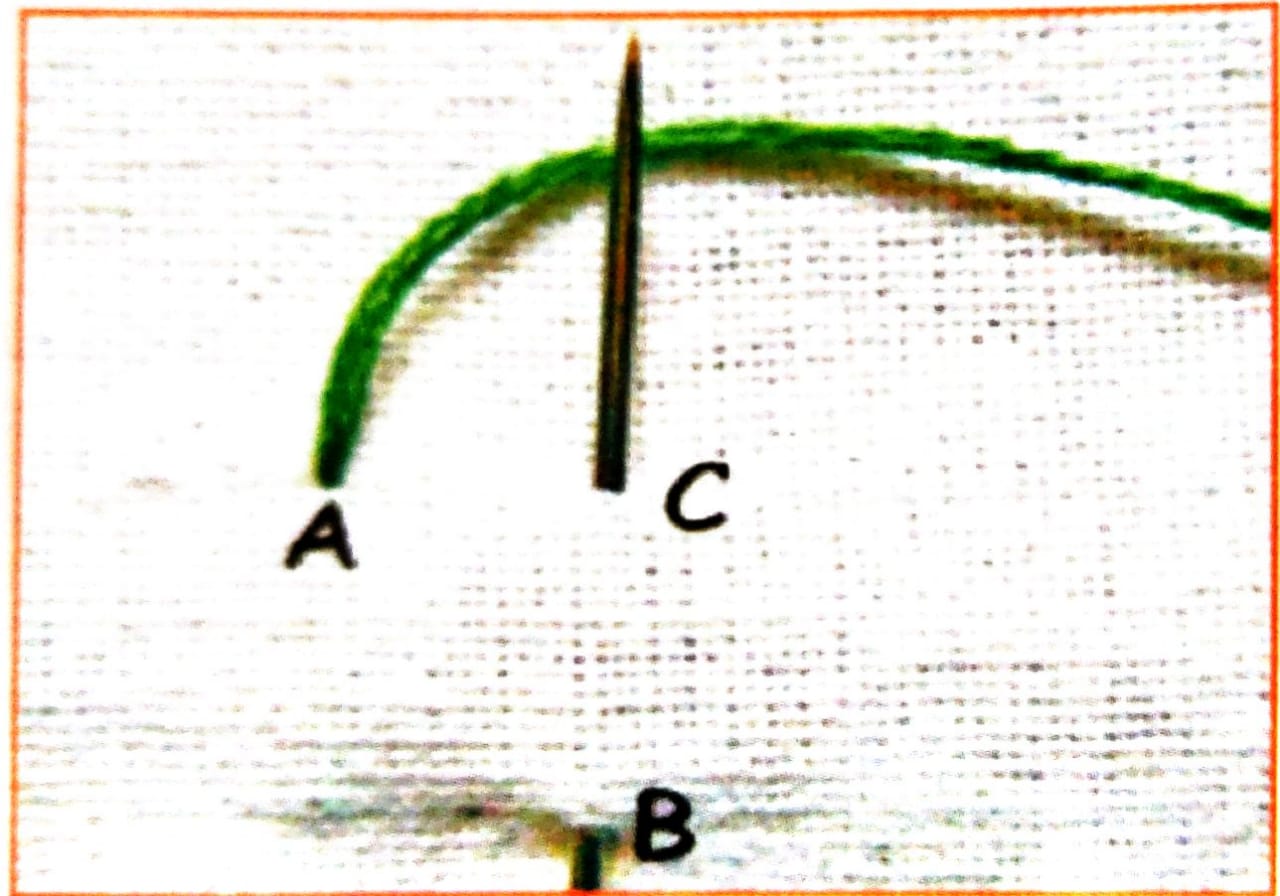
Step 1: Bring the needle from B. Now, put the needle in through D and bring it out from C. Note that the points on B and D falls on a straight line, and Clies diagonally to both Band D. Pull the needle out with the thread under it, as shown. We would form our first V.
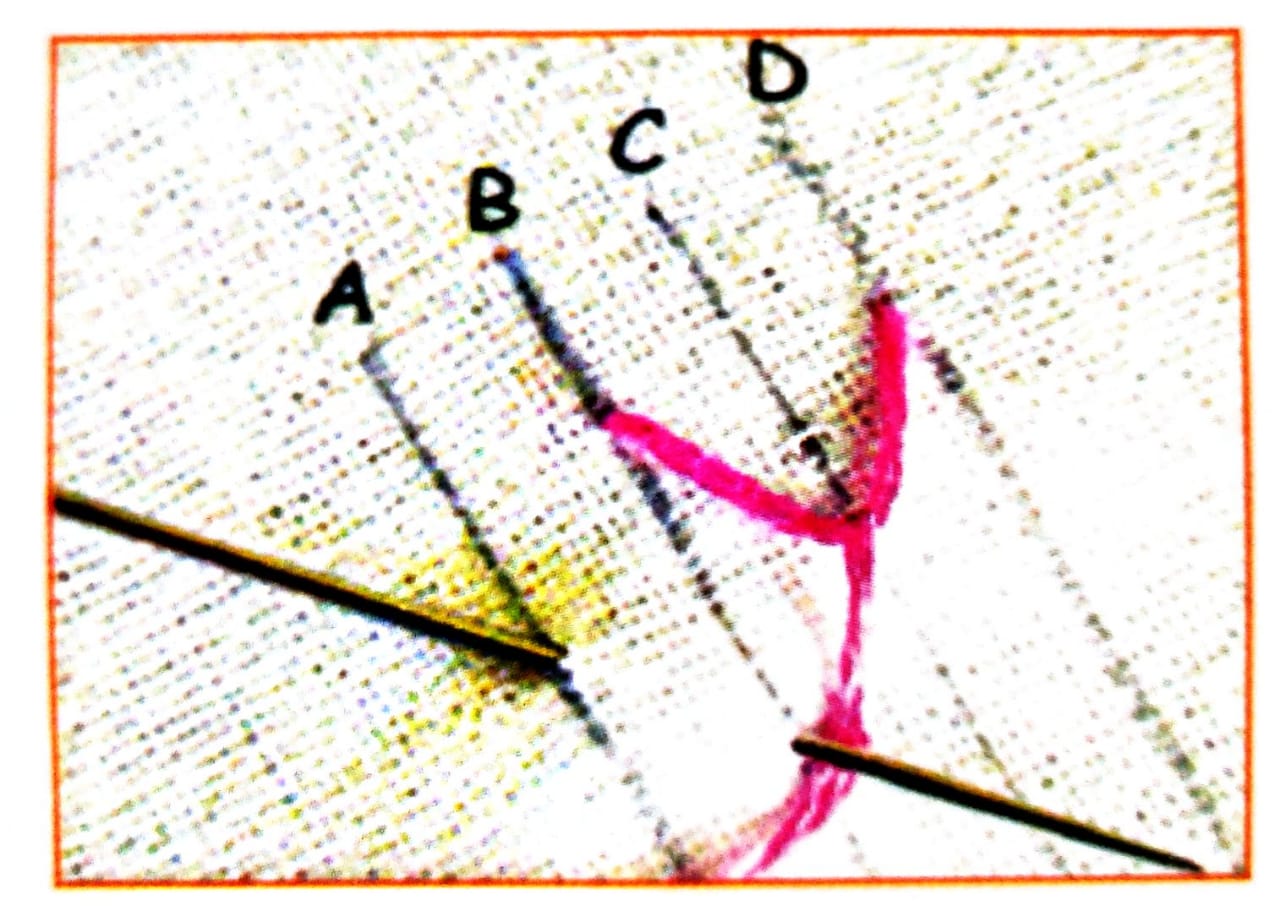
Step 2: Continue to put the needle in through A and bring it out through B. Pull the needle out with the thread under it as shown, to make the next ‘V’.
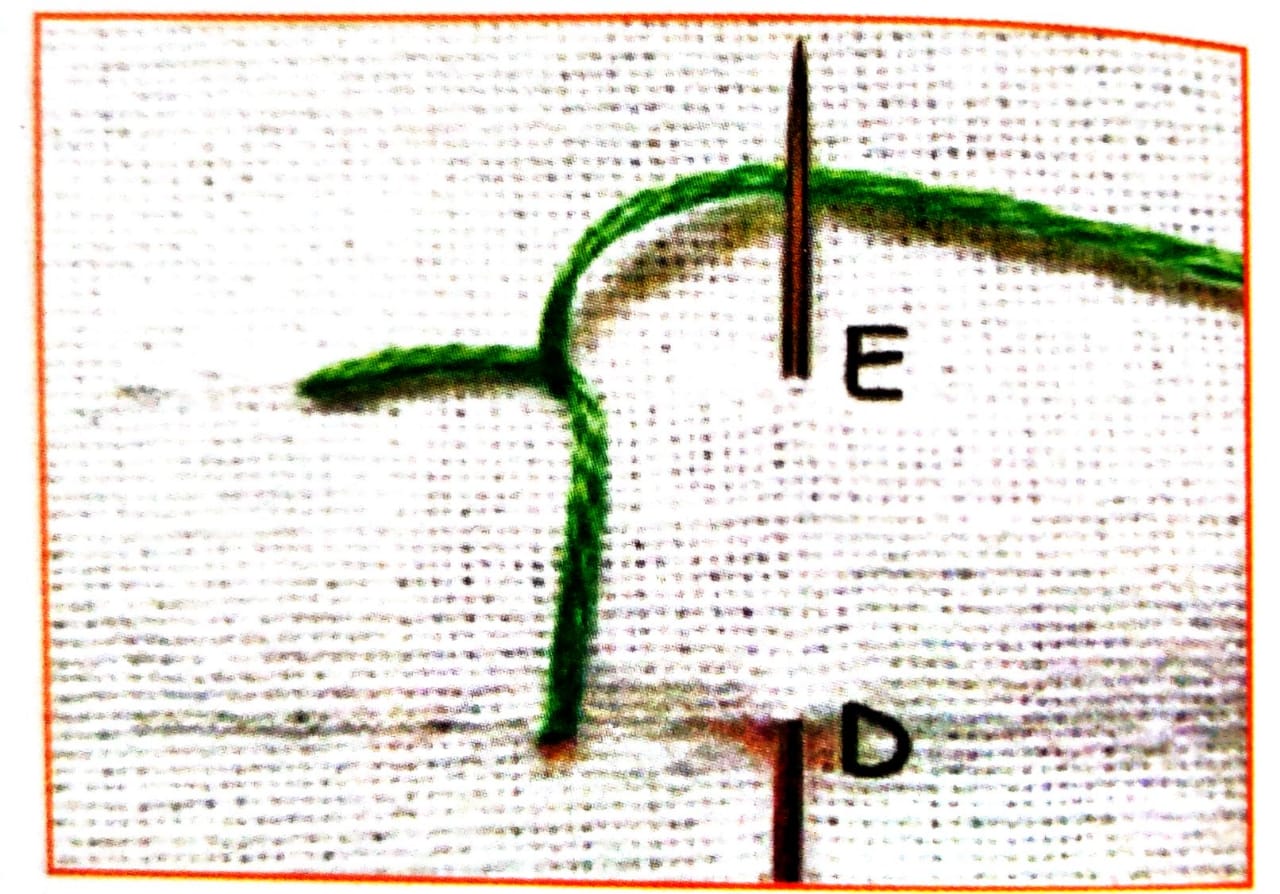
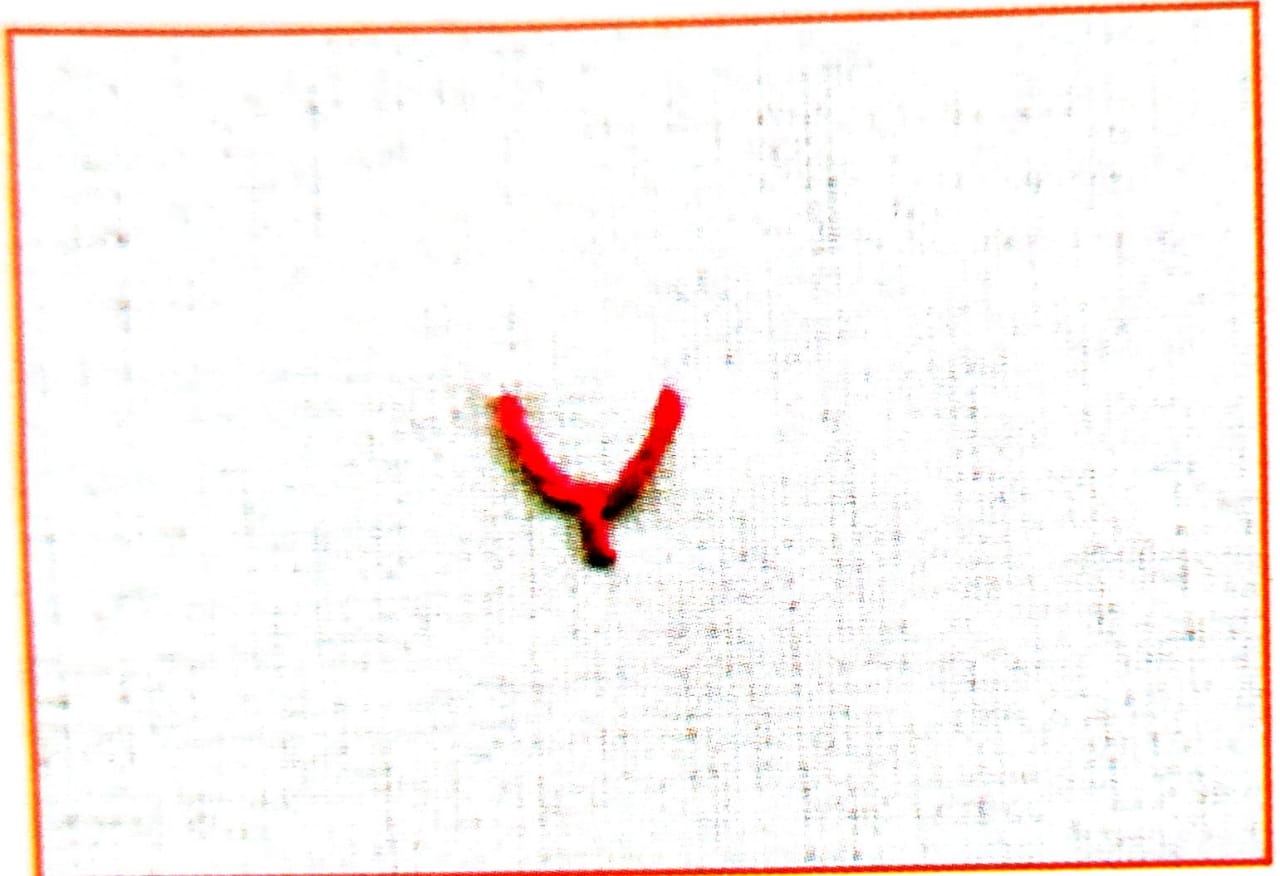
Step 3 Continue the procedure by putting the needle in through the outer stitch line and brining it out from the inner such line. Keep alternating between left and right side to make the Vs putting in the needle through A and bringing it out from B; putting the needle in through D and bringing it out from C.
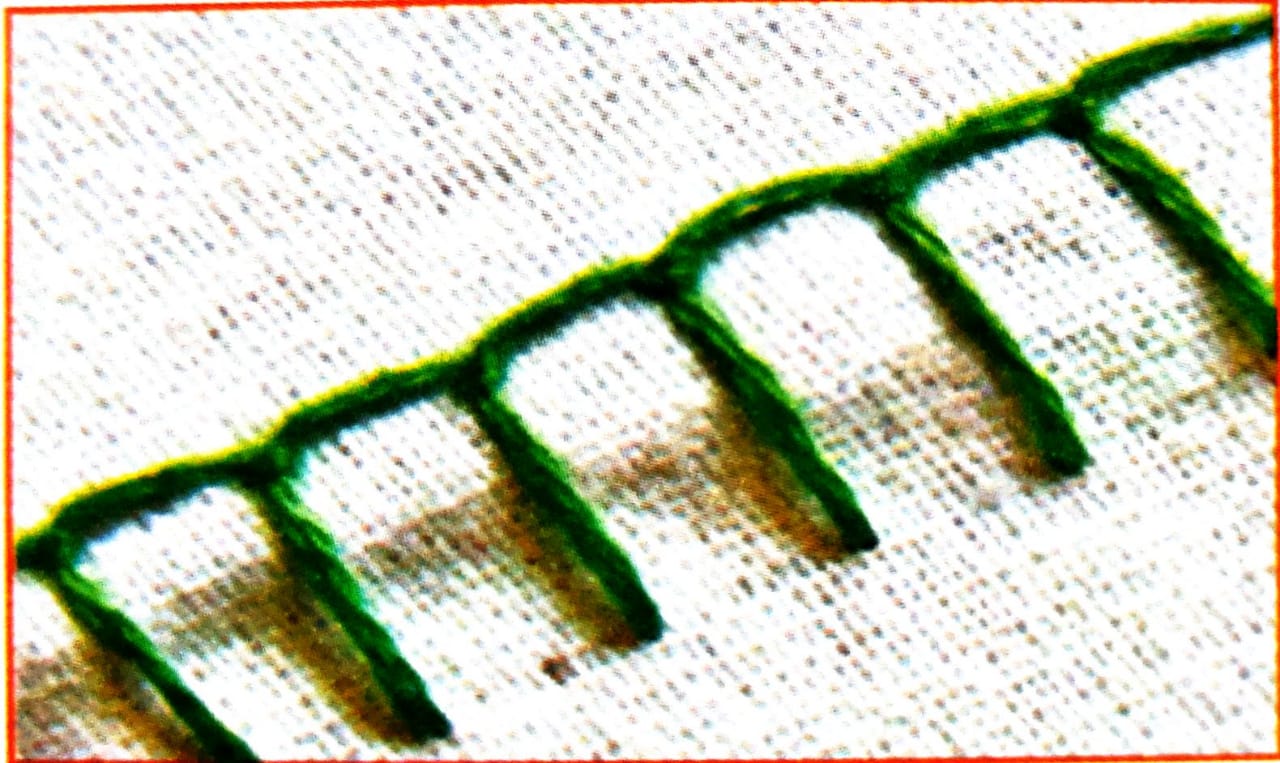
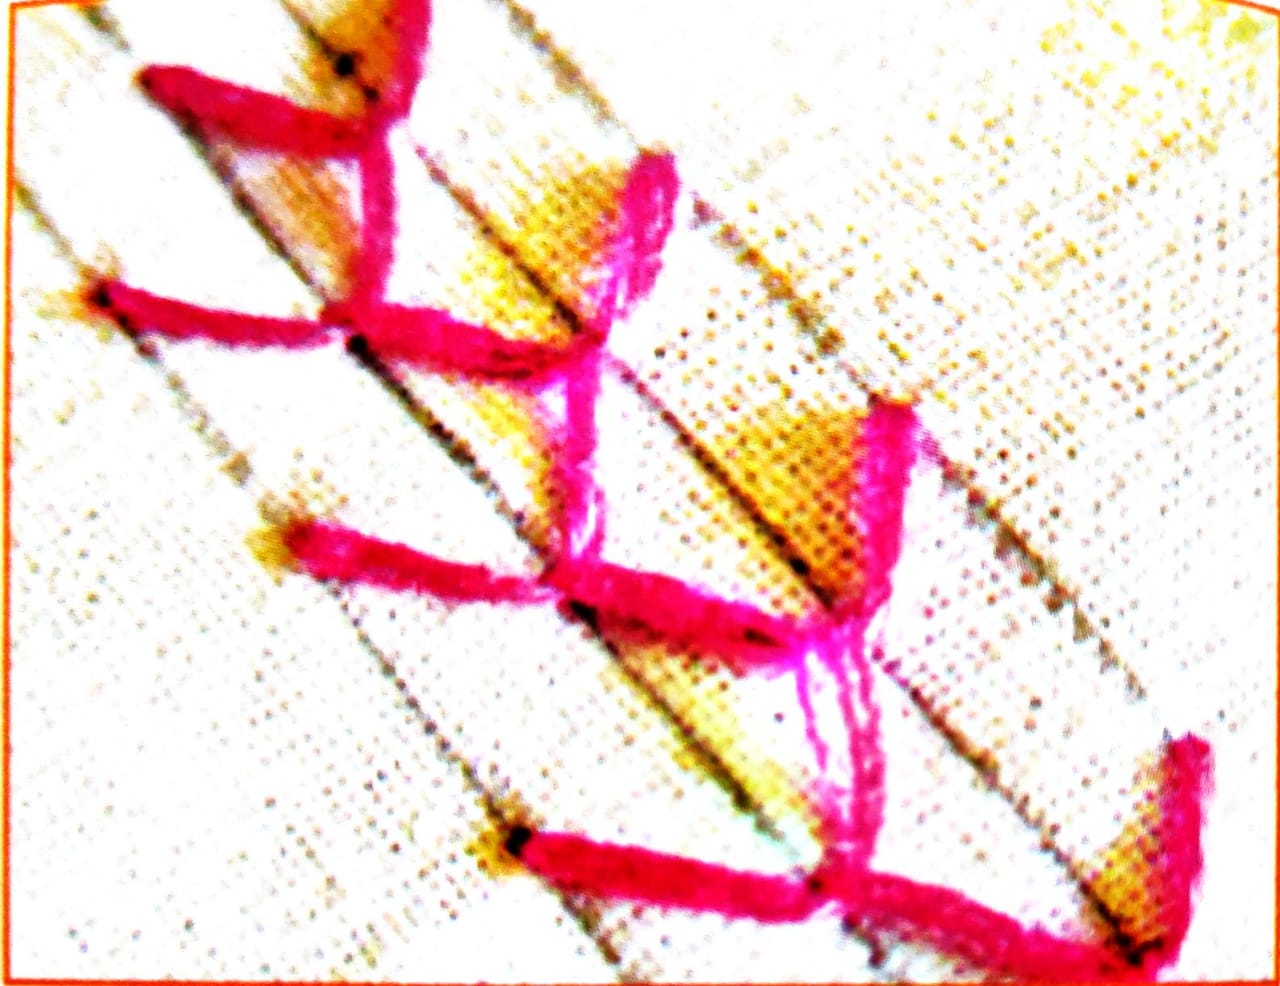
Step 4: Once a small portion of feather stitch is done the stitch will look like as in the figure.
Steps of Carrying out Fly Stitch
This stitch is done in rows for edging or singly for accents, plants and foliage, decorative lines, interesting filling.
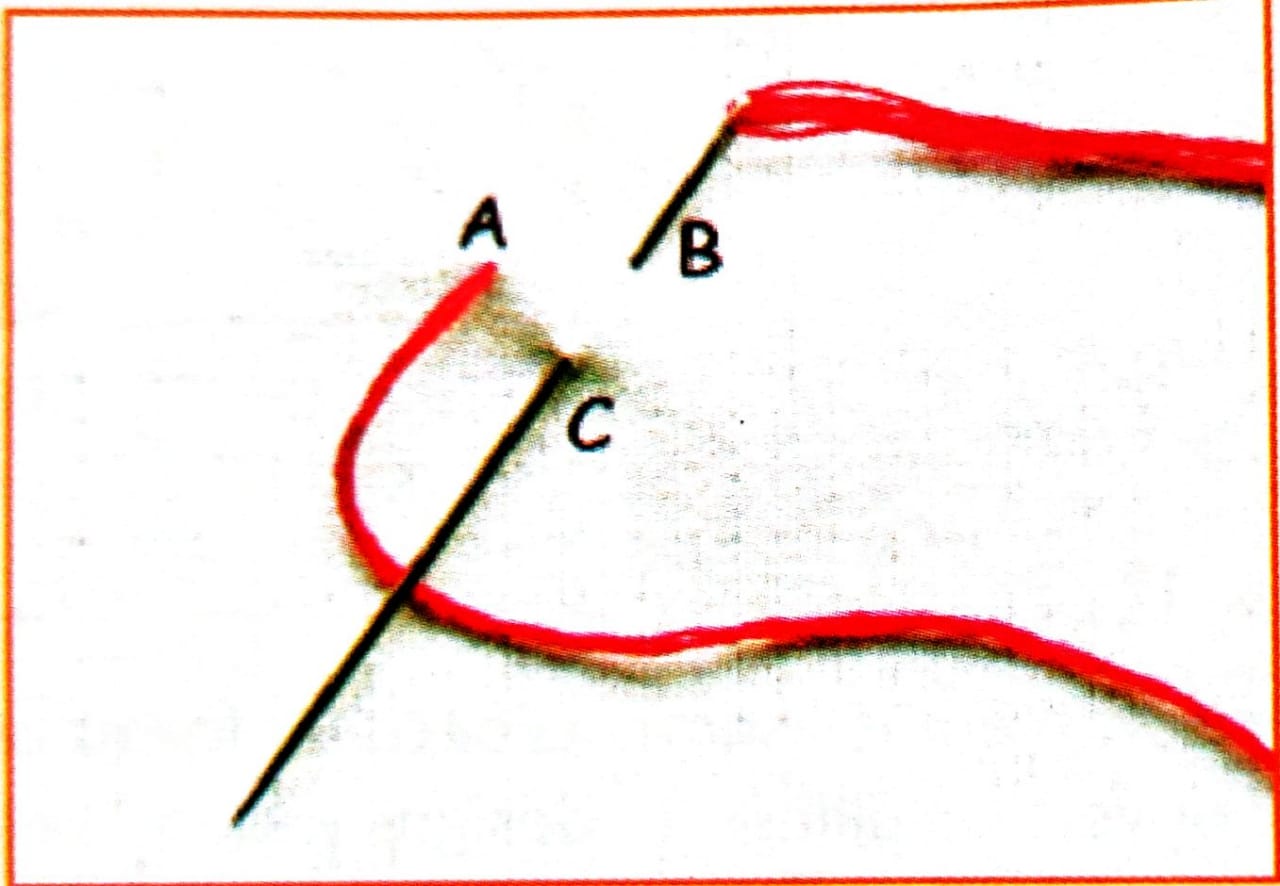
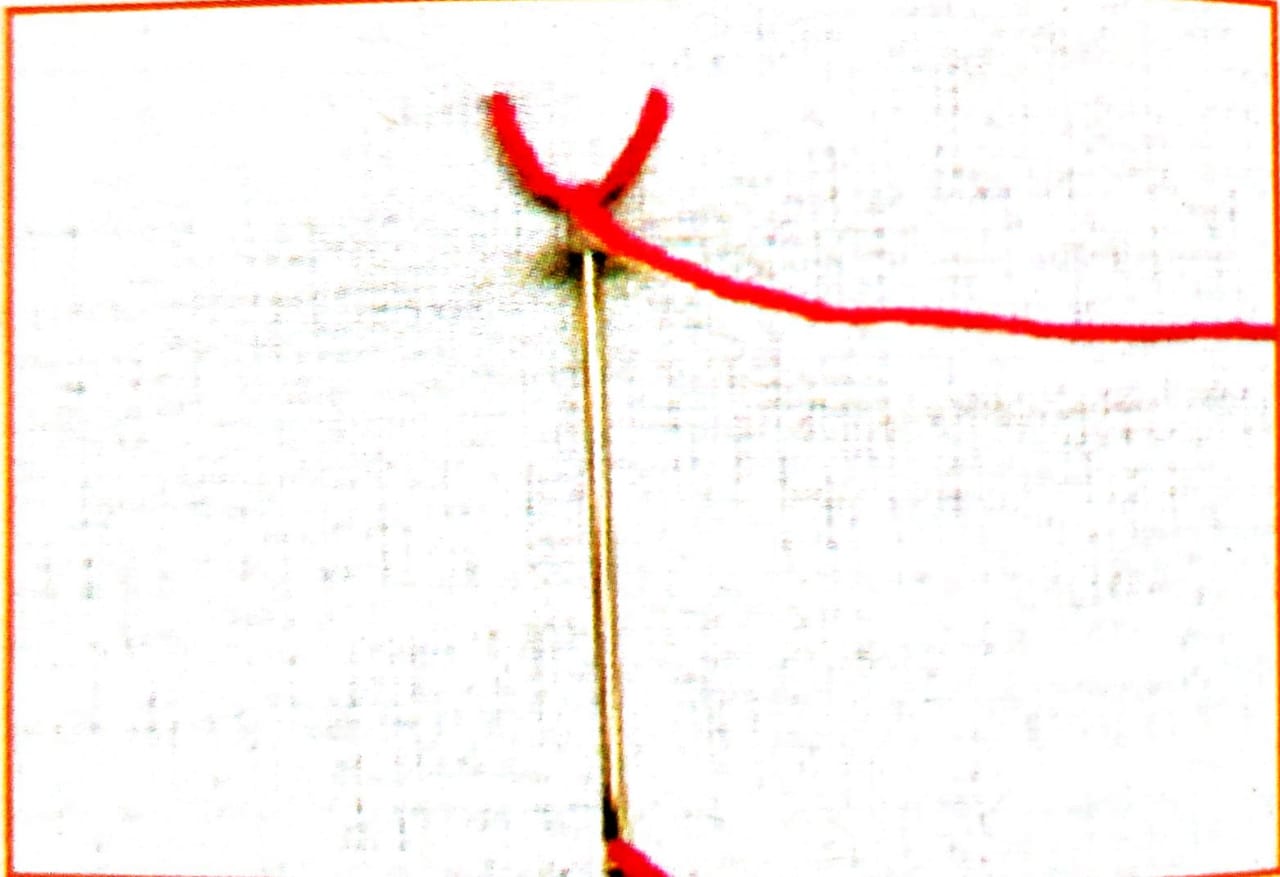
Step 1: Bring the needle out from A and put it in through B. Then, bring it out through C, which lies between and below A and B. Pull the needle out from over the working thread, as shown in the picture, this creates a ‘V” shape.
Step 2: To create the’ Y” shape, we need to make a tail Put in the needle a little space right below C.
\
Step 3: The stand alone fly stitch would look like as in the image.
Knotted Stitches
A knotted stitch is any embroidery technique in which the yarn or thread is knotted around itself Knotted edgings are used as a decorative trims, and can also be used to fill open spaces in cutwork and in needle-lace.
Commonly used types of Loop Stitches and their techniques are given below:
.French Knot
.Double Knot
.Bullion Knot
Steps of Carrying out French Knot
This is one of the most commonly used knotted stitches. French knot is used to make decorative dots, filling flower centres, leaves, plants etc.
Step 1 Bring the needle out through A.
Step 2 Place the needle dose to the fabric. Wrap the thread around it twice.
Step 3: Keep the longer end of the thread pulled with your fingers while putting the needle back in a point just close to A or even through A.
Step 4: Pull down the needle through the fabric You will see your first French knot formed.
Steps of Carrying out Double Knot
It is also known as Palestrina knot stitch. This stitch is usually used for outlining or bordering purposes.
Step 1: Bring the needle out through the point A which lies on the stitch line. Then, take the needle in through B, which lies on the stitch line too. Bring out the needle through Ca point straight above and not too far from B
Step 2. Take the needle below the stitch A-8, without plucking the fabric underneath. The needle will be angled above or towards the left of the point C.
Step 3: Take the needle under the stitch A-B. Only this time, the needle is angled below or towards the right side of the point C Then, loop the thread around the needle.
Step 4: When we pull out the needle, the first double knot is formed. For the nest knot by putting in the needle through D on the stitch Ine and bringing it out from E, just above the point D Continue with the procedure as we did for the first knot.
Step 5: The finished portion of double knot would look like as in figure.
Steps of Carrying out Bullion Knot
This knot is very similar to the French Knot, but here the loop is threaded around the needle more times, producing a worm of a knot that is inserted a slight distance from the needle’s original entry point Bullion knot is used to create decorative dots, leaves, plants etc.
Step 1: Bring the needle out through A and put the needle through B at a desired length.
Step 2: Bring the needle out through A again. Then wind the thread around the needle as shown The distance of wound thread should measure the same as the distance between A and B Too many or too less wraps will spoil the stitch.
Step 3: Hold the wrapped thread with your fingers and pull the needle out with the other finger. Keep pulling the needle completely in an upward direction til the wraps lay on the fabric. Adjust and straten the wraps if required and put in the needle back through B.
Step 4: The finished bullion stitch would look like as in the figure.
Industry Visit
The purpose of visiting a tailor shop/boutique is to get hands on knowledge about various processes involved in the work of a tailor. During the visit you have to interact with Tailors and owner of the shop to understand how work is done in a tailor shop/boutique. Make sure that you keep a notebook handy and note down any important points that come up during your interaction at the tailor shop/boutique. When you go to an tailor shop/boutique, you should:
Understand different types of stitches such as; flat stitches, loop stitches and knotted stitches Observe how a tailor carries out flat stitches, loop stitches and knotted stitches
Ask questions to Tailors/shop owners if you have any query.
Step 4: The finished bullion stitch would look like as