How to use Microsoft PowerPoint
Microsoft PowerPoint is a presentation program that allows you to create dynamic slide shows for a variety of purposes, such as business presentations, school projects, and training seminars. In this guide, we’ll cover the basics of using PowerPoint, including creating and formatting slides, adding multimedia elements, and delivering your presentation.
Getting Started

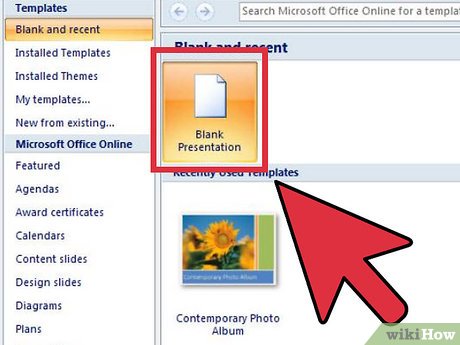
When you first open PowerPoint, you’ll see a blank presentation with a title slide. Here’s a brief overview of the main parts of the PowerPoint interface:
- Slides Pane: The slides pane is on the left side of the PowerPoint window and shows a thumbnail view of all the slides in your presentation. You can click on a thumbnail to select a slide and make changes to it.
- Slide Area: This is the main area where you’ll create and edit your slides. Each slide can contain text, images, charts, and other multimedia elements.
- Notes Pane: The notes pane is located below the slide area and allows you to add speaker notes for each slide. These notes are not visible to the audience during the presentation but can be a helpful reference for the presenter.
- Ribbon: The ribbon is the horizontal menu at the top of the PowerPoint window. It contains tabs, such as “Home,” “Insert,” “Design,” and “Transitions,” each of which contains various commands and tools for working with your presentation.
Creating Slides
To create a new slide in PowerPoint, follow these steps:
- Click on the “Home” tab in the ribbon.
- Click on the “New Slide” button to add a new slide to your presentation.
- Choose a layout for the new slide from the options available (e.g., title slide, bulleted list, blank slide).
Adding Text
To add text to a slide, follow these steps:
- Click on the slide where you want to add text.
- Click on the text box on the slide and start typing. PowerPoint will automatically create a new text box as you type if needed.
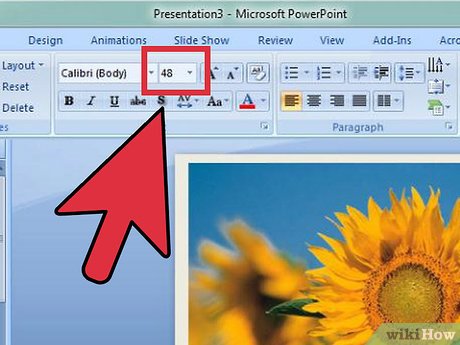
- Use the options in the “Font” group on the “Home” tab to format your text (e.g., font, font size, font color, bold, italic, underline).
Formatting Slides

PowerPoint offers a variety of tools for formatting your slides to make them more visually appealing. Here are some common formatting tasks you can perform:
- Slide Layout: You can change the layout of a slide by clicking on the “Layout” button in the “Slides” group on the “Home” tab. Choose a layout from the options available to change the arrangement of placeholders on the slide.
- Background: You can change the background color or apply a background style to a slide by clicking on the “Background Styles” button in the “Background” group on the “Design” tab.
- Theme: PowerPoint offers a variety of built-in themes that you can apply to your presentation to give it a consistent look and feel. To apply a theme, click on the “Themes” button in the “Themes” group on the “Design” tab.
Adding Multimedia Elements
PowerPoint allows you to add a variety of multimedia elements to your slides, including images, audio, and video. Here’s how to add these elements to your presentation:
- Images: Click on the “Insert” tab in the ribbon, then click on the “Pictures” button to insert an image from your computer. You can also use the “Online Pictures” button to search for and insert images from the web.
- Audio: Click on the “Insert” tab, then click on the “Audio” button to insert an audio file from your computer. You can also record audio directly into your presentation by clicking on the “Record Audio” button.
- Video: Click on the “Insert” tab, then click on the “Video” button to insert a video file from your computer. You can also use the “Online Video” button to insert videos from sites like YouTube.
Adding Charts and Tables
PowerPoint includes tools for creating and adding charts and tables to your slides to help you visualize data. Here’s how to add these elements to your presentation:
- Charts: Click on the “Insert” tab, then click on the “Chart” button to insert a chart into your slide. Choose the type of chart you want to create, then enter your data in the Excel spreadsheet that appears.
- Tables: Click on the “Insert” tab, then click on the “Table” button to insert a table into your slide. You can enter data directly into the table or import data from an Excel spreadsheet.
Animating and Transitioning Slides
PowerPoint allows you to add animations and transitions to your slides to make your presentation more dynamic. Here’s how to add these effects:
- Animations: Click on the object you want to animate (e.g., text, image, chart), then click on the “Animations” tab in the ribbon. Choose an animation from the “Animation” group to apply it to the selected object.
- Transitions: Click on the slide where you want to add a transition, then click on the “Transitions” tab in the ribbon. Choose a transition from the “Transition to This Slide” group to apply it to the selected slide.
Delivering Your Presentation

Once you’ve created your presentation, you can deliver it to an audience using PowerPoint’s built-in presentation mode. To start the presentation, click on the “Slide Show” tab in the ribbon, then click on the “From Beginning” button to start from the first slide. You can also use the “From Current Slide” button to start from the current slide.
Conclusion
Microsoft PowerPoint is a versatile tool for creating dynamic and engaging presentations. By familiarizing yourself with the basics of PowerPoint, including creating and formatting slides, adding multimedia elements, and delivering your presentation, you can create professional-looking presentations for any occasion. With practice, you can become proficient in using PowerPoint to effectively communicate your ideas and information to your audience.
