Beautician Class Notes 3
Class Notes
Before REG Beautician class Note 3
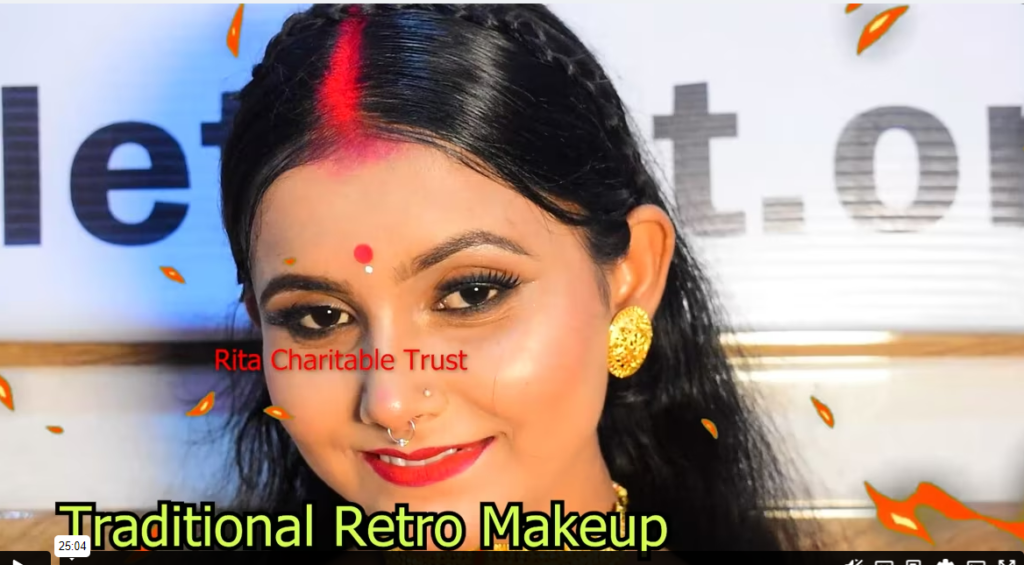
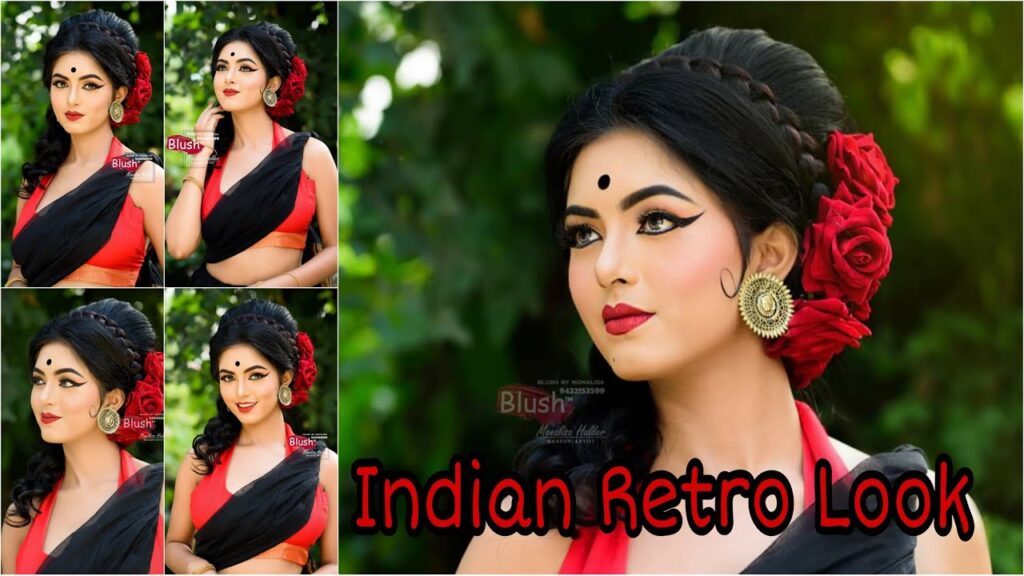
Retro Makeup Look
Introduction
When we think of timeless beauty, retro makeup often comes to mind. Retro makeup looks have an enduring charm that continues to inspire fashion and beauty trends today. Whether it’s the glamorous Hollywood waves of the 1930s or the bold winged eyeliner of the 1950s, each era has left its mark on the beauty world. In this article, we’ll dive into the history of retro makeup, explore the essential elements of each decade, and offer tips and tricks to help you master these iconic looks.
The History of Retro Makeup
The Evolution of Makeup Through the Decades
Makeup has undergone significant transformations over the past century. Each decade brought its unique style, influenced by social, economic, and cultural changes. From the rebellious flapper look of the 1920s to the minimalist mod style of the 1960s, each era’s makeup tells a story of its time.
Key Influences and Icons
Icons like Marilyn Monroe, Audrey Hepburn, and Twiggy have become synonymous with the makeup styles of their respective eras. Their influence extends beyond their time, inspiring countless makeup trends and styles that are still popular today.
Essential Elements of Retro Makeup
Classic Red Lips
Nothing says retro like a bold, red lip. This timeless look has been a staple in makeup since the 1940s and remains a favorite today. The key is finding the right shade of red to complement your skin tone.
Winged Eyeliner
The iconic winged eyeliner is a hallmark of retro makeup, particularly from the 1950s and 1960s. Achieving the perfect wing requires a steady hand and a bit of practice, but the results are worth it.
Bold Brows
Bold, well-defined brows are essential for many retro looks. From the thin, arched brows of the 1930s to the fuller brows of the 1950s, eyebrows have played a crucial role in defining the face.
Flawless Complexion
A flawless, matte complexion is the canvas for any retro makeup look. This involves a good skincare routine, the right foundation, and setting powder to achieve that perfect base.
Retro Makeup by Decade
1920s: The Flapper Look
Smoky Eyes
The 1920s were all about bold, smoky eyes. This look involves blending dark eyeshadows to create a sultry, dramatic effect.
Dark Lips
Dark, vampy lips were also a hallmark of the 1920s, with shades like deep reds and plums being particularly popular.
1930s: Hollywood Glamour
Thin, Arched Brows
The 1930s saw the rise of Hollywood glamour, with thin, highly arched brows defining the look of the era.
Soft, Matte Lips
Lips were soft and matte, with colors ranging from muted reds to soft pinks.
1940s: War-Time Simplicity
Victory Red Lips
During the 1940s, makeup was simpler due to wartime rationing, but red lips, known as “Victory Red,” became a symbol of strength and resilience.
Defined Brows
Brows were more natural but still well-defined, providing a polished look.
1950s: The Rockabilly Look
Pin-Up Eyes
The 1950s are famous for the pin-up look, featuring defined eyes with bold winged eyeliner and lots of mascara.
Full, Red Lips
Full, red lips were a must-have in the 1950s, creating a glamorous and feminine look.
1960s: Mod Style
Dramatic Eye Makeup
The 1960s introduced dramatic eye makeup with thick eyeliner, heavy mascara, and even false lashes to create a wide-eyed, doll-like appearance.
Pale Lips
Lips were often kept pale or nude to balance the dramatic eye makeup.
Creating the Perfect Base
Prepping the Skin
Good skincare is the foundation of any great makeup look. Cleanse, tone, and moisturize to prepare your skin for makeup.
Choosing the Right Foundation
Select a foundation that matches your skin tone and provides a matte finish. This will help create the flawless complexion needed for retro makeup.
Setting the Base
Use a setting powder to ensure your makeup stays in place and remains matte throughout the day.
Mastering the Eyes
Achieving the Perfect Winged Eyeliner
Start with a thin line at the inner corner of your eye, gradually thickening it as you move outward. Use a liquid or gel liner for the best results.
Smoky Eyes Technique
Blend dark eyeshadows on the lid and crease, using a lighter shade to soften the edges. Finish with plenty of mascara.
Applying False Lashes
False lashes can add drama and volume to your eyes. Apply them close to your natural lash line and finish with a coat of mascara to blend them together.
The Art of the Brows
Shaping Your Brows
Shape your brows according to the style of the era you’re recreating. Use tweezers to remove stray hairs and a brow pencil or powder to fill them in.
Filling in Brows for a Bold Look
For a bold brow look, use a brow pencil or pomade to define and fill in your brows, following their natural shape.
Luscious Lips
Choosing the Right Red Lipstick
Find a red lipstick that complements your skin tone. Warm skin tones look great with orange-reds, while cool tones suit blue-reds.
Application Tips for Long-Lasting Lips
Apply a lip liner before your lipstick to prevent feathering. After applying lipstick, blot with a tissue and reapply for long-lasting color.
Finishing Touches
Blush and Contour
Use blush and contour to add dimension to your face. Choose shades that complement your skin tone and the era you’re emulating.
Highlighting for a Retro Glow
Apply a subtle highlighter to the high points of your face for a radiant glow.
Retro Makeup for Different Skin Tones
Adapting Retro Styles to Suit Your Skin Tone
Retro makeup can be adapted to suit any skin tone. Choose shades that complement your complexion and adjust techniques as needed.
Modern Twists on Retro Makeup
Combining Retro and Contemporary Elements
Mix retro and modern elements to create a unique look. For example, pair winged eyeliner with a glossy lip or a bold brow with a soft, natural eye.
Making Retro Makeup Work for Everyday Looks
Tone down dramatic elements for everyday wear. Use softer shades and lighter applications for a retro-inspired, yet modern look.
Tips for Long-Lasting Retro Makeup
Setting Sprays and Powders
Use setting sprays and powders to keep your makeup in place all day. These products help prevent makeup from smudging or fading.
Touch-Up Tips
Carry a compact powder and lipstick for touch-ups throughout the day. This will help you maintain your retro look from morning to night.
Common Mistakes to Avoid
Overdoing It
Less is often more. Avoid overloading your face with too many bold elements. Focus on one or two key features.
Not Matching the Era Correctly
Research the specific era you want to emulate. Each decade has distinct characteristics that should be accurately represented.
Inspiration from Retro Icons
Audrey Hepburn
Known for her classic, elegant style, Audrey Hepburn’s makeup is timeless and chic.
Marilyn Monroe
Marilyn’s iconic red lips and winged eyeliner are still emulated today for their classic glamour.
Twiggy
Twiggy’s bold, mod style is perfect for those who love dramatic eye makeup and a playful look.
Conclusion
Retro makeup has a timeless appeal that continues to captivate and inspire. Whether you’re looking to recreate a specific era or add a touch of vintage glamour to your everyday look, understanding the key elements and techniques of retro makeup is essential. Don’t be afraid to experiment and find the style that suits you best.
FAQs
How do I choose the right era for my retro look?
Consider your personal style and the features you want to highlight. Each era has distinct characteristics that can enhance different aspects of your appearance.
Can I mix elements from different decades?
Absolutely! Mixing elements from different decades can create a unique and personalized look. Just be mindful of blending them seamlessly.
What are the best products for a retro makeup look?
Look for products that provide a matte finish, long-lasting wear, and bold pigmentation. Brands like MAC, Revlon, and Maybelline have great options for retro-inspired makeup.
How can I make my retro makeup last all day?
Use a good primer, set your makeup with powder, and finish with a setting spray. Carry essentials like lipstick and powder for touch-ups.
Is retro makeup suitable for all skin types?
Yes, retro makeup can be adapted to suit all skin types. The key is to choose products and techniques that work well with your skin’s needs.
How to use a mascara wand:
Let’s start with the obvious: Mascara. Use this type of makeup brush to apply mascara or separate and
declump your lashes after you’ve applied too much product, or gently rub the bristles to remove any
mascara smudges without moving the makeup underneath. Comb it through your brows to help even
out eyebrow makeup, or use it to try soap brows. Use one to apply your eyelash serums or brow
serums, tame flyaways—basically, it’s the one tool that kinda does everything.
Please Visit our Website
www.ritacharitabletrust.org . or Attend our
Practical Class On Youtube Channel
Angled eyeshadow brush
Some eyeshadow brushes are rounded, some are flat, some are tapered—but the brush we’re talking about right now is the angled one. These brushes might be fluffier than an angled eyeliner brush, which
is very thin and flat, but they have a similar slanted silhouette with firm bristles that are shorter on one end and gradually grow longer and fuller toward the other end.
How to use an angled eyeshadow brush
The angled shape of these bristles hug the contour of your brow bone when applying shadow in the crease of your eye (think of it as a contour brush for your eyes). Because the bristles are both dense and fluffy, this type of makeup brush is also super-helpful for diffusing eyeshadow in an outer “V” shape for blended winged shadow. Please Visit our Website www.ritacharitabletrust.org . or Attend our
Practical Class On Youtube Channel
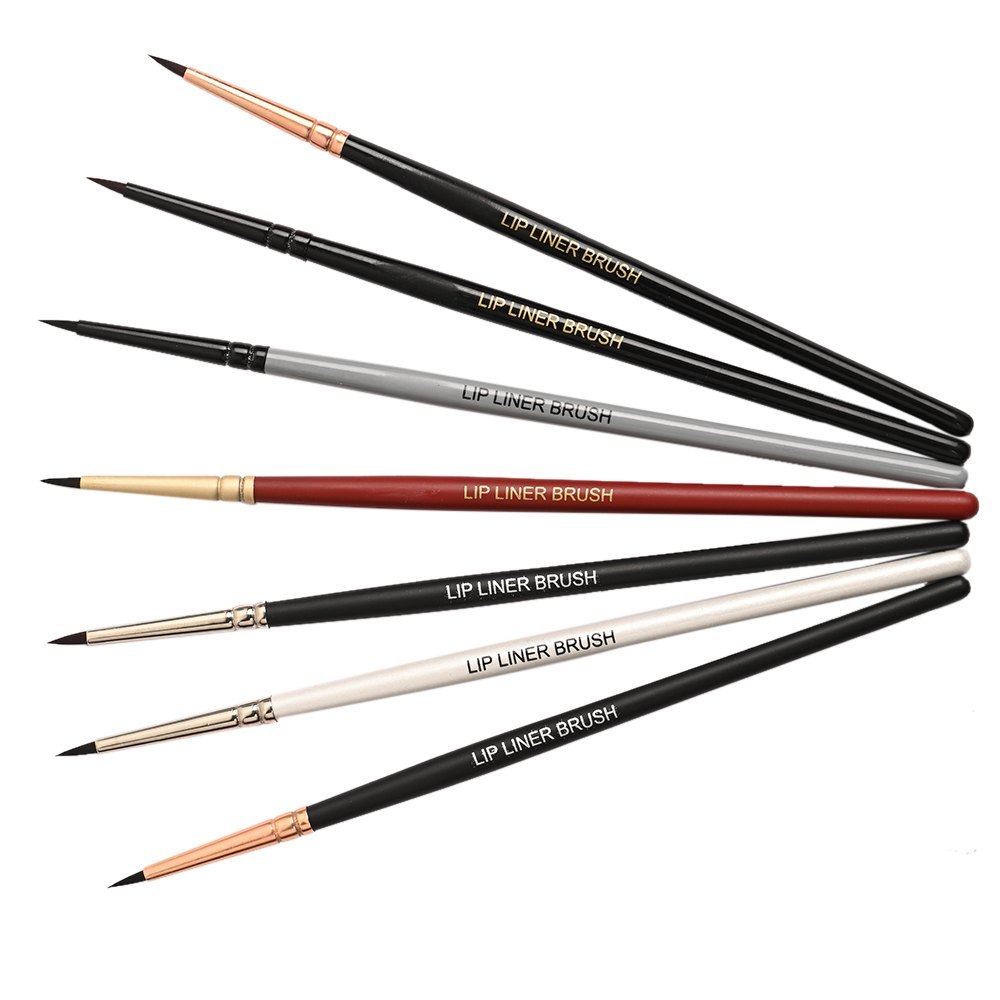
- Lip liner brush
Maybe you call it a lip liner brush, or maybe you call it a precision liner brush. Either way, you instantly recognize this type of makeup brush when you see it because of its distinct small, pointy shape. One would think the tip of this brush is thin enough that you could count the bristles, but it’s packed full of synthetic hairs to help maintain its
shape so you can draw precise lines in even the tiniest places.
How to use a lip liner brush:
What tiny places are we talking about? Try this brush on the outline of your lips for lip liner or your lash line for tight lightening your eyes. You can also use it for drawing cool, graphic eyeliner à la Euphoria makeup if you don’t have any colorful eyeliner pencils. Pro tip: Hold it at a slight angle (rather than straight up and down) when you draw to make the line smoother and straighter and less shaky.Please Visit our Website
www.ritacharitabletrust.org . or Attend our Practical Class On Youtube Channel
- Duo-fiber brush
A duo-fiber brush is just a fancy way of saying the brush contains two different kinds of bristles with two different lengths. Packing it with two types of bristles makes the brush more compact at the base
and finer toward the top. You’ll commonly find duo-fiber brushes in larger sizes for applying liquid foundation, but as shown here, they’re also available in smaller sizes for blending cream blushes and
liquid highlighters and even powders and loose pigments, too.
How to use a duo-fiber brush:
When using a duo-fiber brush, you want to think about gently blending the makeup, not bending the bristles. If you press too hard, the longer bristles will spread and leave streak marks in your makeup, so use light pressure in a circular motion to buff the product into the skin.
Please Visit our Website www.ritacharitabletrust.org . or Attend our Practical Class On
Youtube Channel
- Stippling brush
Not to be confused with the duo-fiber brush, a stippling brush…well…you see…okay, fine.
You can definitely get a stippling brush and a duo-fiber brush confused because a stippling brush is known for its duo fibers, so they’re basically the same thing. When you want a softer foundation application or a more airbrushed effect, stick with the stipple. Because of its lighter finish, these brushes are also ideal for applying tinted moisturizer or
shearing out liquids and creams without messing up the product underneath (have you ever blended those on with your fingers, only to be left with patchiness? Exactly).
How to use a stippling brush:
Dip the bristles into the liquid makeup, or swipe the bristles into a cream stick or powder, then lightly swirl them into your skin. Remember: Just the tips. If you have a heavy hand or the tendency to jab your brushes into your skin (why do we do this?!), hold the brush by the very end,
giving you virtually no control over the brush.Please Visit our Website www.ritacharitabletrust.org .
or Attend our Practical Class On Youtube Channel .
- Kabuki brush
In a lot of ways, the kabuki brush is the opposite of the stippling brush. Its name might not ring a bell, but if you’ve ever played around with makeup, this classic makeup brush definitely will. Made famous by
Kabuki Japanese drama theater, this style of brush is most commonly recognized by its short, chubby handle and very dense, firm, flat or dome-shaped bristles.
A synthetic kabuki brush can be used to apply liquid foundation or body makeup for a medium-to-full coverage, but the density of the brush makes it perfect for packing on superfine powders or mineral foundation for a fuller-coverage finish.
How to use a kabuki brush:
Because these bristles are so dense and firm, you’ll probably find that a slight pressure is necessary for working the product into the skin. Use the tips of the bristles to pick up the product, then swirl and buff to diffuse it across your face.
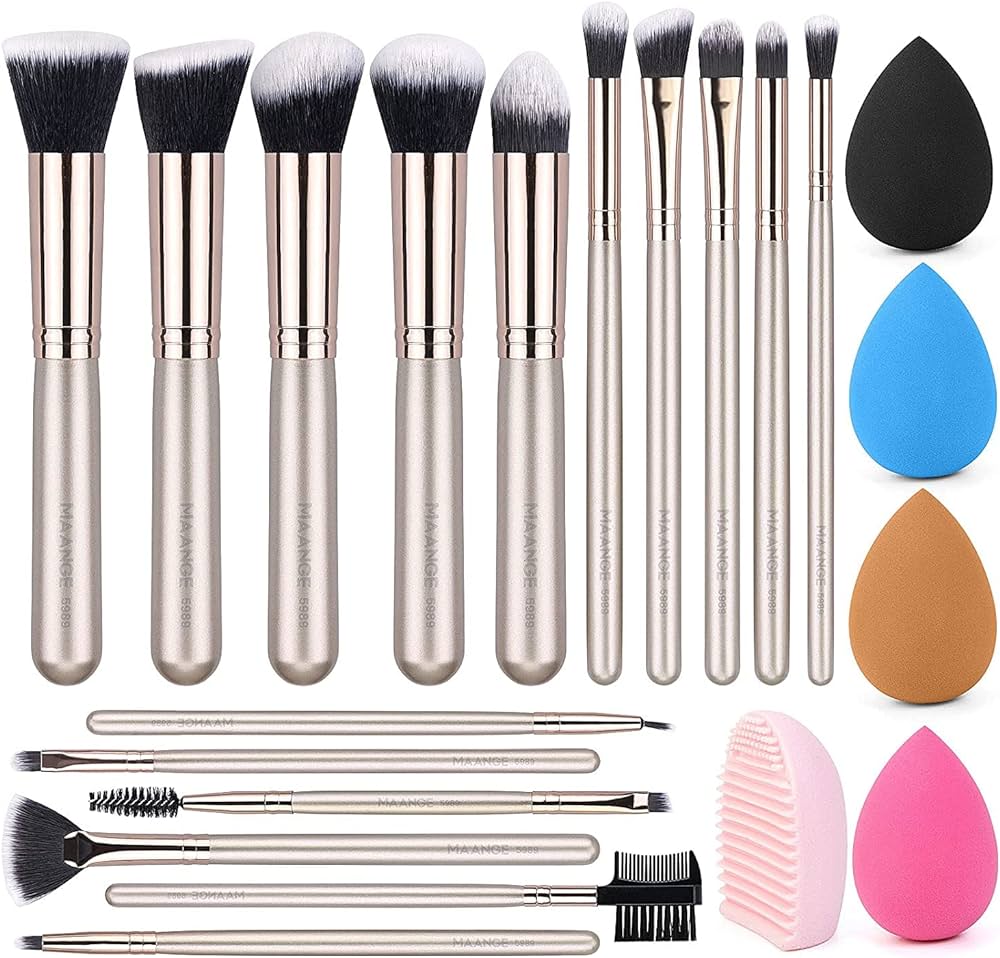
- Foundation brush
While using a brush for your liquid makeup is optional (you can opt for a sponge or your clean fingers instead), you absolutely do need to use some sort of application brush for your mineral makeup or powder foundation. Enter: the foundation brush.
These kinds of brushes are typically dense and can be pinched flat (like a paintbrush) or are full, rounded, and dome-shaped. While some people prefer synthetic bristles (which are easier to clean) for
their liquid formulas, or even natural bristles—which are naturally more porous—for their powders, I’m all about synthetic bristles. Yes, really; the quality has improved vastly over the years and can easily be
used for both.
How to use a foundation brush:
For a perfectly smooth foundation application, start in the middle of your face (cheeks and T-zone) and apply your foundation outward in smooth, even strokes to prevent harsh makeup lines around the edges
of your jawline and hairline. If you’re using a mineral or powder foundation, swirl and buff the bristles to work the product into the skin.
Please Visit our Website www.ritacharitabletrust.org . or Attend our Practical Class On Youtube
Channel
- Blending sponge
Remember how I said a brush for your liquid base makeup is optional? That’s because many makeup artists and YouTubers opt for sponges to get an airbrushed, streak-free finish. Thanks to their rounded,
smooth shape, sponges won’t leave behind any weird lines or stray bristles, and their damp surfaces help sheer out your heavy full-coverage foundation, concealer, or cream blush for a natural finish.
How to use a blending sponge:
The trick to using a sponge most effectively is to saturate it with running water, squeeze out the excess, then squeeze it a few more times in a clean towel or paper towel. This wetting process will not only prevent your
sponge from soaking up all of your foundation (because it’s already damp with water) but will also help blend your makeup as smoothly as possible. Use the sponge’s broad sides to stamp and stipple your cream formulas across your face and the sponge’s tip to reach crevices around
your nose and eyes.
- Concealer brush
Think of concealer brushes as small-scale foundation brushes. Whether you’re looking to pack on the product under your eyes or cover up a bright-red blemish, these synthetic brushes are ideal for targeting small, specific areas that you want to be concealed. Sure, you can use the spongey, doe-foot applicator straight from the concealer tube, but a brush like this one is not only more hygienic but also offers a more realistic, even finish.
How to use a concealer brush:
Dab the tip of the brush into a tiny amount of concealer, then gently tap or pat the brush on your zits, your under eyes, whatever. After the area has been covered, blend out the edges while being careful not to wipe away the rest of the concealer. Other great uses: sharpening and cleaning up messy eye makeup or feathered lipstick edges.Please Visit our Website www.ritacharitabletrust.org . or
Attend our Practical Class On Youtube Channel
- Powder brush
If shiny T-zones or under-eye creases are your main
annoyance, allow me to introduce you to your new best friend: setting powder. And, along for the ride, powder brushes. Depending on the area you’re looking to cover, the size of this brush varies from small to large and typically has long, dense, fluffy bristles. It’s meant to ever-so-lightly “set” your liquid/cream foundations or buff and blend out powder foundations, depending on your needs.
How to use a powder brush:
Use the fluffy bristles to pick up a fine layer of loose powder (tap—don’t
blow—off the excess first) and dust it over your T-zone and under your eyes.
Load up the product to “bake” your makeup or use a light dusting to quickly set your foundation or
concealer. Bronzer, blush, and powder brushes are similar enough that one could do the job of many, yes, but who
has the time to clean them between each step (and don’t you dare think about using just one brush and
not cleaning it). Find a bronzer and/or blush brush with long, fluffy bristles and a dome shape to evenly
diffuse your powder pigments. The fluffier it is, the less product it will pick up (which is ideal when you
want just a wash of color).
How to use a bronzer/blush brush:
When it comes to bronzer and blush, the way you use the brush is almost more important than the brush itself. For bronzer, loosely sweep the brush in a “3” pattern, starting from your forehead, cutting across your cheekbones, then moving back out and down to your jawline. For blush, lightly swirl the product on the apples of your cheeks and blend it up
into your cheekbones.
- Contour brush
The contour brush is a hard one to pick out of a crowd simply because it can appear in so many different ways. The bristles on some are cut sharp and straight across, while others may take on more of an “S” shape to hug the shape of your cheekbones. The slanted contour brush is the most versatile and makes it easier to contour for your face shape by
blending your contour powder cleanly and precisely beneath your cheekbones, jawline, and forehead. Use a brush with blunt bristles and a sharp edge for a sharper sculpt, or use one with a softer slanted shape for a subtle shade.
How to use a contour brush:
Swirl the brush into your contour powder, tap off the excess (important), then gently glide the brush back and forth below your cheekbones to emphasize your natural contours. For an even more chiseled look, reload the brush and swirl it under your jawline and along your hairline as well.
- Highlighter brush
The shape of your highlighter brush totally depends on the level
of glow you want. Use a long, tapered brush or a fan brush
(more on that later) with very long bristles for a more diffused
effect, or grab a brush with short, dense bristles to make even a
cheap highlighter look super-bright and opaque.
How to use a highlighter brush:
Swirl your brush over a powder face highlighter, tap off the excess, then lightly sweep and blend the brush over the tops of your cheekbones, brow bones, Cupid’s bow, and anywhere else the light naturally
hits your face. Wanted an even brighter glow? Spritz your brush first with a setting spray to enhance the pigment payoff.
- Fan brush
Finally! A brush with a name that actually makes sense with the shape! The bristles on this brush are fanned out and flat to give it a very distinct silhouette that’s much different from all the others. Imagine if
you were to take a powder brush and pinch the bristles at the base to flatten them—that’s a fan brush.
These can come in smaller sizes (like an inch across) with sparse bristles or they can expand up to a couple of inches at their widest point and be packed with dense brush hairs.
How to use a fan brush:
With a side-to-side motion (like a windshield wiper), use the bristles of a large or medium fan brush to sweep away fallout or excess setting powder under your eyes or apply highlighter along your cheekbones. And if you’re using a smaller brush, you can even use it to apply mascara for a clump-free finish. Rub the fan brush against the wand of your go-to mascara, then press the pigment against the roots to load up the
base and run it through the length of your lashes.
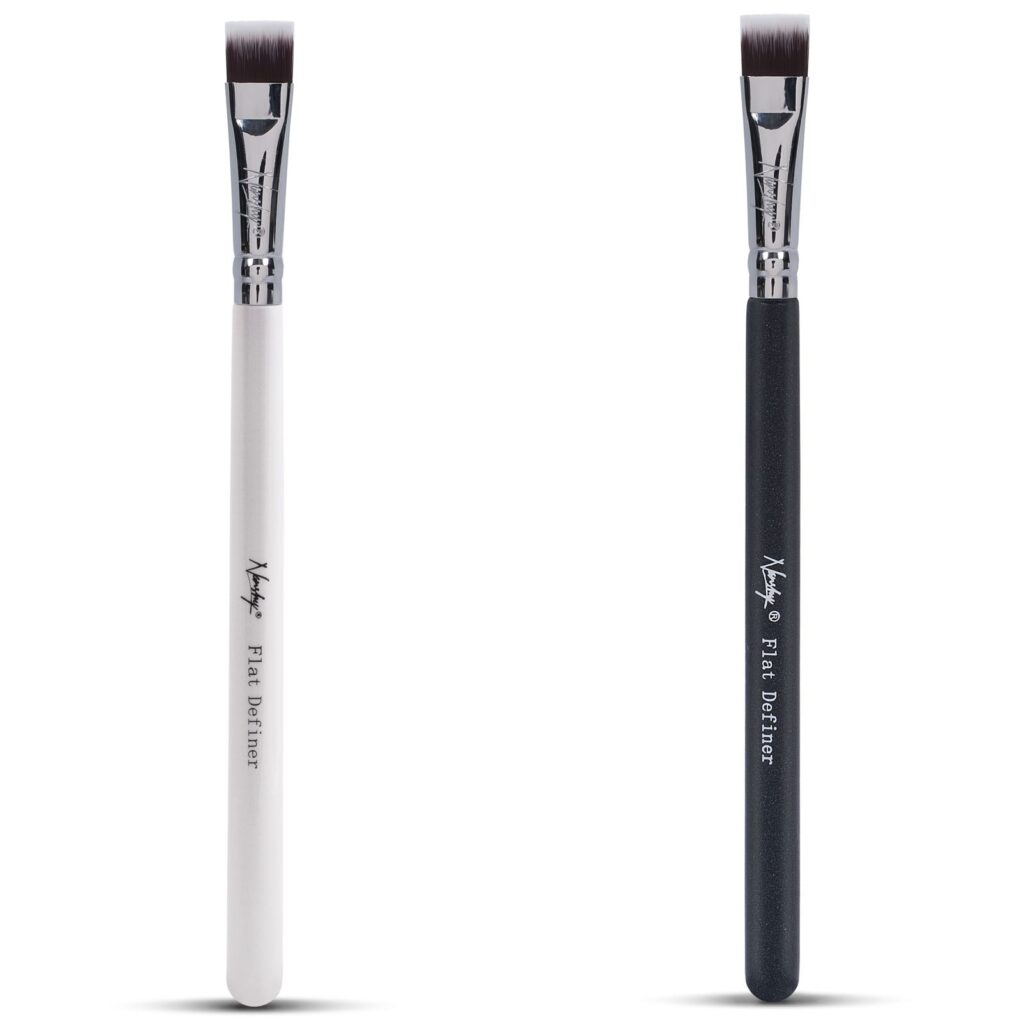
- Flat eyeshadow brush
Okay, despite the extra-sounding name, an eyeshadow shading brush is actually key for getting an opaque, even layer of color on your lids. These brushes are typically flat, rounded at the tip, and dense so they can pick up a bunch of powder or cream for a concentrated color payoff.
How to use an eyeshadow shader brush:
After rubbing the brush over the product, pat or press the eyeshadow onto your eyelids, gently swirling the brush around the edges to blend them out. You can also mist your brush with a setting spray first to deepen the opacity of a powder pigment or to better pick up glittery eyeshadow. Keep this on hand to get really sharp cut-crease eyes.
- Eyeshadow crease brush
Unlike a shader brush, which essentially packs on the pigments to get your lids a ton of color, an eyeshadow blending brush, well, blends out the powders for a really sheer, diffused finish—basically the smoke behind a smokey eye or the trick to a natural-looking shadow. These
brushes are known for their tapered shape and soft, fluffy bristles to help you really blend, blend, and blend without scratching the hell out of your lids.
How to use an eyeshadow blending brush:
Swipe the fluffy bristles into the crease of your lids with a
windshield-wiper motion to apply your eyeshadow for a
diffused look, and swirl it around the edges of your eyes when
transitioning between colors or blending multiple shades on
top of one another.
- Pencil brush
pencil brush kind of does it all: smudges out your eyeliner,
pushes eyeshadow straight into precisely blend beneath your
lashes, etc. When the other brushes your lash line, it helps if
you are too big or too fluffy, grab this stiff, dense, tapered
brush—especially if you plan to do a smokey eye or any hazy, blended-out shadow.
How to use a pencil brush:
After you’ve applied your eyeliner, use the pointed tip of the brush to gently smudge it out. Or skip eyeliner and use the tip to smoke out your eyeshadow underneath your bottom lashes. You can also pinpoint smaller areas around the eye, such as the inner and outer corners, when
applying intense pigment.
- Smudge brush
The short, super-dense, packed bristles make this brush ideal for packing on the pigment exactly where you want it, then smearing it out. Because the bristles are wider and flatter than the precision pencil brush, this smudging brush is better for using along the upper and lower lash lines.
How to use a smudge brush:
Dip the brush straight into the eyeshadow and run it along your lash line for a thick, smokey line, or use it to diffuse and set your eyeliner. Here’s what I mean: Apply your kohl or pencil liner, then use the brush to blend the edge of the eyeliner outward. Then, use the same brush to go back over the eyeliner with a similar eyeshadow shade. This will not only set the color underneath but also layer textures to create depth so your smokey eye doesn’t look one-dimensional.
Please Visit our Website www.ritacharitabletrust.org . or Attend our
Practical Class On Youtube Channel
- Eyeliner brush
An eyeliner brush is another one of those tools that can look a million different ways, but no matter the shape of the handle or the bristles, it’s always going to be one of your smallest (if not your smallest)
brushes. Some have tapered and pointed tips, some have flattened and straight or slanted bristles (like the one shown here), and on some eyeliner brushes, the stem is bent at a 45-degree angle to make it a little easier to get into tight spaces.
How to use an eyeliner brush
Whether you use gel eyeliner or prefer a more diffused outline with your
powder eyeshadow, you’ll find an eyeliner brush v helpful for getting the
product flush against your lashes. Dip the bristles into the product, then
use it to apply your eyeliner like you would a regular pencil or liquid eyeliner.
Please Visit our Website
www.ritacharitabletrust.org . or Attend our Practical
Class On Youtube Channel
- Eyebrow brush
You’ve definitely seen—and probably even brushed—your brows with a spoolie or comb before, but a dual-ended eyebrow brush like this one also has flat, blunt, and angled bristles to help you draw individual brow hairs using brow gel or powder.
How to use an eyebrow brush:
Use the spoolie side first to shape your brows, then flip it over to the firm, slanted bristles on this small eyebrow brush to fill in sparse brows with eyebrow powder. If you’ve filled them in with too much
product, you can also use the spoolie brush to comb through your brows afterward and remove some of the makeup to soften them. Alternate use: combing, taming, and de-clumping your lashes—just make sure the spoolie is clean first.
Please Visit our Website www.ritacharitabletrust.org . or Attend our Practical Class On Youtube
Channel 21. Lip brush
Easily confused for a concealer brush, the lip brush has the same flattened, curved shape but is usually smaller so that it can fit in the cupid’s bow and define the lips. Most of the time it also comes with a cap
so that you can stick it in your handbag for touch-ups. You might think lip brushes are only for professional makeup artists, but if you line your lips, you’ll find a lip brush to be really helpful for diffusing
harsh lines from your lip liner and blending it into your lipstick.
How to use a lip brush:
Trace your lips with lip liner, then run the bristles of the lip brush along the inside edge of the line to soften it. If you’re using your own products, you can swipe the brush right on the lipstick to pick up the
product for a more precise application. And if you want to create your own custom lip shade, mix together multiple lip colors with your brush, then use it to apply the product.